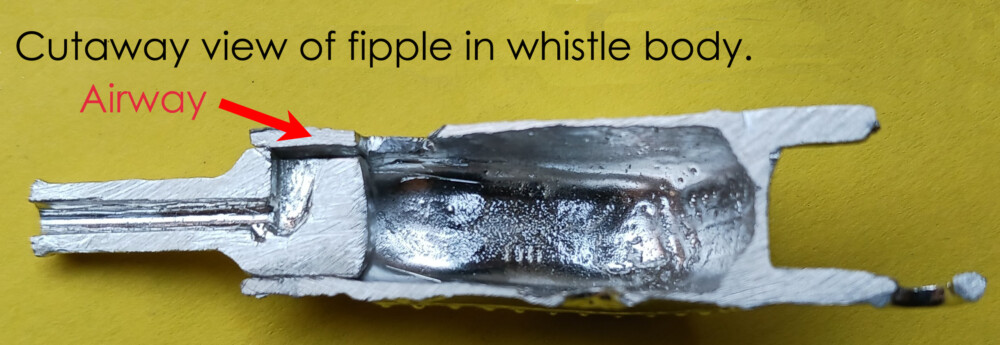
Whistles “whistle” because the air you blow into them is directed against a sharp edge. A fipple is the part of the whistle that shapes the air into a smoothly flowing stream and directs it against that sharp edge. When this works, you get a nice clear sound. When it does not work, you get a muddy and/or hiss-y sound….
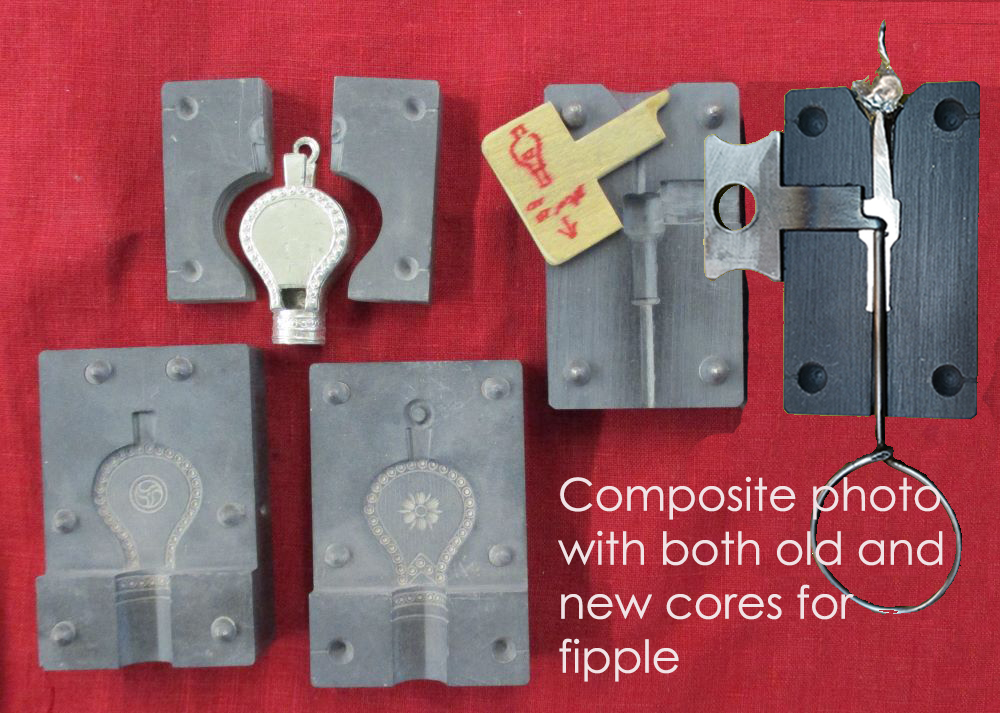
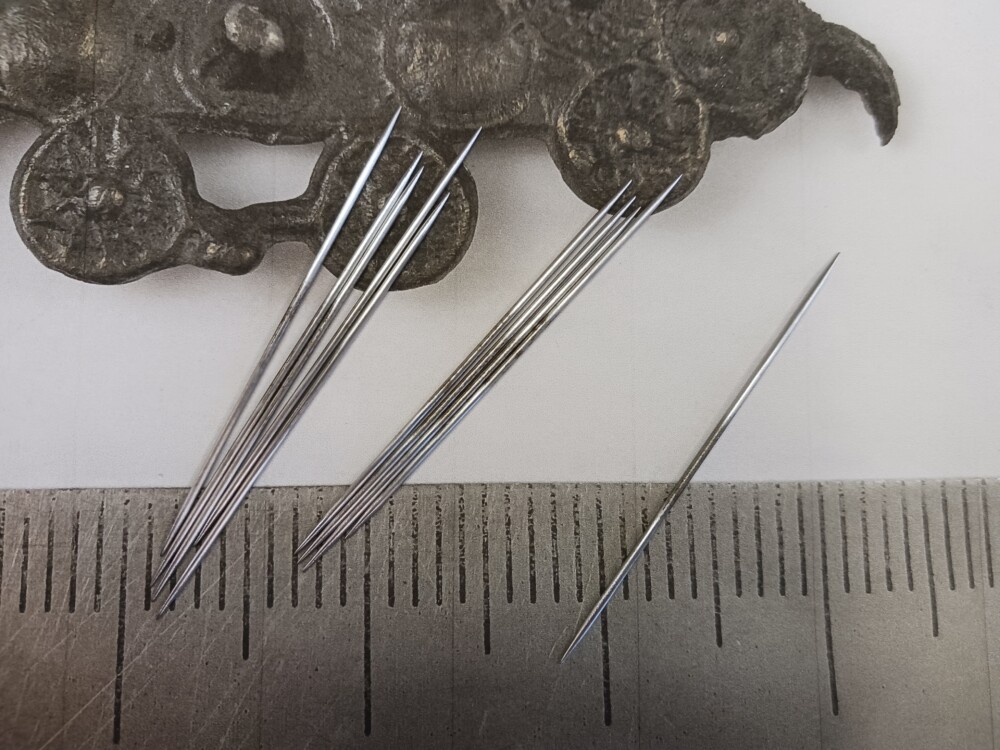
…which was happening with our otherwise excellent Bellows Whistle. This is a complex item made in tin with two separate molds. The outer part is slush cast (we fill up the entire mold with tin, let it cool enough that the outside solidifies into a shell, and pour out the still molten tin inside). The fipple is cast in a separate mold. It has a wire core to make the tube you blow into, and a second core to shape the airway.
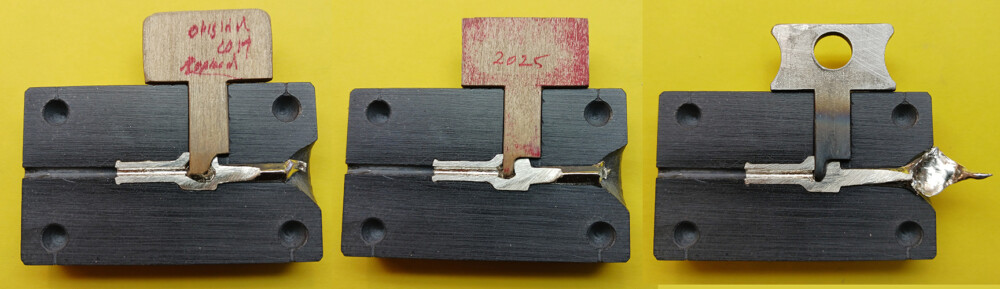
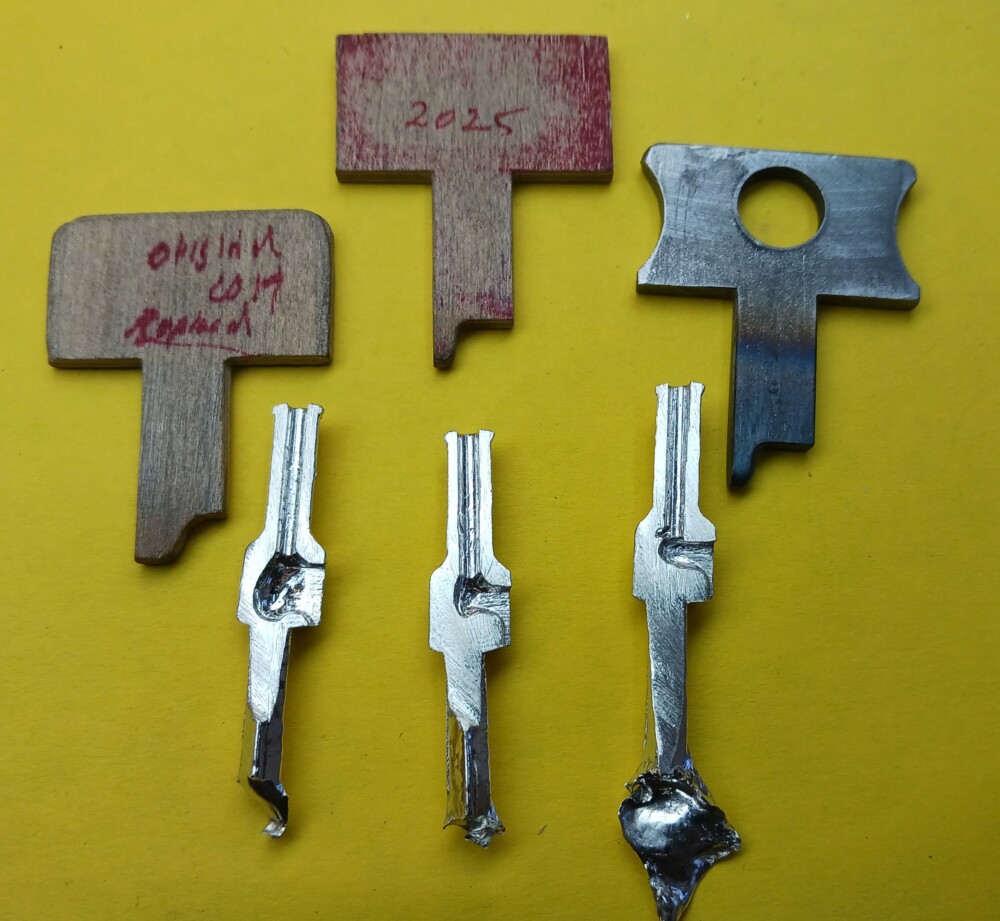
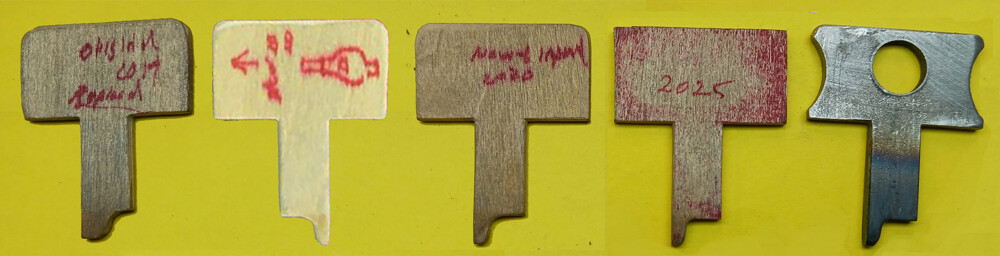
As the metal cools it shrinks – and in this case the tin poured into the fipple mold shrank and created a rough-walled, hollowed out, sloppy airway that did not retain the shape of the core. This made the whistle sound weak and hiss-y. Mac made a core, then a replacement core, trying to solve the problem when we introduced the whistle. The next time he cast it he made a third. When he started casting it most recently, he made a fourth. Although there was some improvement, the airflow was still turbulent.
Because the problem was caused by the metal shrinking away from the wooden cores, on his fifth attempt Mac introduced a “chill” to affect the cooling pattern by making the mold from steel. This pulls heat out of the tin faster than the stone mold does, so the metal solidifies around it, retaining the shape of the mold. We need indentations in the steel core to pull it out of the mold, because the cast piece is so much tighter.
When the new fipple is inserted and soldered into the body of the whistle, the airway is much cleaner – and the sound is better.
Mac doesn’t have any additional ideas about making a better fipple right now, but he may – next time.
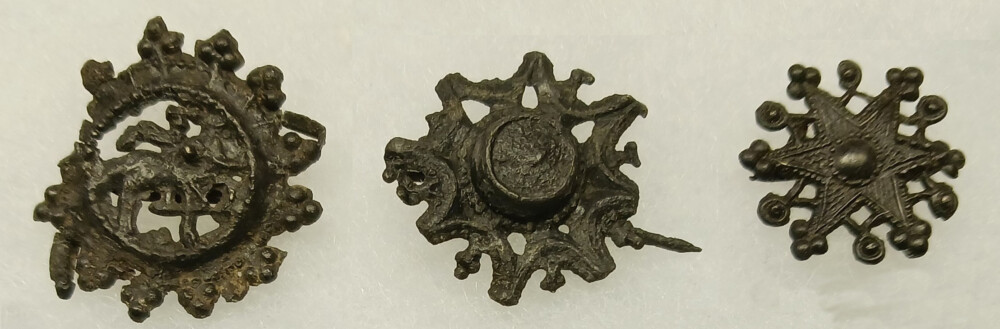
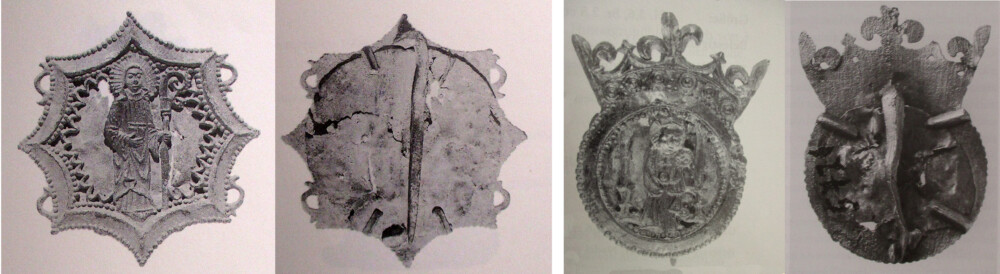
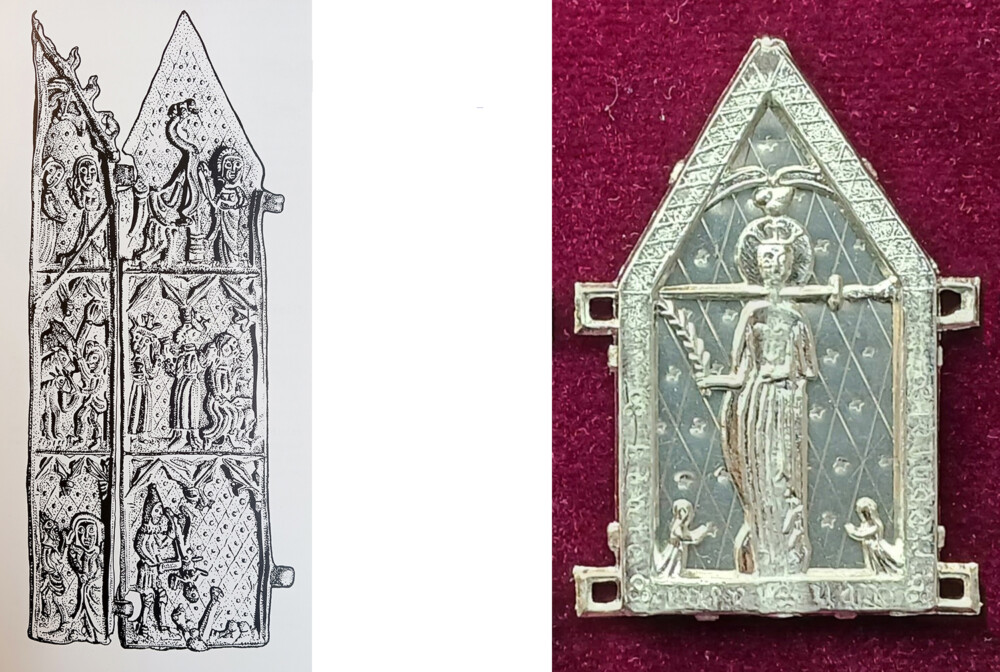
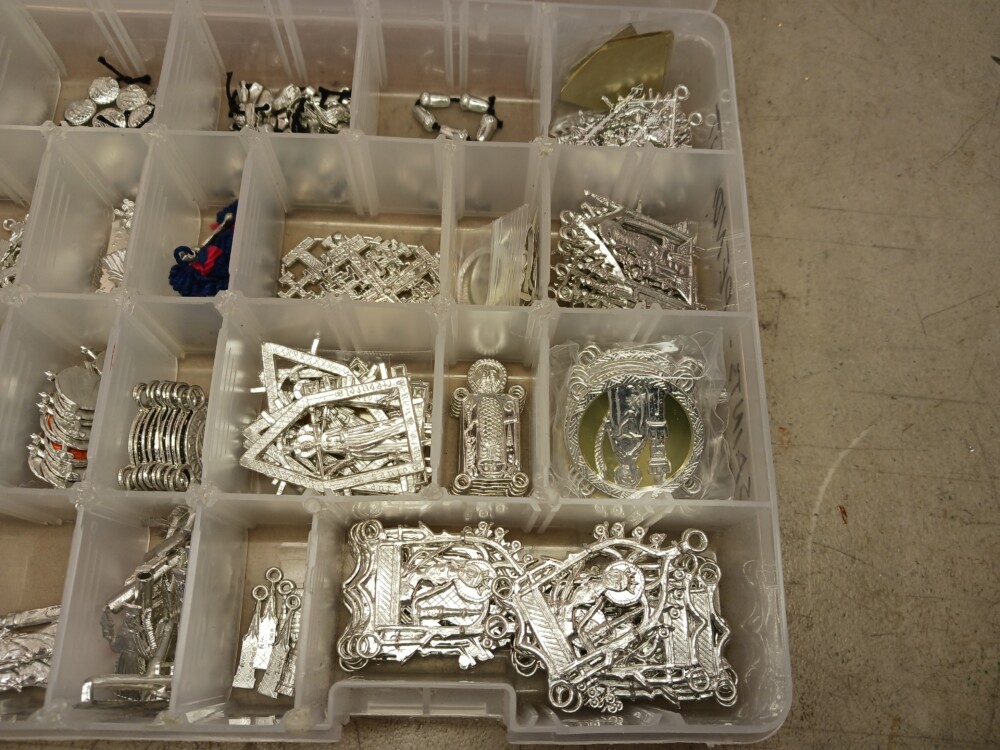
Many medieval pewter pieces had a central figure in a frame or some other openwork that let you see straight through the piece. Here is a small selection of real pieces from our collection.
And here are some shown in contemporary paintings: on the left. St. Roch, c. 1480. On the right, St. Josse, c. 1500.
In some openwork pieces you see the clothing of the wearer (or whatever else the item is attached to) through the openings, as with St. Roch’s middle sign. In others, there is a backing attached to the pewter, and you see the foreground figure against the backing instead – just as the backing of St. Josse’s larger pilgrim sign shows, rather than his hat.
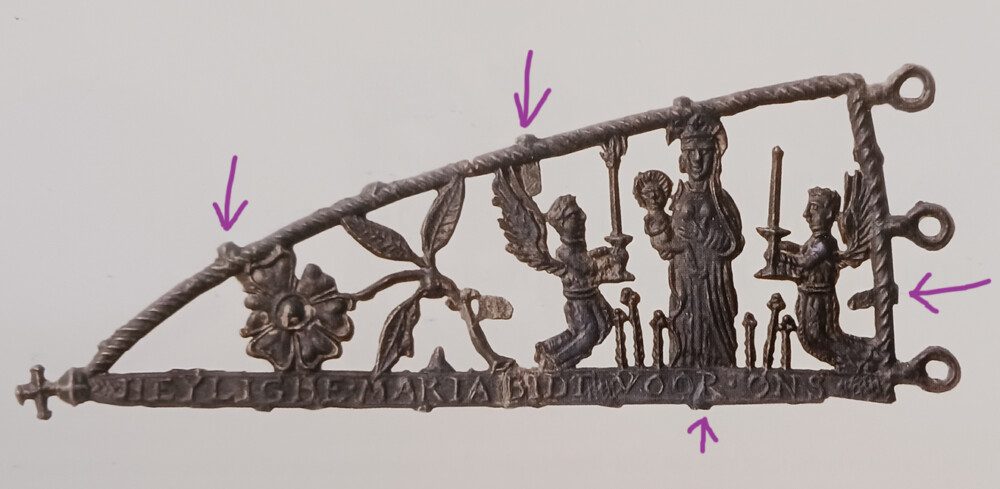
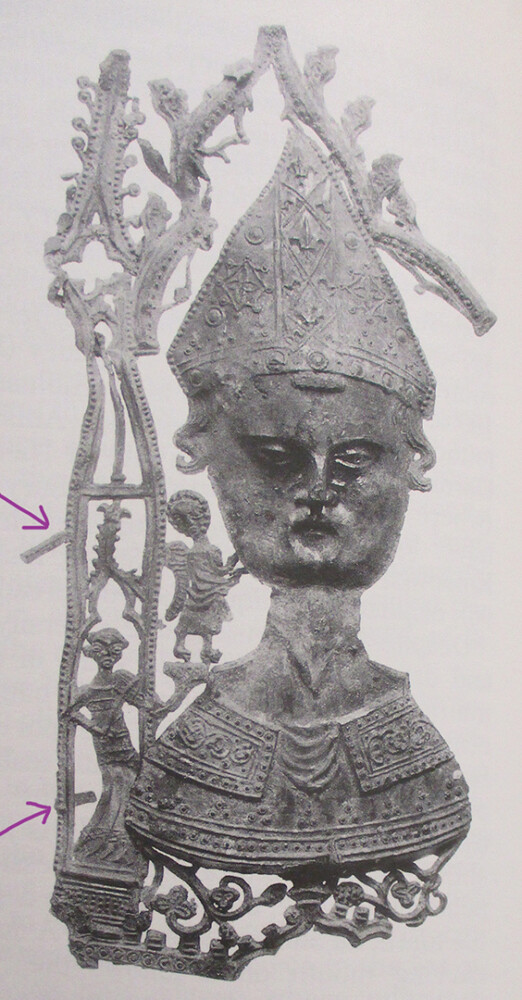
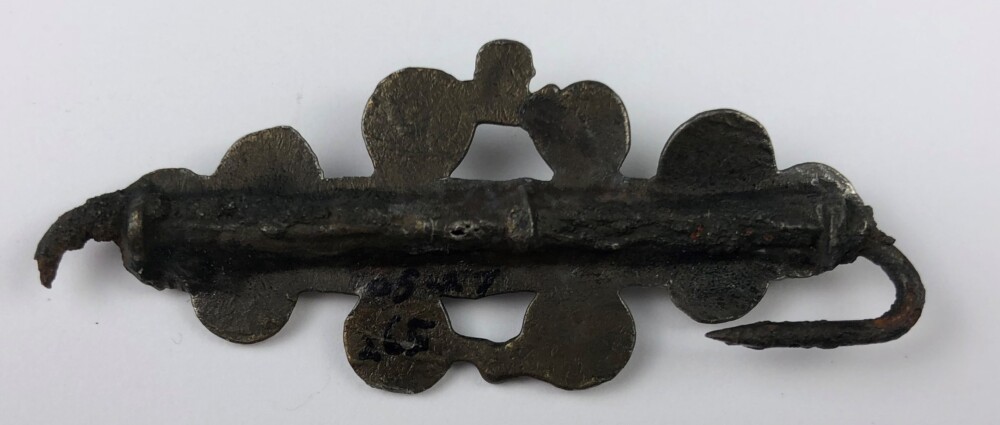
Pewter items that were designed to take a backing have little tongues or fingers sticking out from the edge. You fold these tongues over to hold the backing in. Medieval castings with tongues almost always have them bent in – whether the backing is still there or has been lost. Here’s a Flemish pilgrim sign with the Virgin inside a banner. The arrows point to four of the ten (maybe eleven) folded over tongues that once held in a backing.
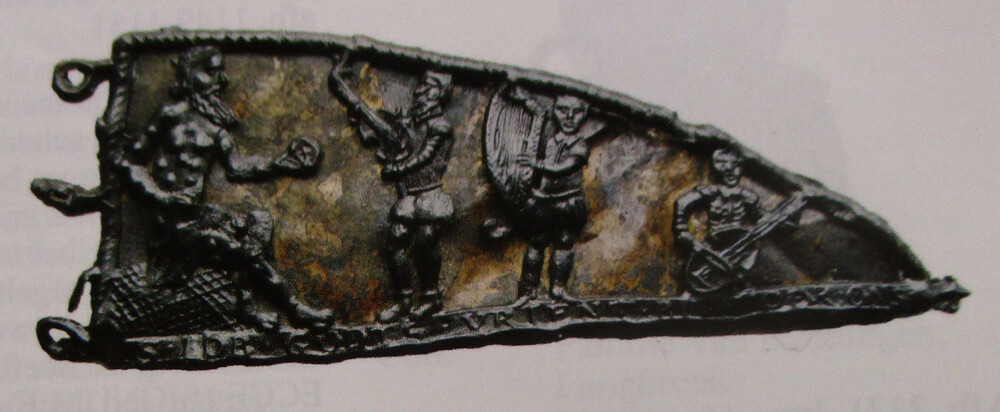
And here is a partial pilgrim sign from Canterbury (now in the Museum of London). The upper tongue on the left is sticking out, bent down a little, but in the same position it was cast in. The lower tongue is folded in.
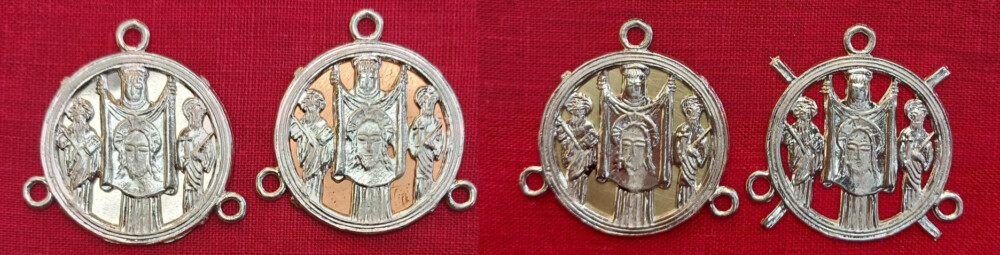
A small number of medieval pewter signs, brooches, and pendants still have their original metal backings. Here are examples, fronts and backs, from the Musee de Cluny (left) and from the Yper City Museum (right).
Museum and collection records seldom identify the metal backing materials fully or accurately . They are frequently described (I’m translating to English here) only as “metal” or sometimes, “a backing plate,” or “a sheet.” When the metal is identified, we still have to be cautious. A backing identified as “tin,” “lead,” or “pewter,” may actually be any of those metals or alloys, unless the piece has been subjected to analysis by radiography, X-ray fluorescence, optical emission spectroscopy, etc. Usually someone just guessed based on color, oxidation, corrosion, damage, or signs of fabrication.
Enough backings have been reliably identified that we can be sure – at a minimum – that copper and tin (or tin alloys) were used. This banner- shaped pilgrim sign for St. Job at Wezemaal (HP 3, no.2369; Kunera 16449) dated 1525-1575, has a backing identified as copper.
The backing of a round brooch showing a king and a bishop holding up a city gate or other structure between them (HP 2, no.1687; Kunera 06817), dated to 1383, in the Yper City Museum has been identified as tin.
Many extant pieces have folded over tongues, but no backings. This strongly suggests that their backings were materials that degraded over time. (A small number of other materials are sometimes held into pieces with pewter tongues, including mirrors and wood, but they are uncommon. We will discuss them in the future.) If you were re-creating one of these objects, it would be reasonable to make a backing of parchment, paper, or cloth (perhaps glued to parchment or card). Any of these might also have been painted – either as a solid color or embellished with a decorative pattern. As we will see in a moment, patterned metal backings were used, although infrequently. I do not know of any direct evidence for the materials of the absent backings, so this is speculation, but it seems reasonable. It also seems possible that some pieces were offered with a choice of metal or parchment/textile backings – presumably at different price points.
Our pieces with backings
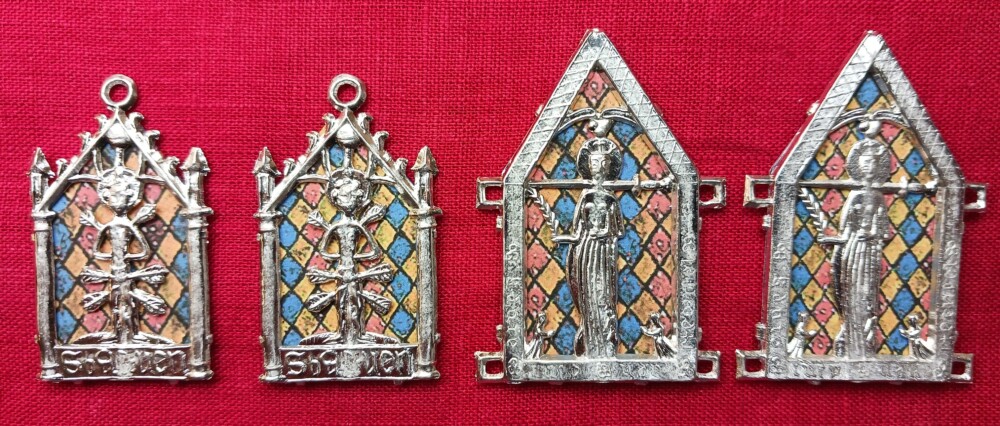
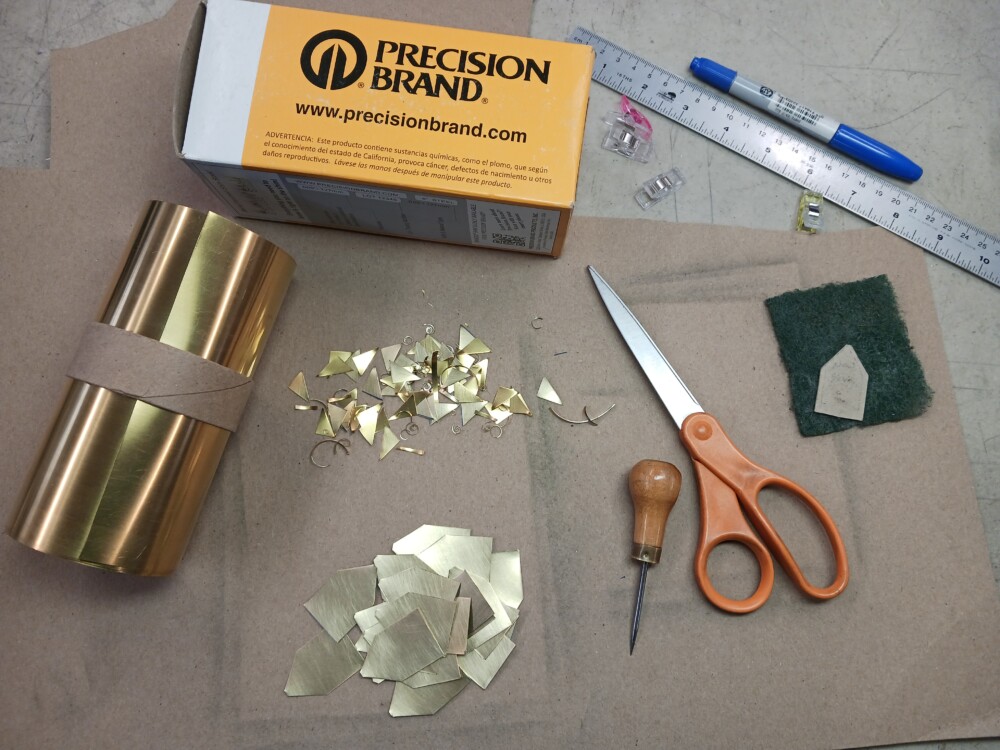
Up to now we have offered metal backings for openwork pieces where the originals have the little tongues, including many pilgrim signs, two miniatures, and one naughty item. We’ve used both brass and copper, which are easy to buy in thin sheets six inches (~15 cm) wide and several feet long. We’ve supplied the checkers (draughts) board with either red or black paper backings. We recently became interested in offering pewter backings, so we bought a rolling mill which lets us make our own thin sheet. We have experimented and decided on pewter sheet approximately 10 mils thick (10/1000 of an inch or .254 mm) for our backings. We are using copper sheet of the same thickness and brass sheet, which is stiffer, 8 mils (8/1000″ or .203 mm) thick.
I was concerned that the pewter backings might not show off the pewter openwork well. In fact, in some lighting the design is not immediately visible, but as soon you move the piece, the reflections off the various parts make the image clearly visible – and extremely striking. There is a very brief video of a sign of St. Barbara at https://www.youtube.com/shorts/eRYl24tQdIo.
Even fancier backings
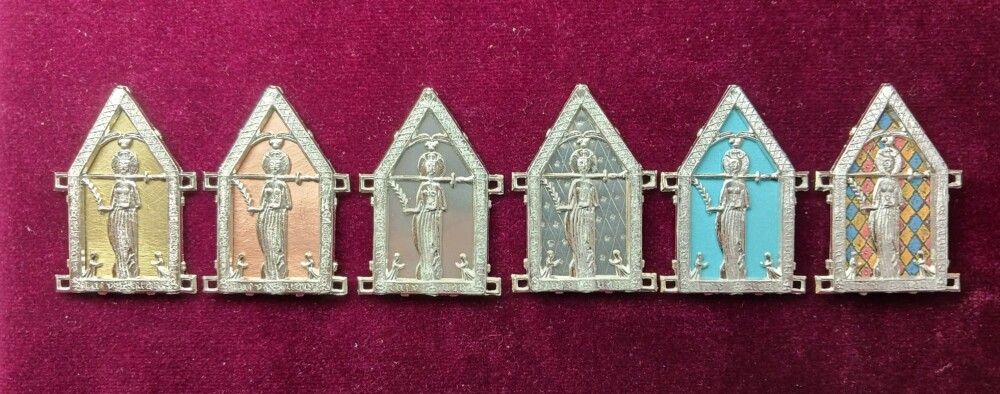
Although we are not offering these options for sale, you may be interested in two of our further experiments. The first uses decorated pewter sheet. The two leaves of a small three-dimensional shrine in Salisbury (left, below) have a wrought metal sheet background with a simple pattern. We have made some exploratory pewter backings worked with a diamond pattern, like the backing for the St. Lucy sign, below right. See a video of this sign with the patterned pewter background in motion at https://www.youtube.com/shorts/KwbRvrHnPqY.
We have also faked up a colored background based on one of the diaper patterns in the Göttingen Modelbuch. These are satisfyingly gaudy and, like the pewter sheet, show best when the piece is in motion. We are still experimenting with the scale of the pattern and the colors which offer the best contrast. These offer more insights into the possible range of decorative backings for castings in the Middle Ages.
While we continue to learn more about the backings, we have started offering a range of options for our openwork pieces. Each item on our site with a backing is now photographed with backings of pewter, copper, brass, and colored paper – and with no backing at all. Check them out! You can order them with any of the metal backings – or “empty,” with a pattern so you can fit them up to suit yourself.
Be sure to share your creations to our Facebook page, or on Instagram (tag #billyandcharliepewter and #billyandcharlieDIY). We can’t wait to see what you come up with!
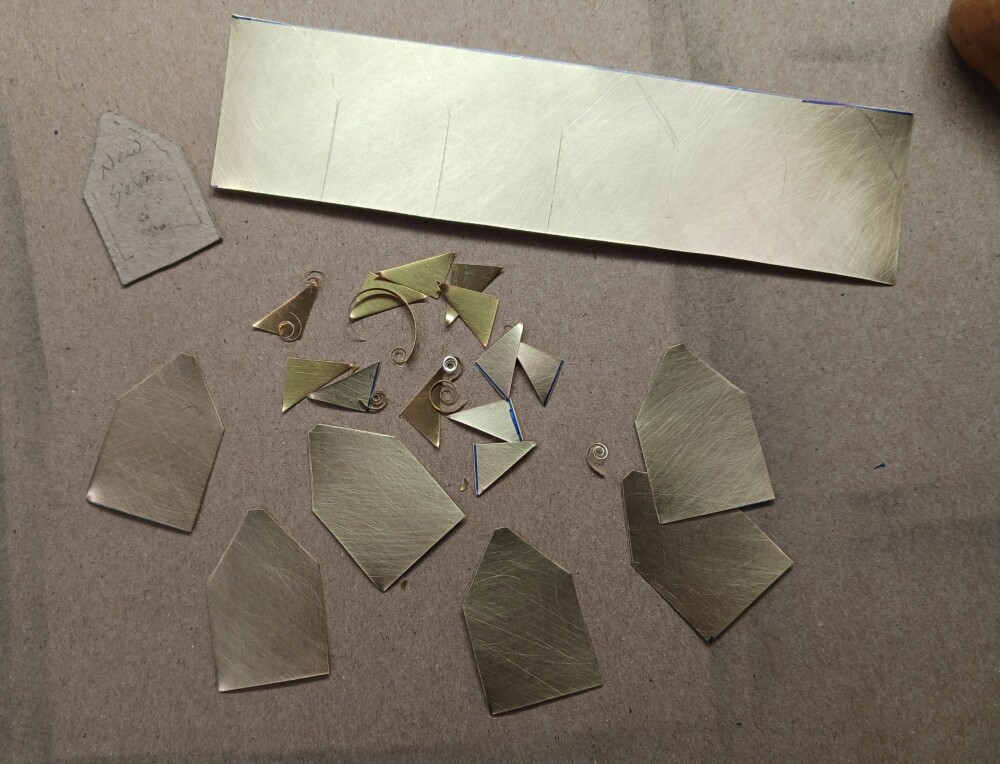
Some medieval openwork objects had backings against which the cast pewter stood out. These pieces can be identified by the little tabs that stick out from the edges, which were bent in to keep the backing in place. In many cases the backing has disappeared; these may have had backings made of parchment or paper – or cloth backed with parchment or paper. Some extant pieces have metal backings. Many of those are probably pewter sheet, but there are a handful of later examples with copper alloy sheet. We use paper and brass (or occasionally copper) sheet for some of our excellent items. The process is simple and creates really beautiful results.
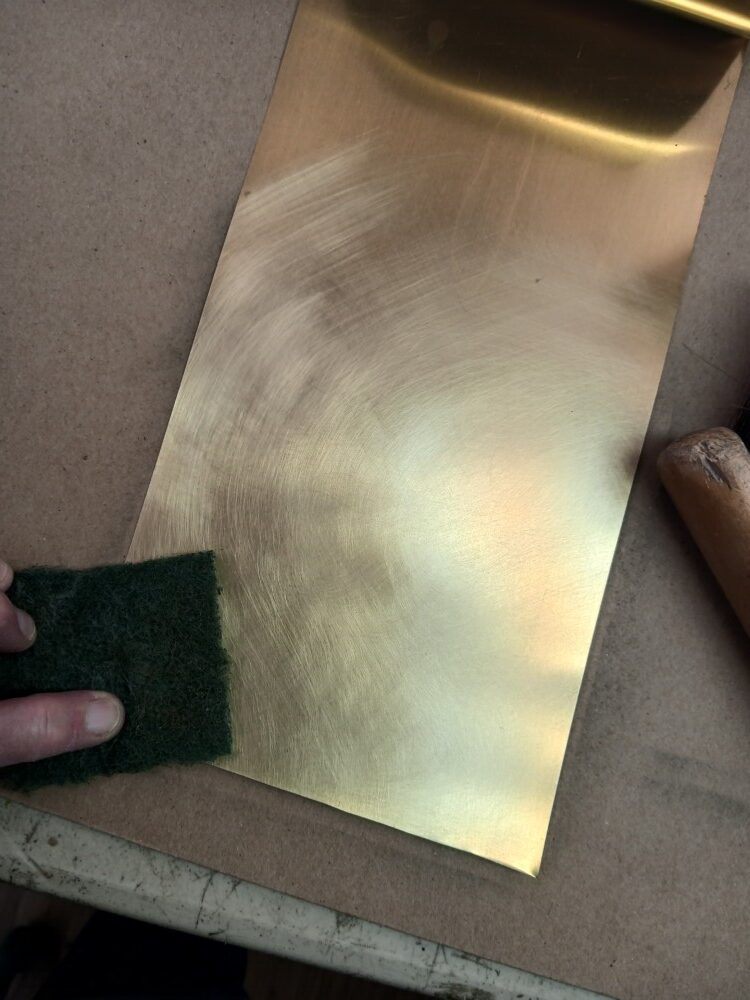
We buy our metal sheet in rolls as half-hard brass shim stock. Of course, we do not need the accuracy of shim stock, but it is a convenient way to purchase and store what we need. Most of our backings are .008 inch (.2mm) thick. As the roll of metal sits in our shop it gradually gets dull. We clean the oxide off and brighten up the sheet before we make the backings. Because the areas that are exposed are small – and surrounded by bright pewter – we finish with an unobtrusive circular pattern of fine scratches from the abrasive pad, rather than trying for a polish.
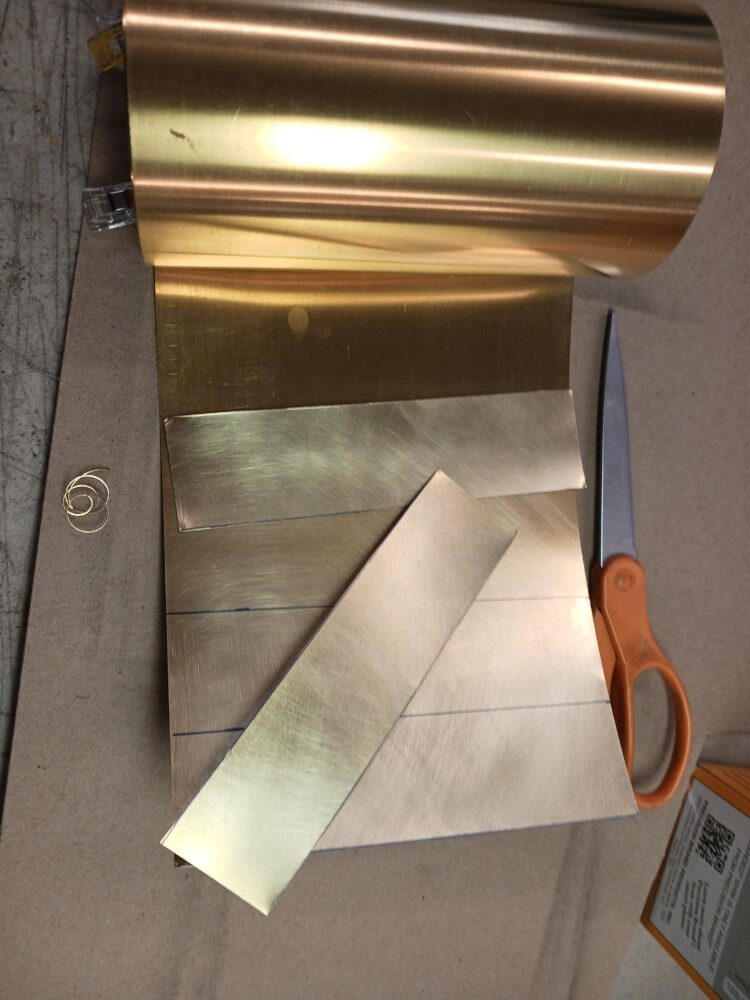
We cut the sheet off in strips wide enough to cut the backings from. At this thickness, we can use ordinary scissors to cut the sheet.
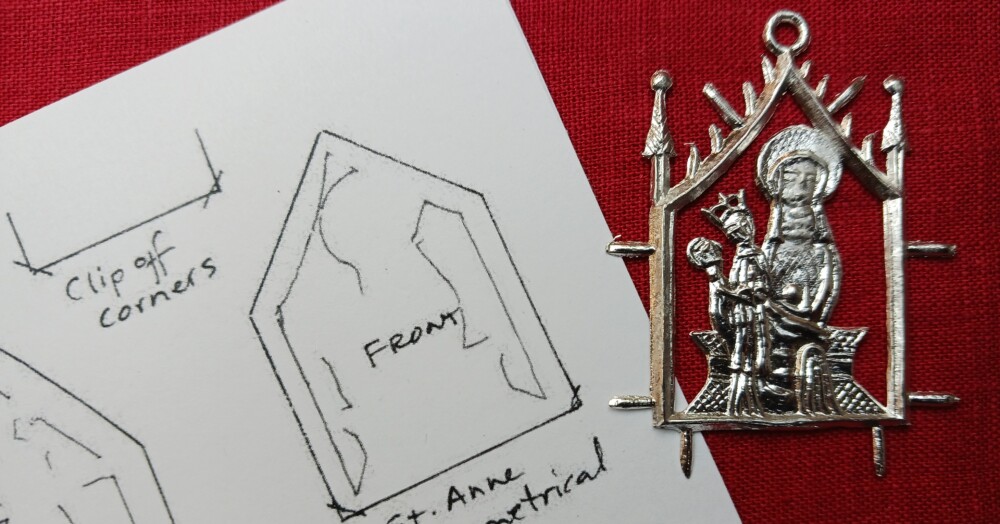
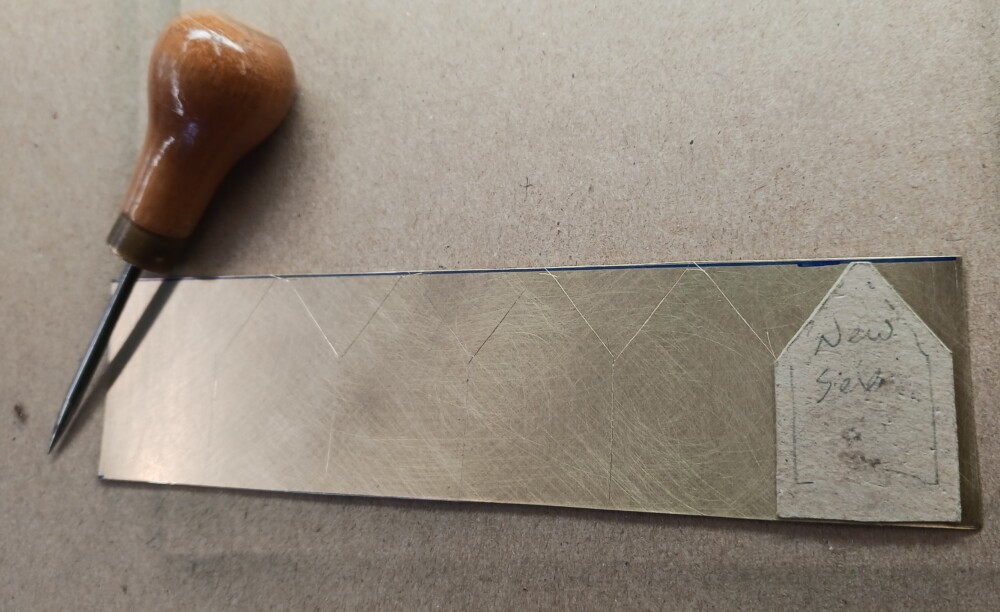
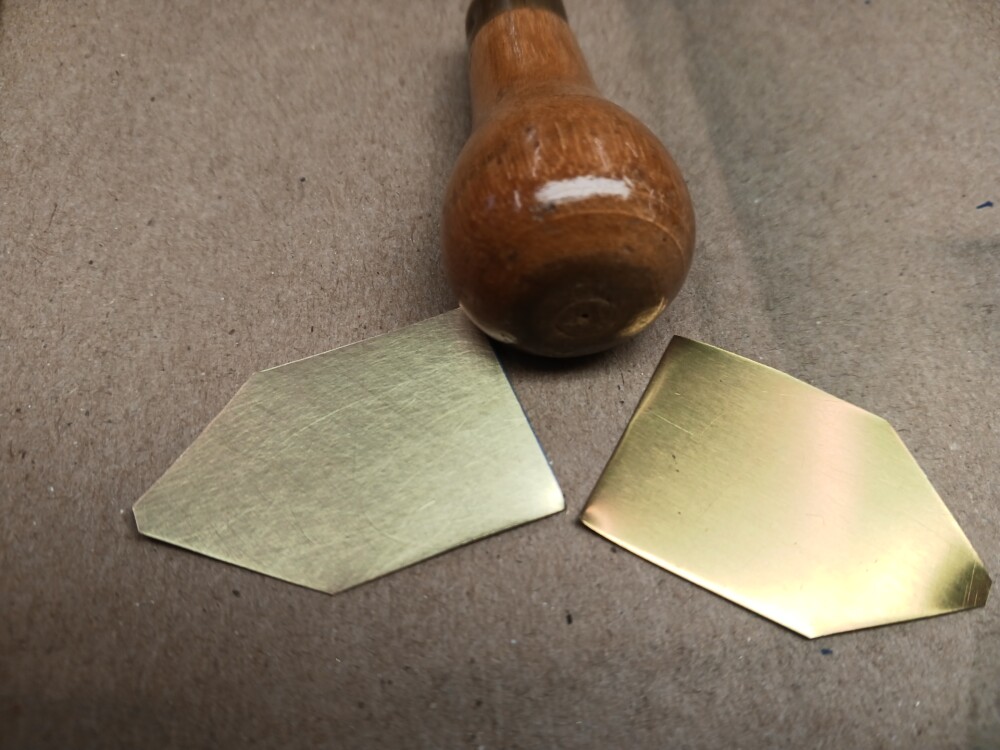
We use a cardboard template to trace the shape needed for each backing. The strip is just a little taller than the final piece, so each backing is trimmed on all sides.
This is just as well, as the cast pendant – and therefore the backing – is not symmetrical. The edges of the backings do not line up perfectly with each other, and trimming them creates many tiny, spiky curls of metal that shoot across the table as they are freed from the sheet. We usually find the last ones a couple of days later, by setting an arm or a hand down on them. Ouch!
The other result of cutting with the scissors is that the corners of the backings get turned up. We take a minute to flatten them (with the handle of the awl) and then nip them off with the scissors to keep them from catching on clothing when they are worn.
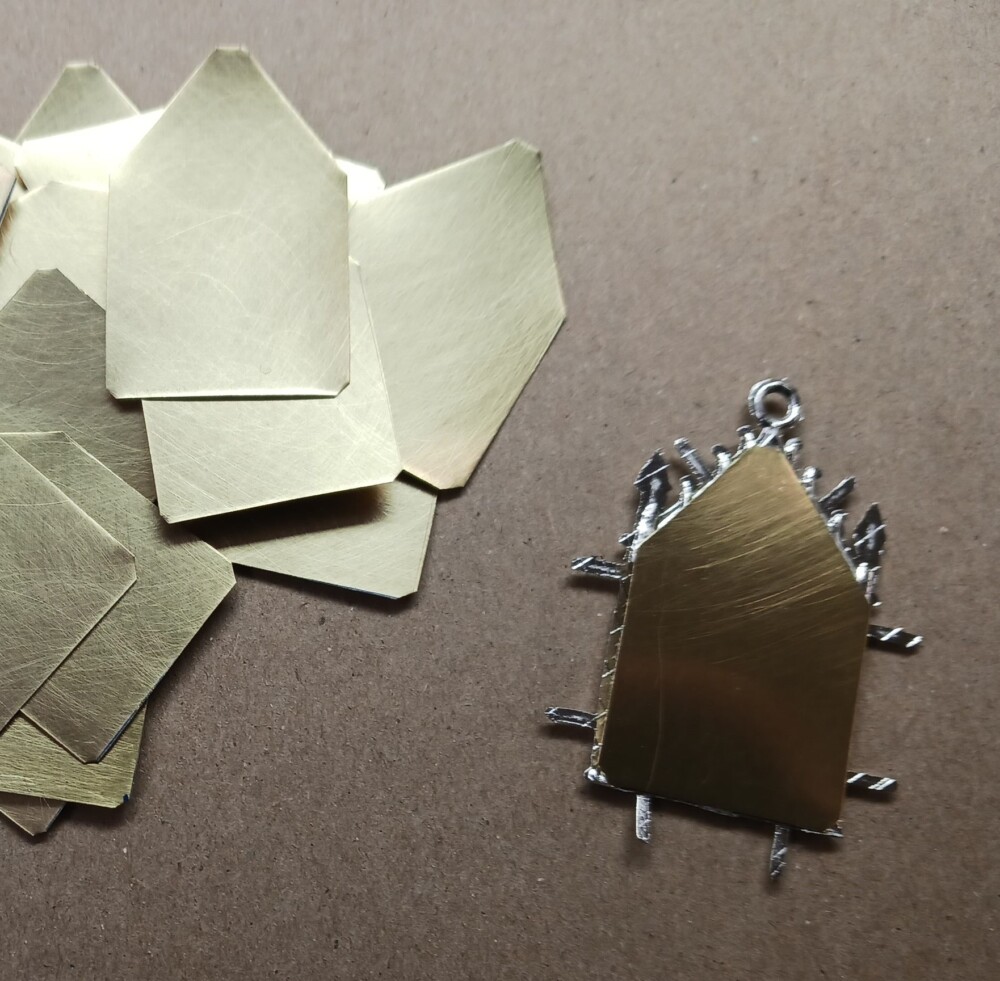
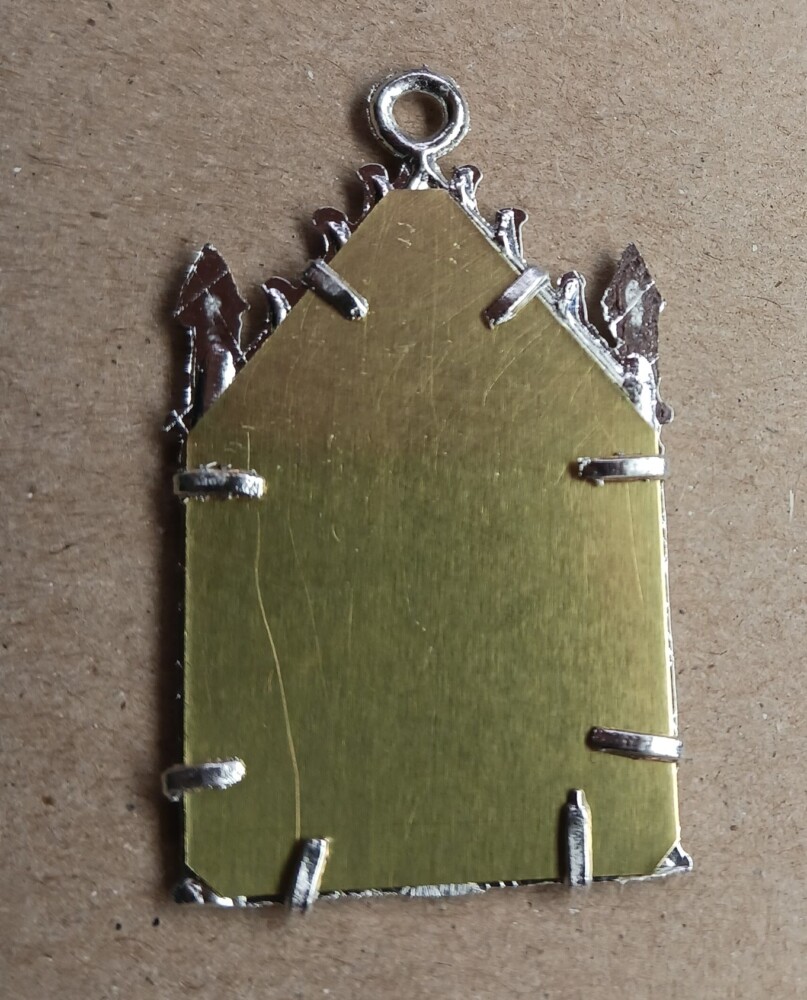
We set the pendants face down and add a backing. Remember that part about how neither the castings nor the backings are symmetrical? Because we only brightened one side of the sheet, and then traced the template on that side, if we put the backings on with the bright side toward the castings, they will always fit.
The clips fold over easily and hold the backing in place.
To keep the backings bright while the pendants await their new owners, we keep them them in small plastic bags inside our storage bins. The St. Barbara rondel badges near the front have the backings installed already, so the entire piece must be enclosed. The St. Sebastians at the back are still separate, so only the backings need to be put in a bag.
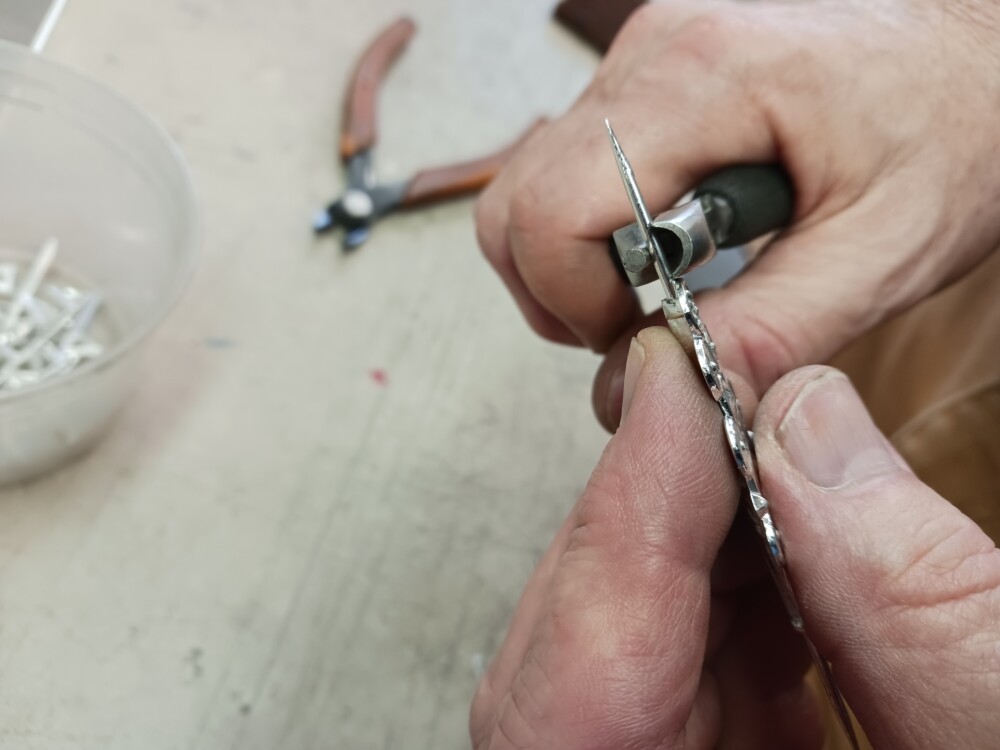
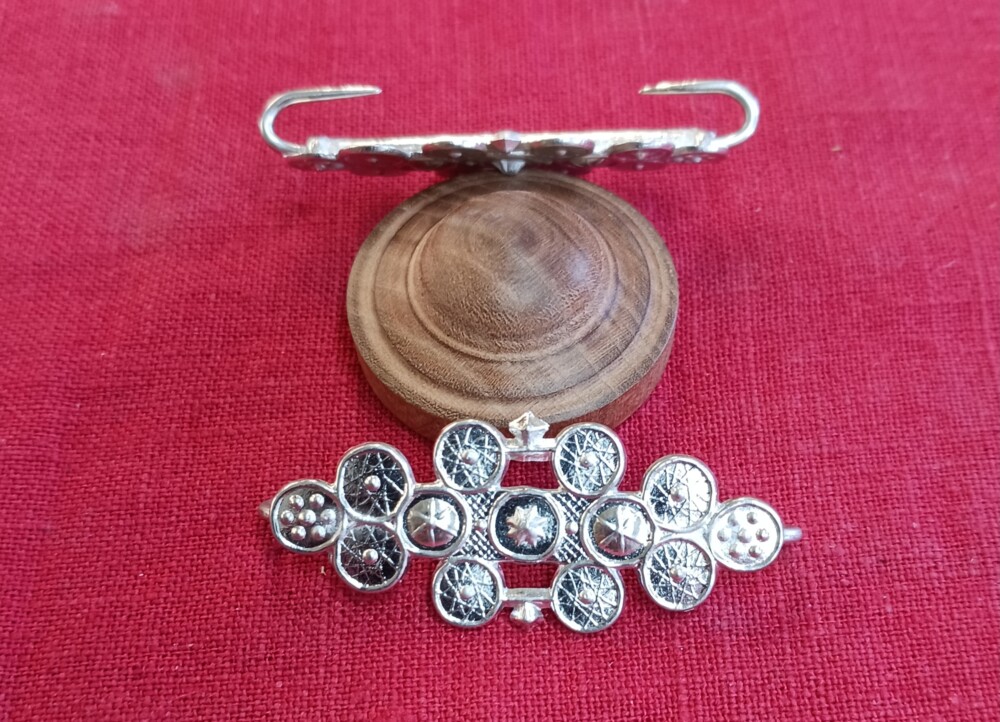
We have cast a hook into our new pewter cloak clasp. Several of our goods have copper alloy or ferrous wire/rod cast into the pewter pieces.
The new cloak clasp is copied after an original clasp from Rotterdam, the iron hook of which has partially rusted away. To replicate this object, we cut 16 ga. mild steel rod to length.
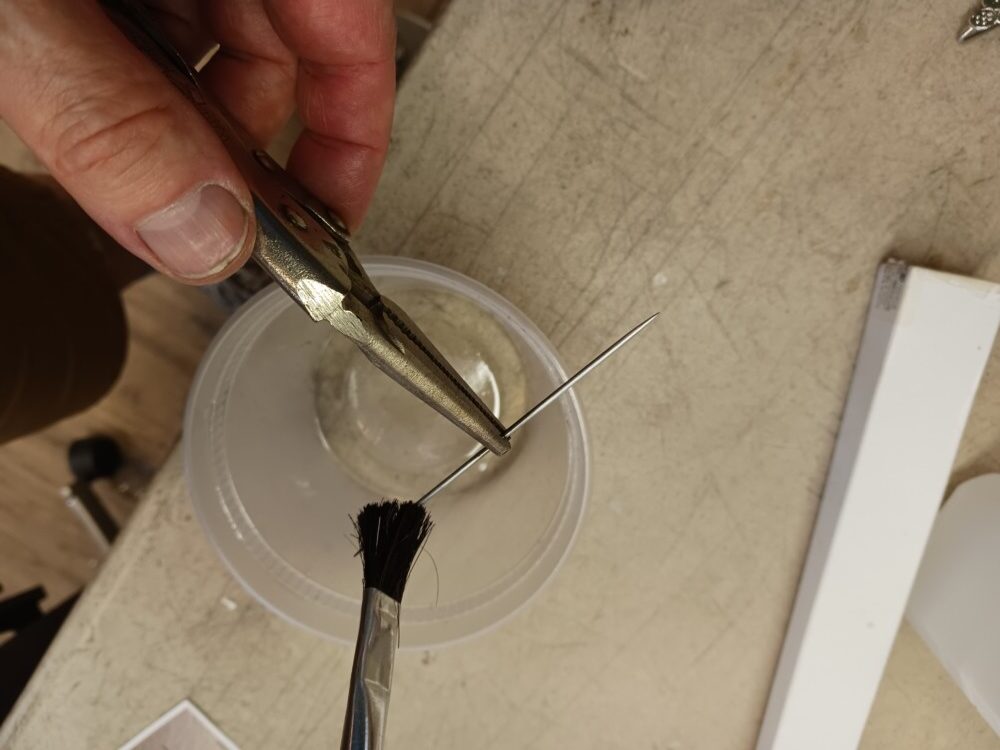
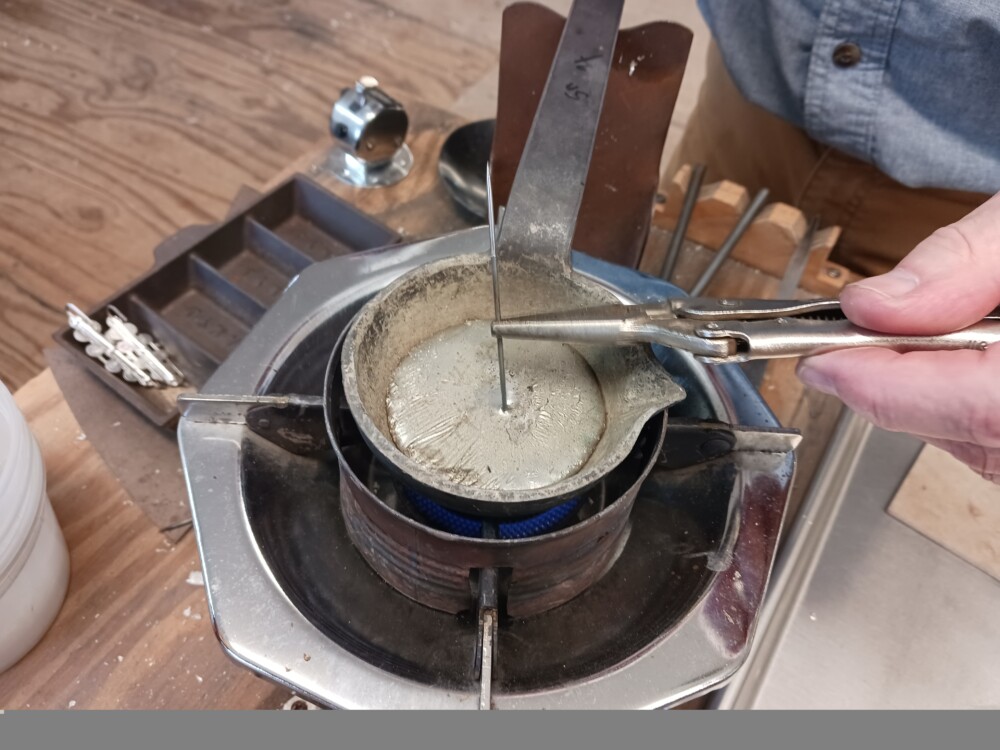
We sharpen both ends of the pins. To tin them, we brush an acidic commercial liquid soldering flux over the parts of the rods that will be exposed, then dip each end in a pot of molten tin.
We wipe the excess tin off. When all the pins are prepared, we put each one into the mold for the cloak hook. Closing the mold keeps the pin the the correct place and we fill the mold with molten pewter.
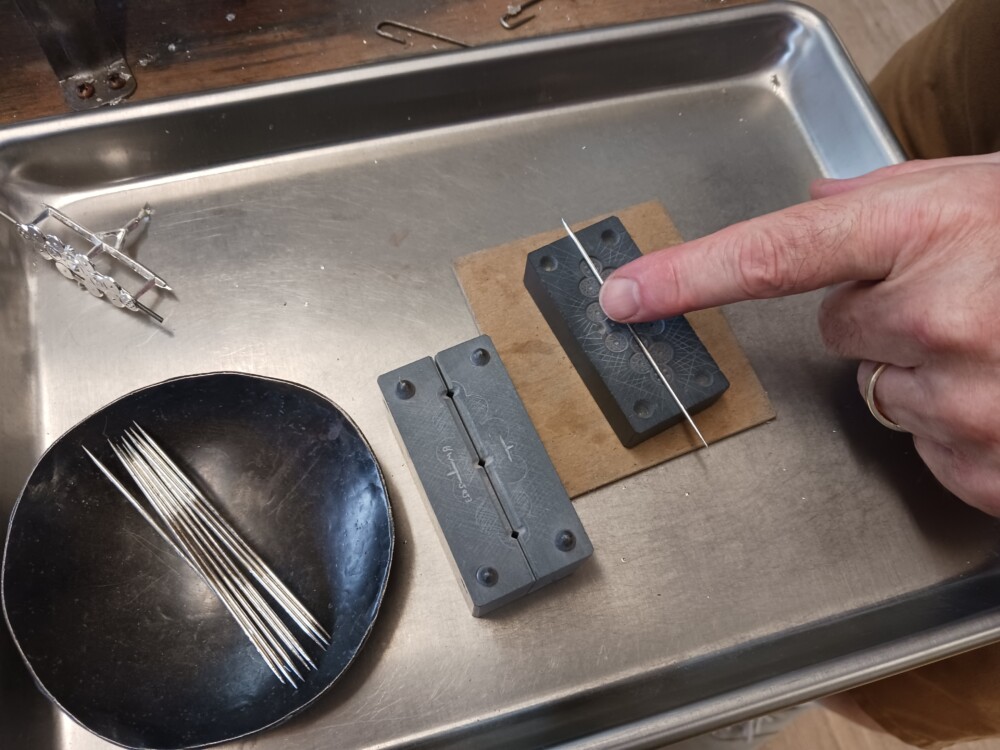
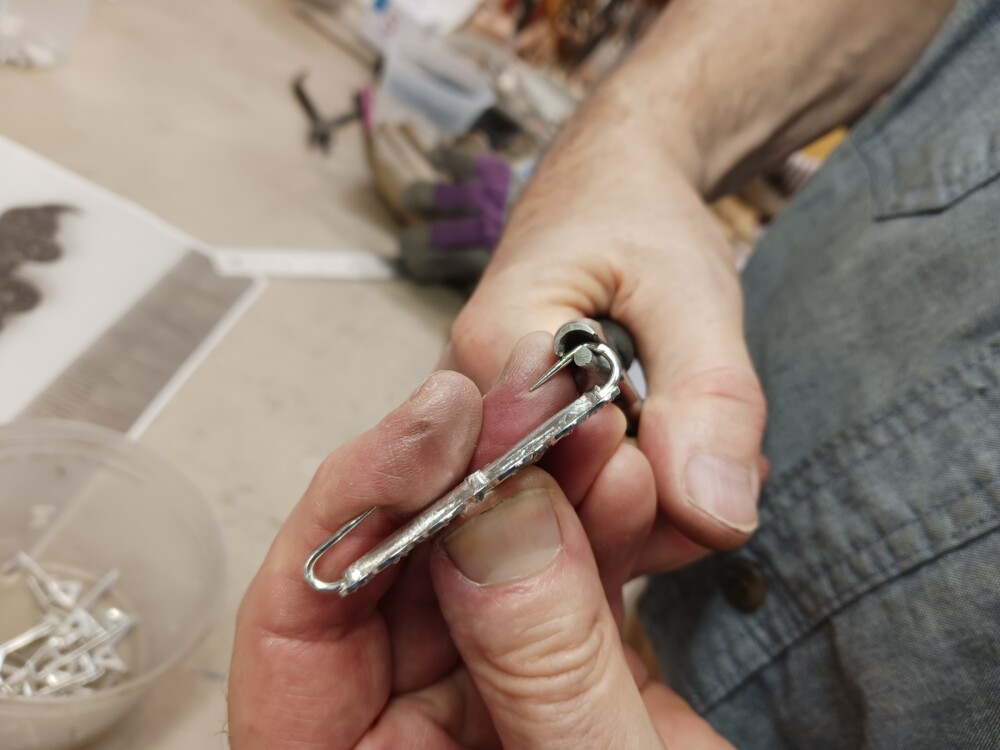
The pewter encloses the pin and holds it firmly. We cut off the sprues.
We use a wire looping (concave and round nose) pliers to bend the hooks into place.
Read more about this strong, decorative cloak hook. on the product page.
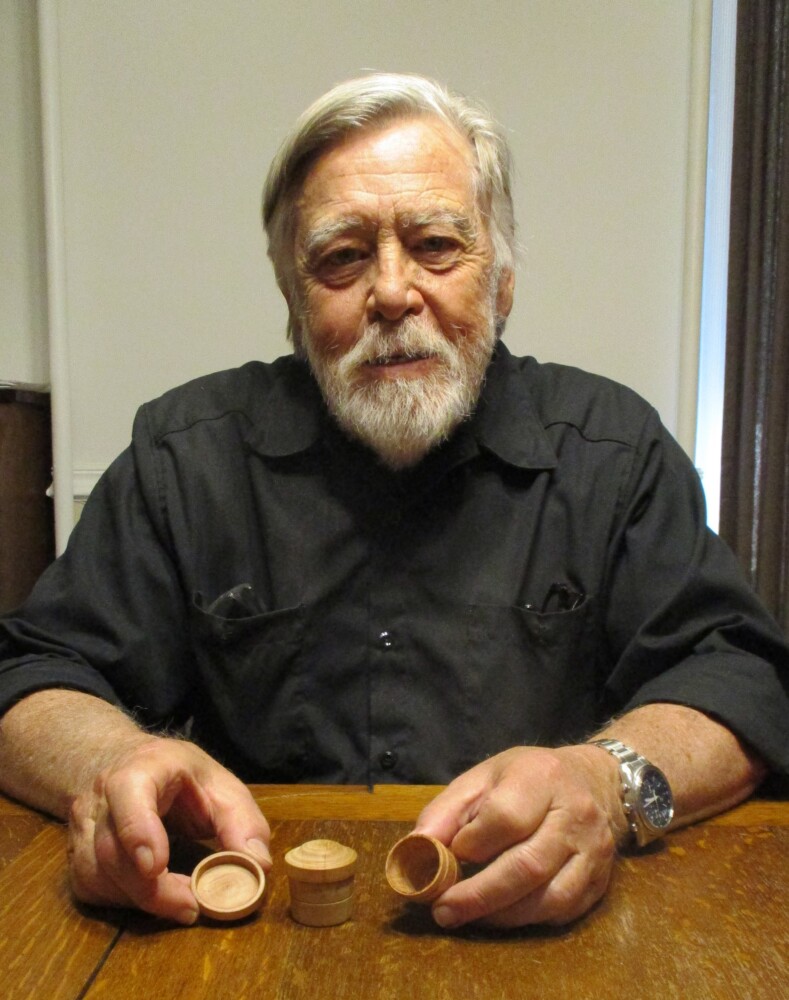
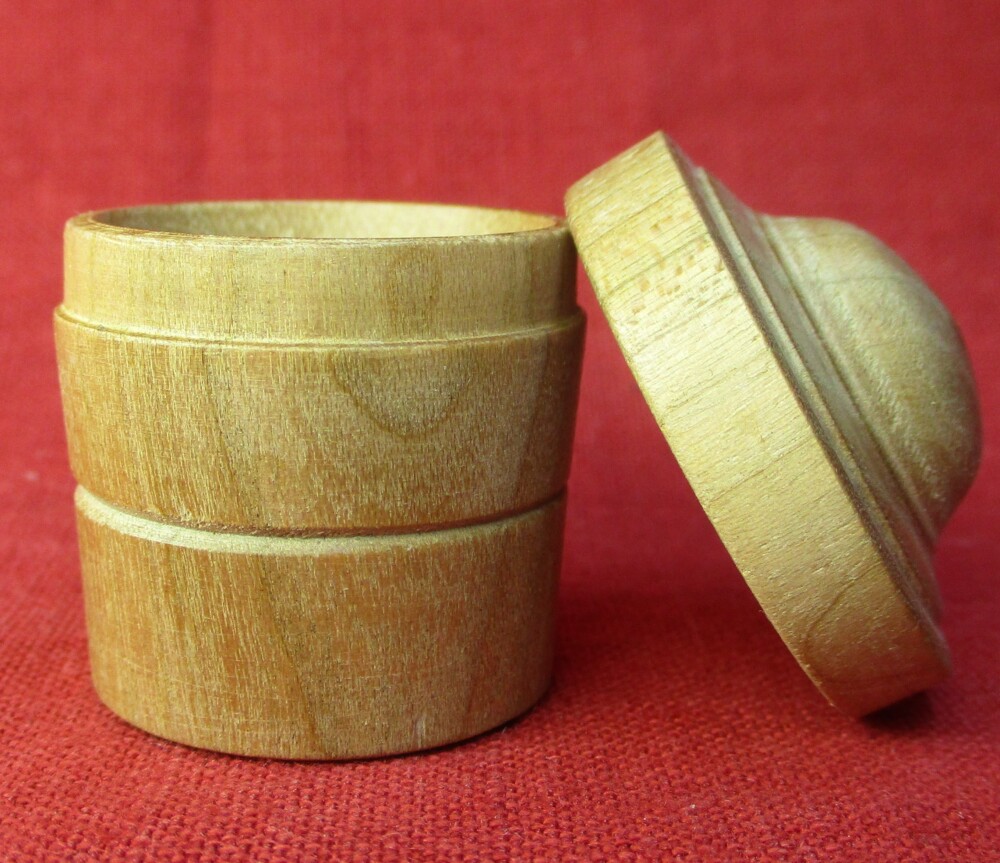
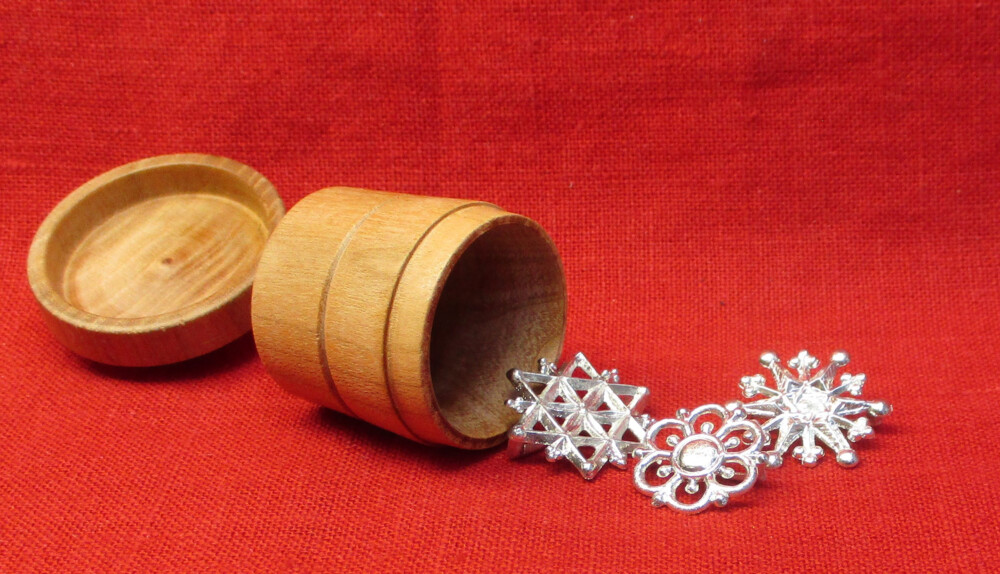
Our friend Chuck (Master Gryphon), a talented wood worker, has been working on making replicas of the turned wooden box in which the three Rotterdam brooches were found. He has shared a step by step description of his process.
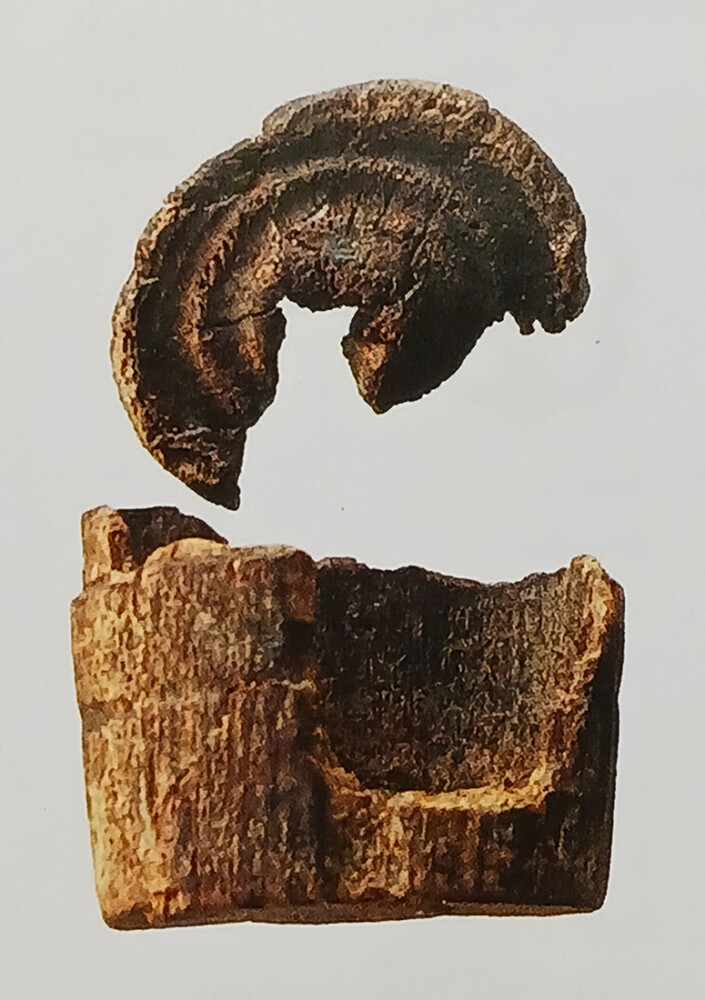
The Rotterdam trio, as we call them, are three brooches dated to 1350-1400. They were excavated from the construction site of the Markthal in 2009-1010 and when they were found, they were all in a single wooden box, barely large enough to hold them. Images of the brooches and the remains of the box were published in Heilig en Profaan 3(2012).
The kind folks at Archeologie Rotterdam (BOOR) provided better photos of the box (as well as images of the three brooches). They say that the wooden box is 2.7 cm high and approximately 3.0 cm in diameter.
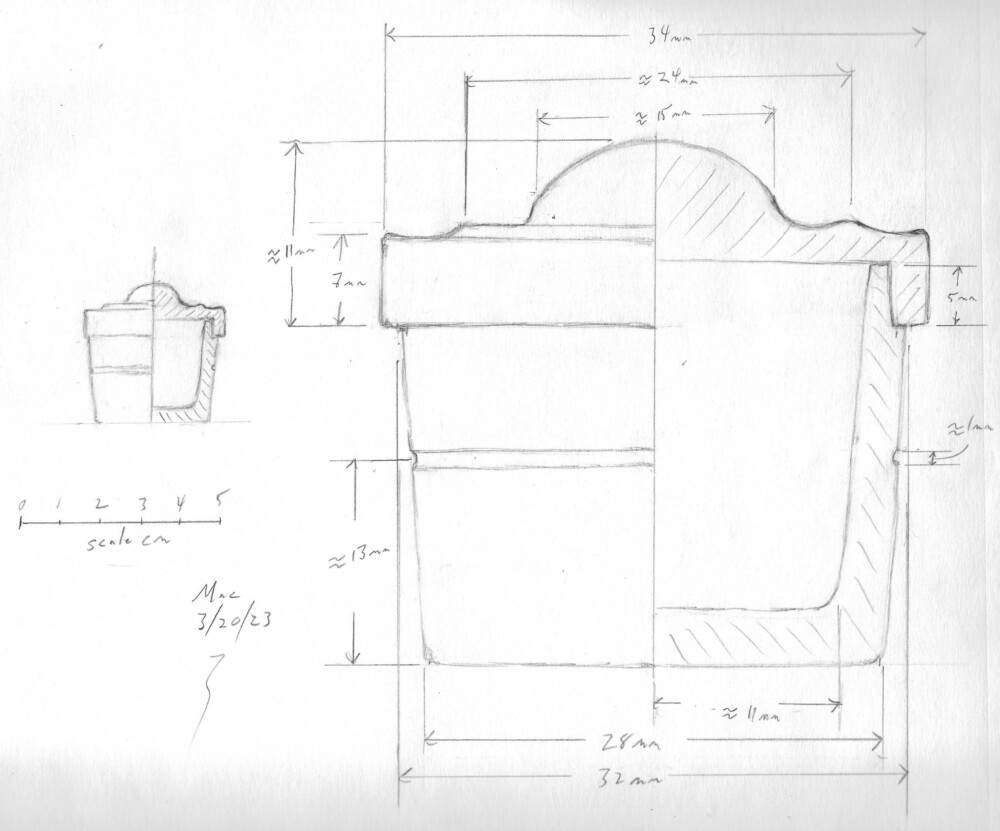
Chuck and Mac studied the photos, discussed where the measurements were taken, and talked about what the box might have looked like when it was complete. Mac made a sketch showing the results of their analysis.
After a series of experiments and test pieces, Chuck produced not only our box (and some additional boxes for friends), but also photos showing his procedure. He has been kind enough to share these:
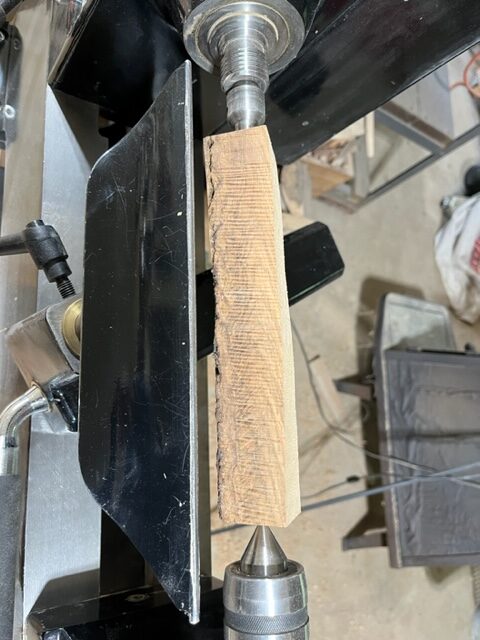
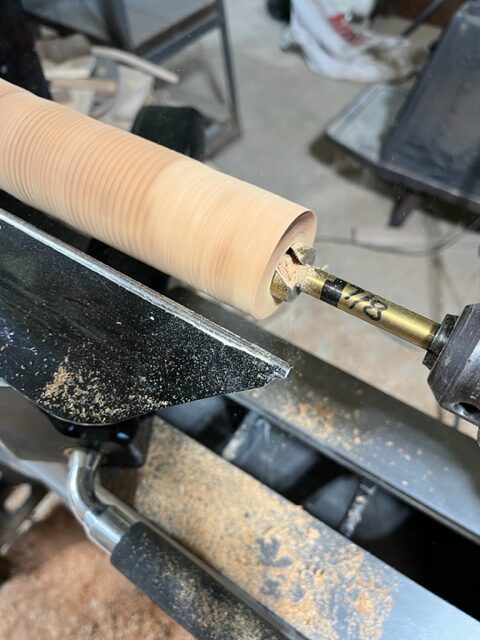
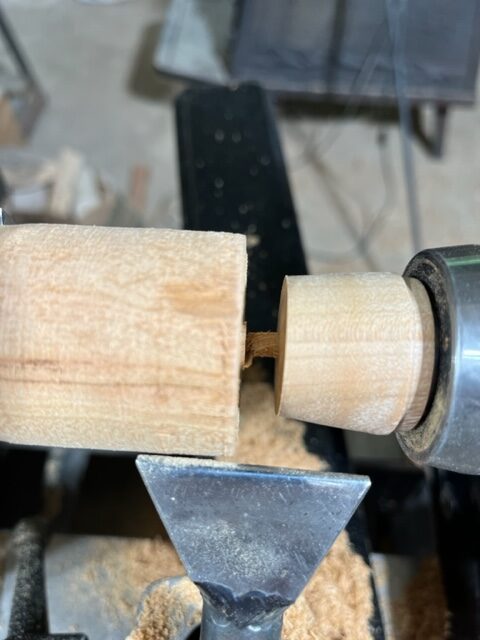
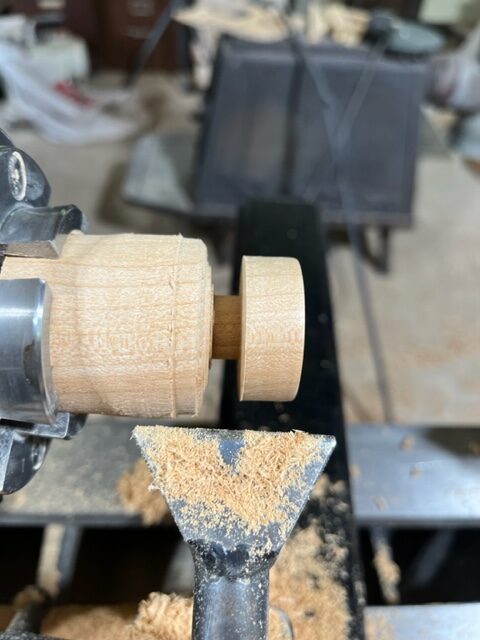
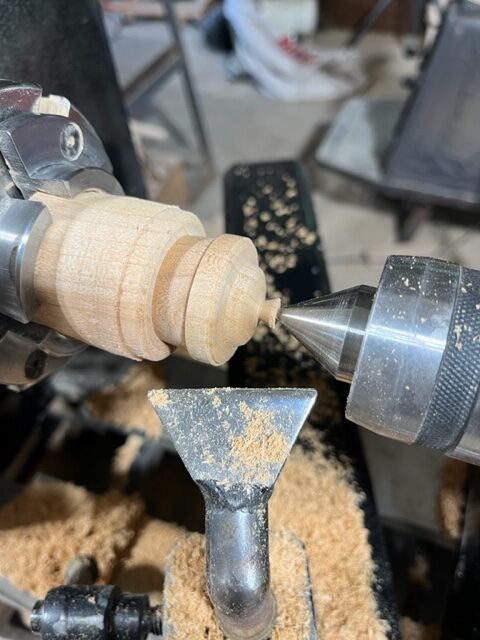
Select a square piece of close grained hardwood at least 1.5” square x 6” long. Mount between centers on the lathe.
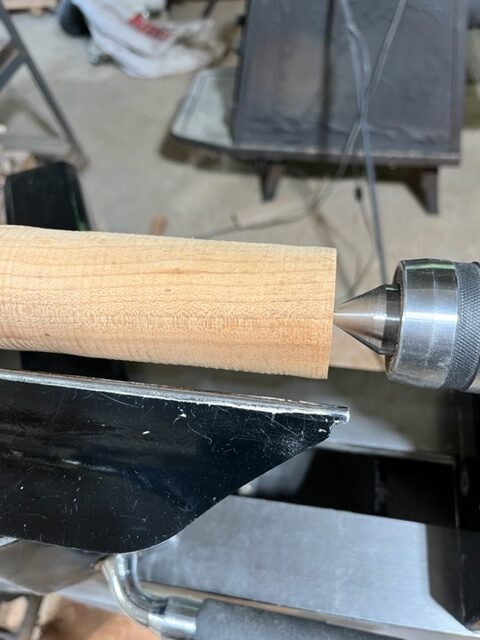
Turn round to just less than 1.5” diameter.
Use a 7/8” Forstner bit and drill in 21mm. Can also use bowl gouge or scraper instead of drill.
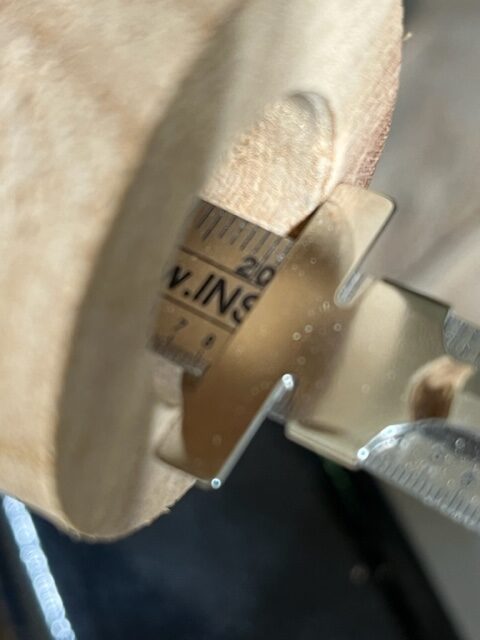
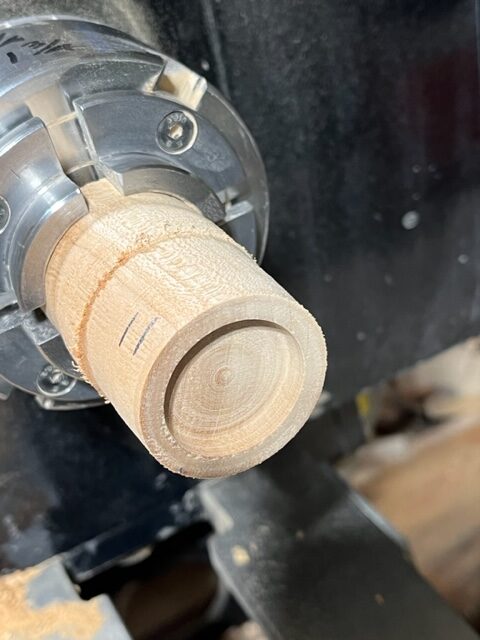
Check the depth for 21mm.
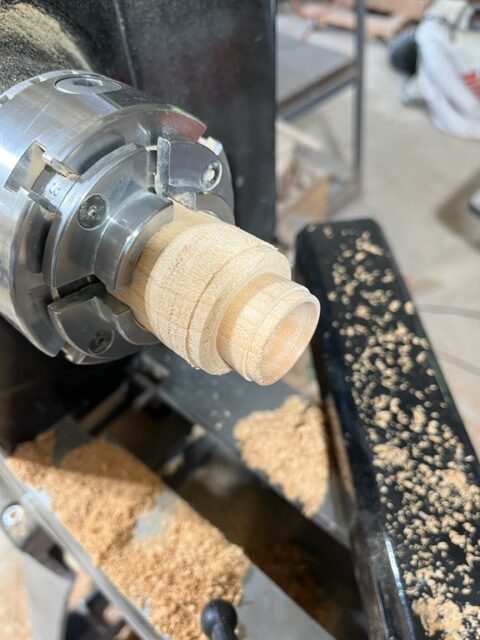
Use a round nose scraper (or bowl gouge) to shape the inside to the proper dimensions and taper (26mm at top and 22mm at bottom).
Place live center in opening.
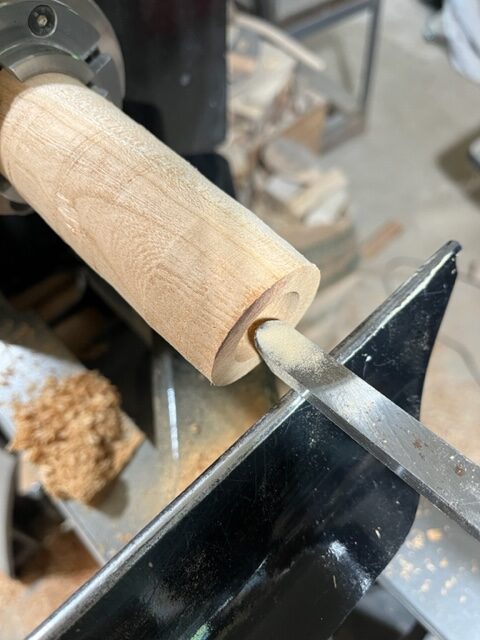
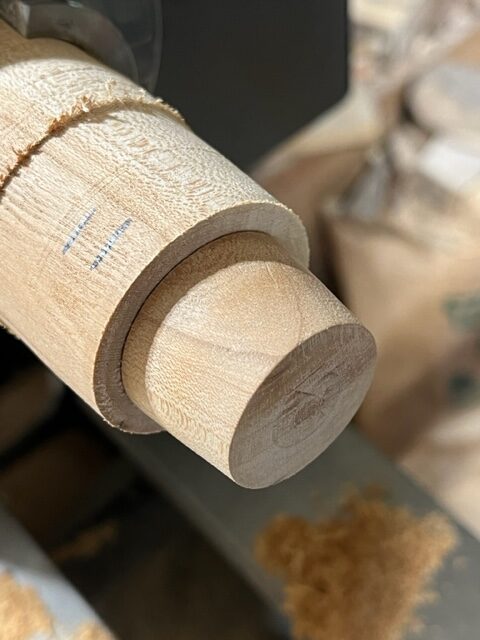
Use spindle gouge to turn the outside to the proper dimensions, taper, and add lip for lid.
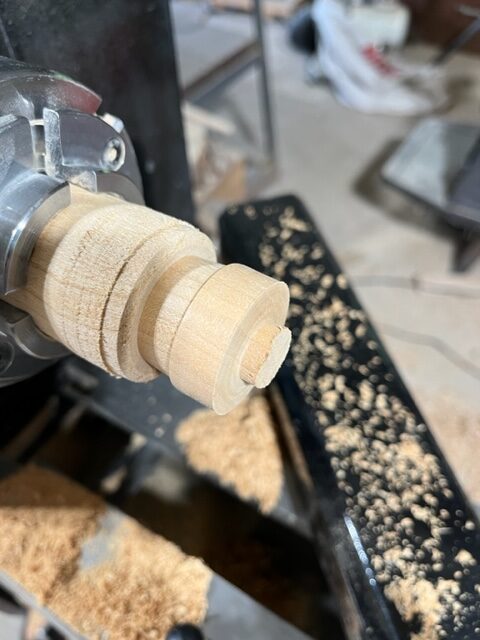
Use parting tool to cut to length leaving it still attached. Sand the inside and outside and finish parting from lathe.
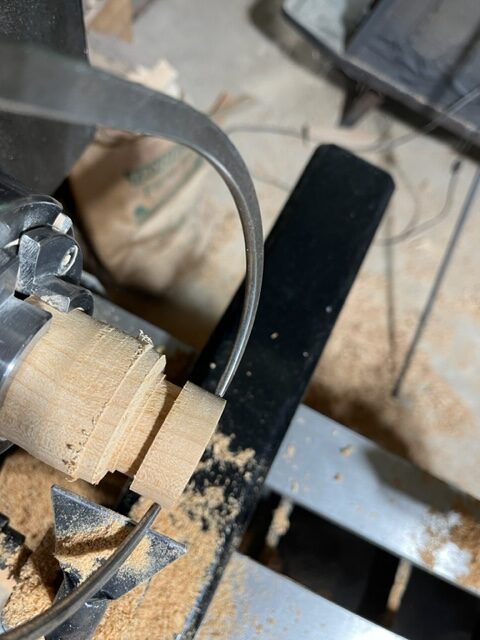
Mark the remaining piece on the lathe for the top dimensions (7mm and 11mm) and turn the inside to match the lip on the bottom.
Insert the bottom into the top recess and check for tight fit.
Turn the top diameter to 34mm diameter and 11mm long.
Sand and part the top from the lathe.
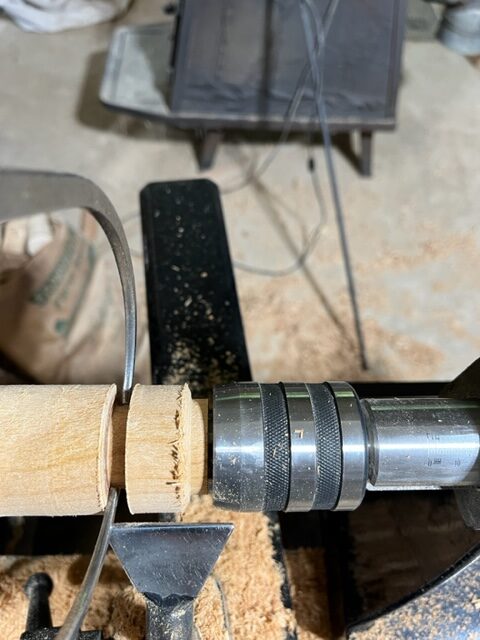
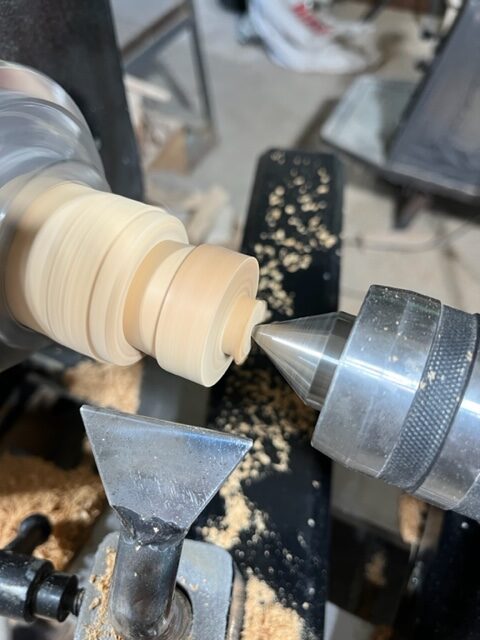
Turn a recess into the remaining piece on the lathe to accept the bottom and act as a jam chuck. Check that the bottom is centered.
Mount the top onto the bottom.
Adjust the tail stock to lightly support the top mounted to the base.
Finish turning the outside of the top. Remove the small stud and sand.