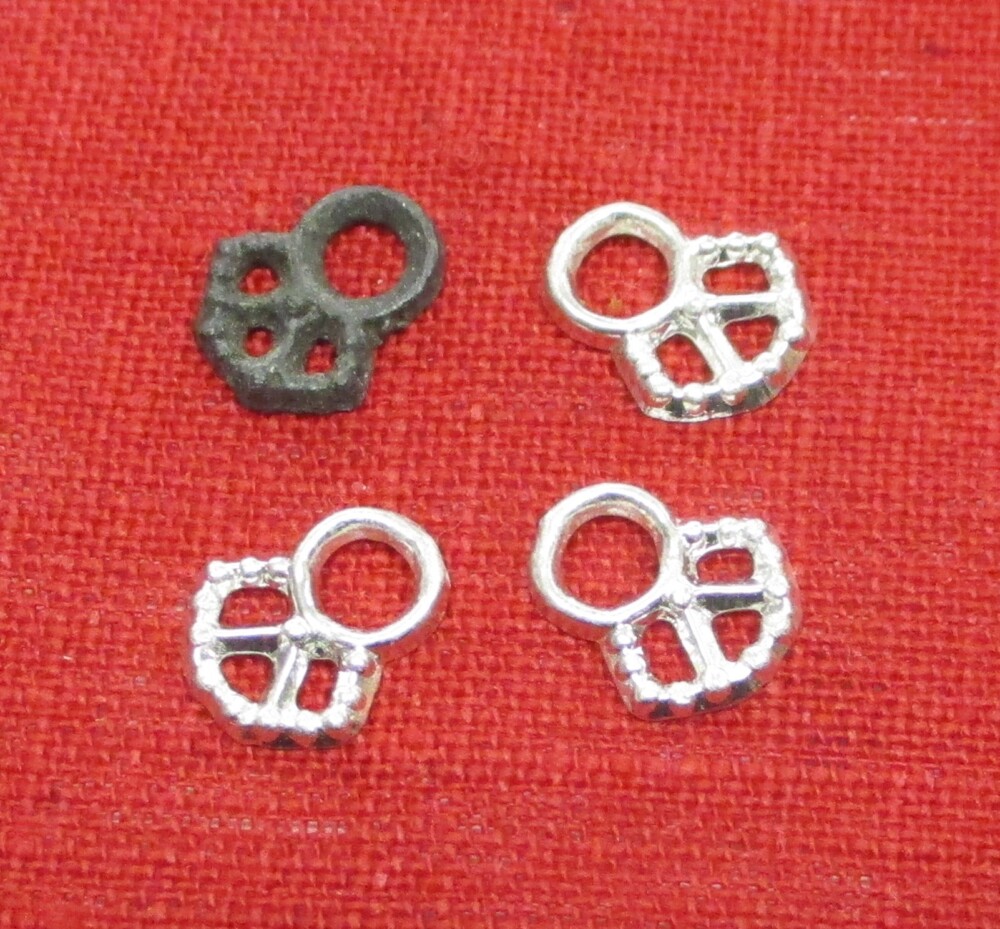

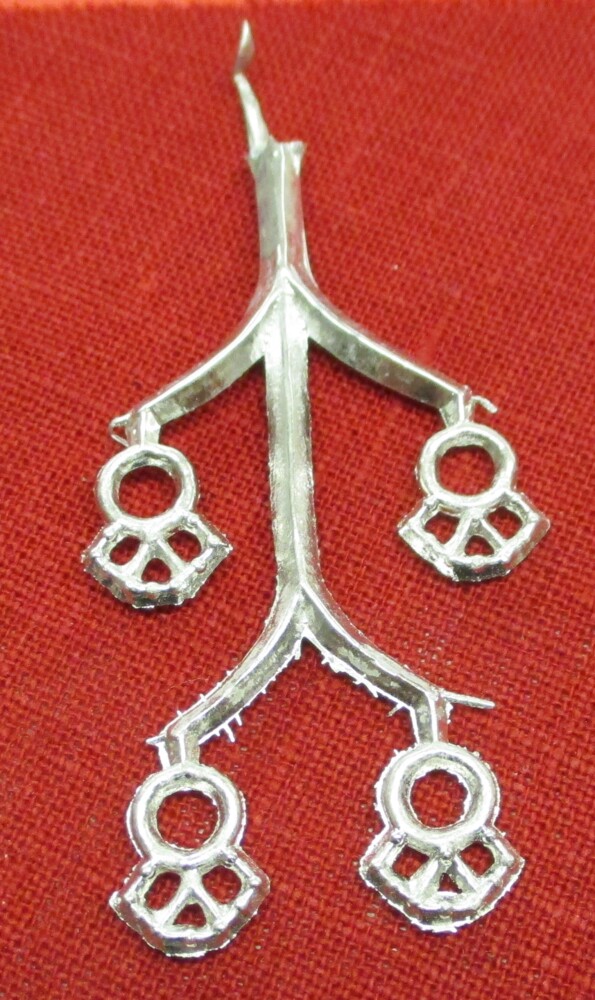
We used to offer a low-profile eyelet with three sewing holes and a pearled surface. It was copied after an original lacing eyelet in our collection. The eyelet was attractive and sturdy but the mold had problems.
There are several ways to arrange the cavities in a gang mold – and all have their uses. Marianne, who made the first mold in 2006, used a vertical sprue with individual channels branching out for each eyelet. The channels travel towards the outside of the mold, then drop vertically with the eyelet cavities all descending at the same angle.
If a gang mold is properly made all the cavities fill perfectly every time. If it is not, some cavities do not fill or fill incompletely. Meanwhile, other cavities flash (have “fins” of unwanted metal that sneaks between the mold parts) and have to be cleaned up after casting. The problem with arranging the cavities vertically in a gravity-fed mold is that the lower cavities cast completely at a lower temperature (of mold and/or metal) than the upper ones – or more consistently – because the pressure is greater at the bottom. Usually you can adjust the spruing and gates so that most of the castings are satisfactory most of the time.
This mold shows one way to try solve that problem – the upper branching channels are thicker than the lower ones, feeding more, hotter, metal to the higher cavities. Making the mold was a prolonged struggle, with repeated unsuccessful efforts to balance the pressure to each casting. It is also a tightly fitted mold and needed extensive venting. We were in the midst of a period of exploration of venting technologies, and Marianne vented it – too aggressively – with a grid of closely spaced vents across the entire back mold valve. The result was that, even after all the fuss, castings usually had fewer than four complete eyelets and many of the complete eyelets were flashy.
We continued to use the mold for a number of years, fiddling with metal temperature as we poured to try to control the flash; cleaning the flash off rapidly while cutting the eyelets from the sprue; throwing a lot of partial casts back into the pot, and cursing. We eventually introduced our pointy eyelets and let the filigree eyelets drop out of production.
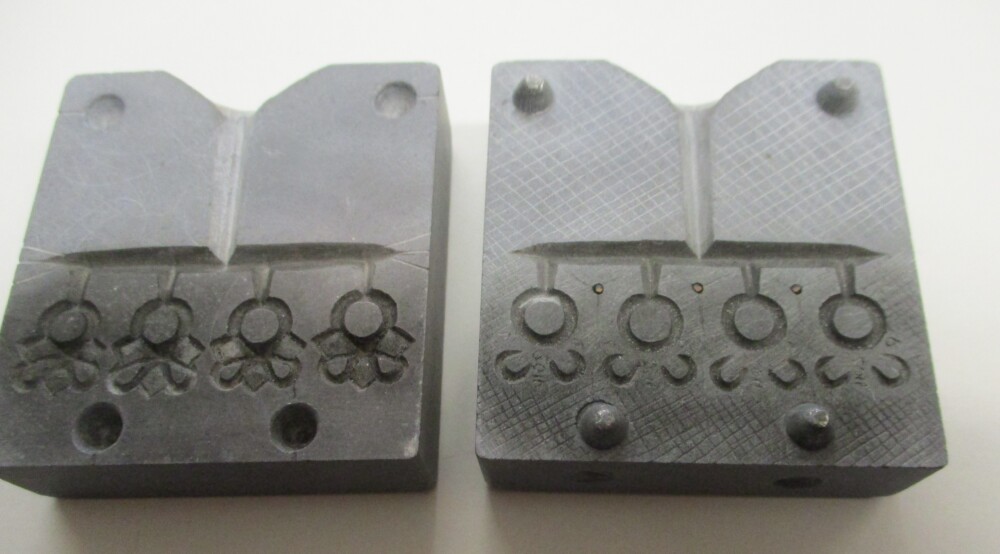
The pointy eyelet mold is laid out on a different plan, with one sprue descending to a horizontal runner – and it worked well from the beginning. This arrangement equalizes the pressure to each cavity better, although you have to tweak the thickness of the runner to optimize it. This sort of mold is also sensitive to whether it is level when the metal is introduced, as a tilted mold may give you flashy castings at the lower end of the runner and incomplete ones at the higher end.
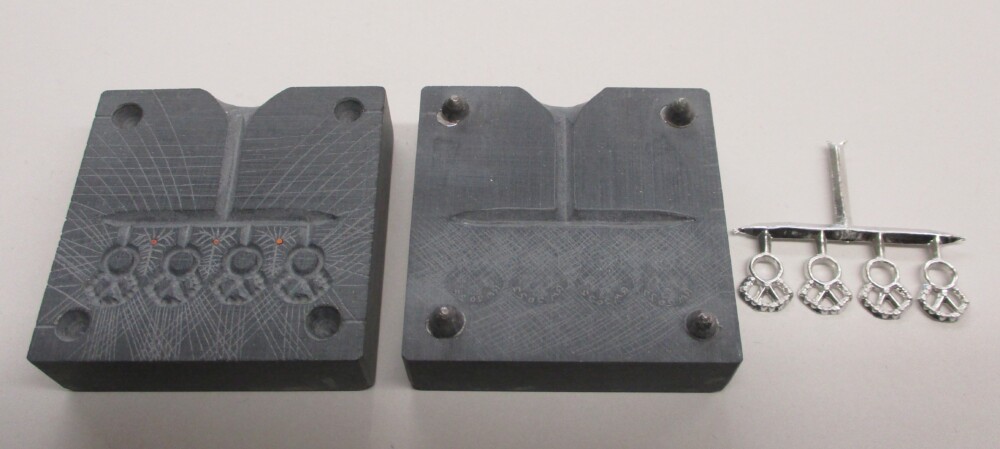
This week Mac remade the filigree eyelet mold on the same pattern as the pointy one. The new mold is also vented very thoroughly – those are vents straight through the stone (filled with copper wire) between each of the cavities – but more expertly. We know more than we did 16 years ago, thank goodness.
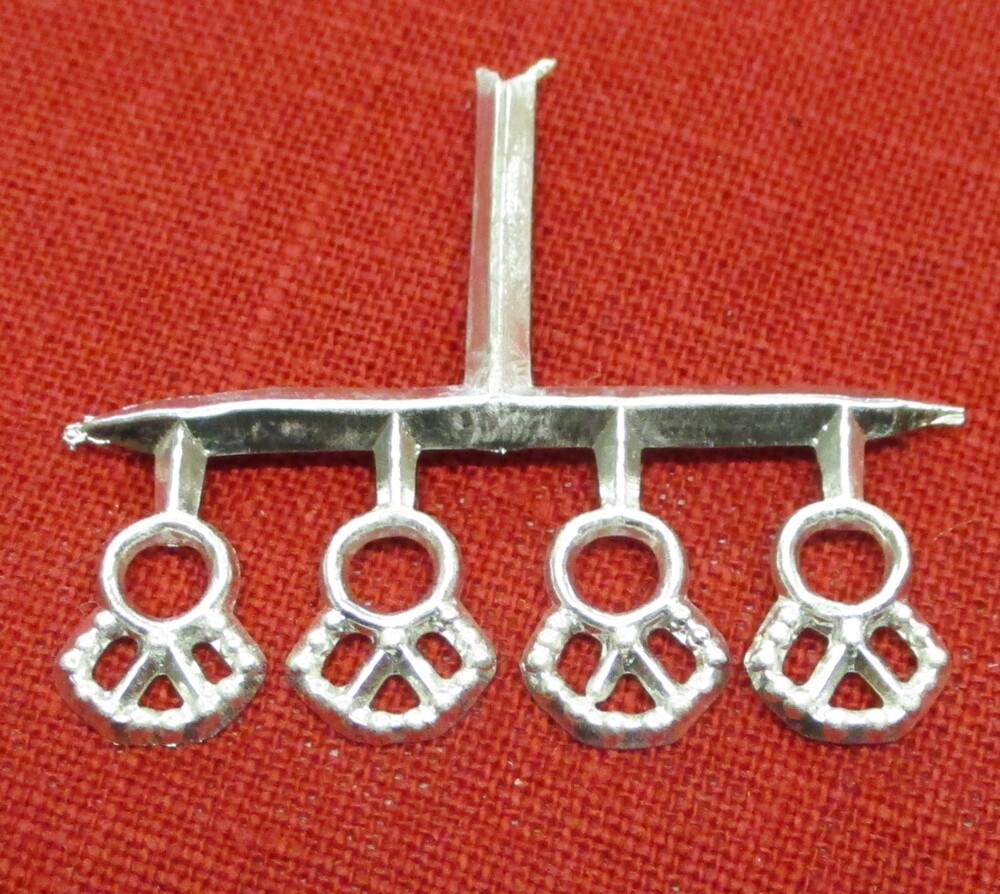
With the horizontal runner this mold consistently casts four perfect eyelets every time. We are offering this nice little lacing eyelet again.