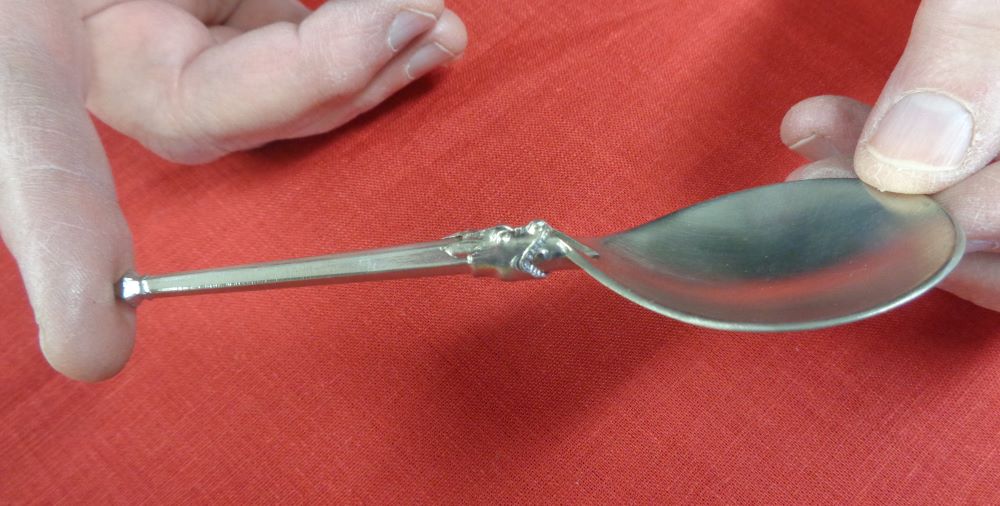
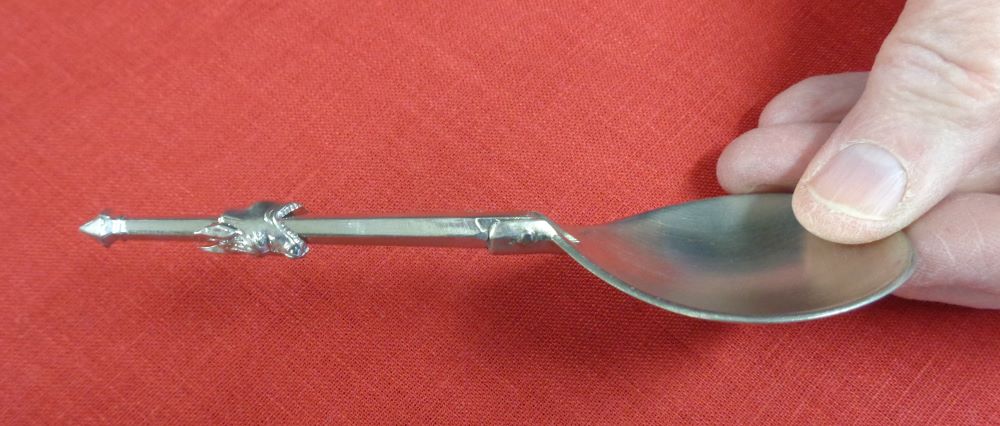
Sometimes people have a little trouble figuring out our folding spoon when they first pick it up, so we thought a short demonstration might be in order.
When the spoon is open, the hinge that lets it fold is covered and enclosed by the little beast head.
If you want to fold the spoon, pull the head back away from the bowl.
When the hinge is uncovered, you can fold the spoon into its compact form.
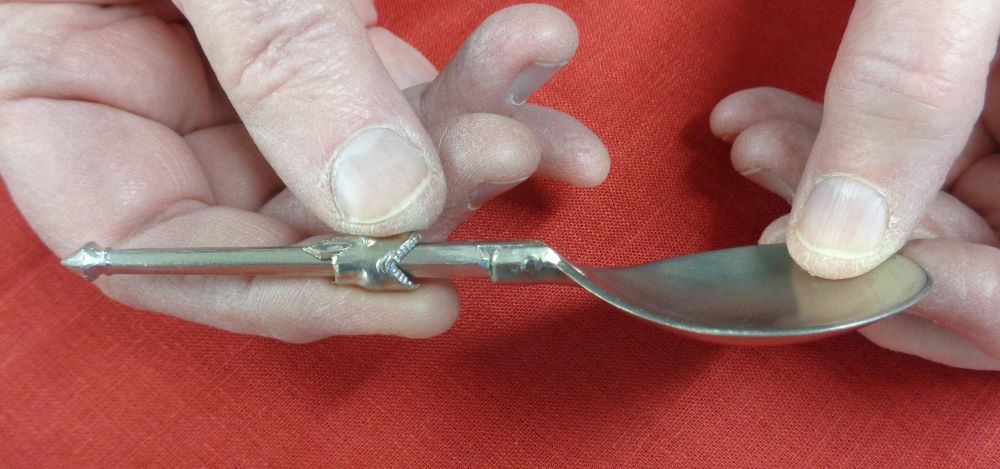
The inside of the beast head is a specific shape that fits tightly over the hinge when it is in the right position.
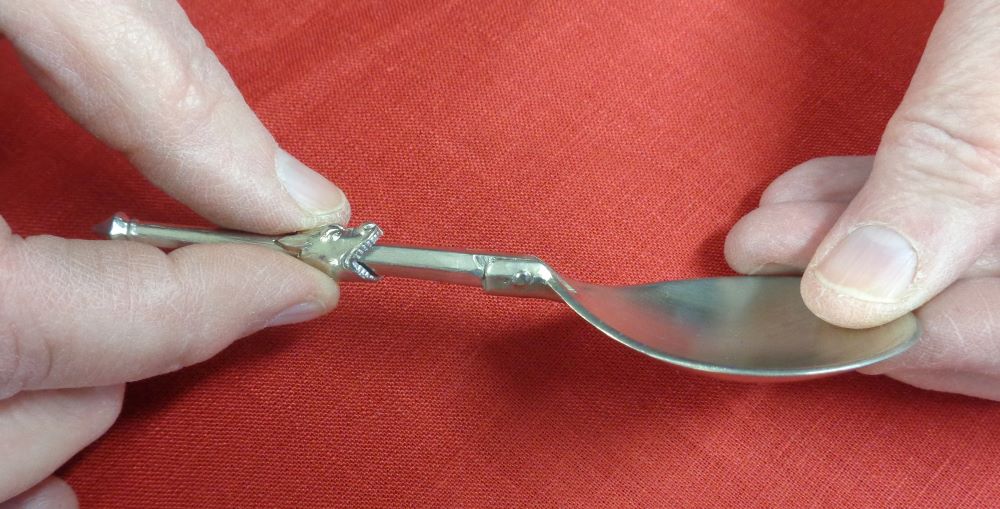
When you want to open the spoon again, unfold it. Then check to see if the beast head is aligned correctly. In the photo above, it is not.
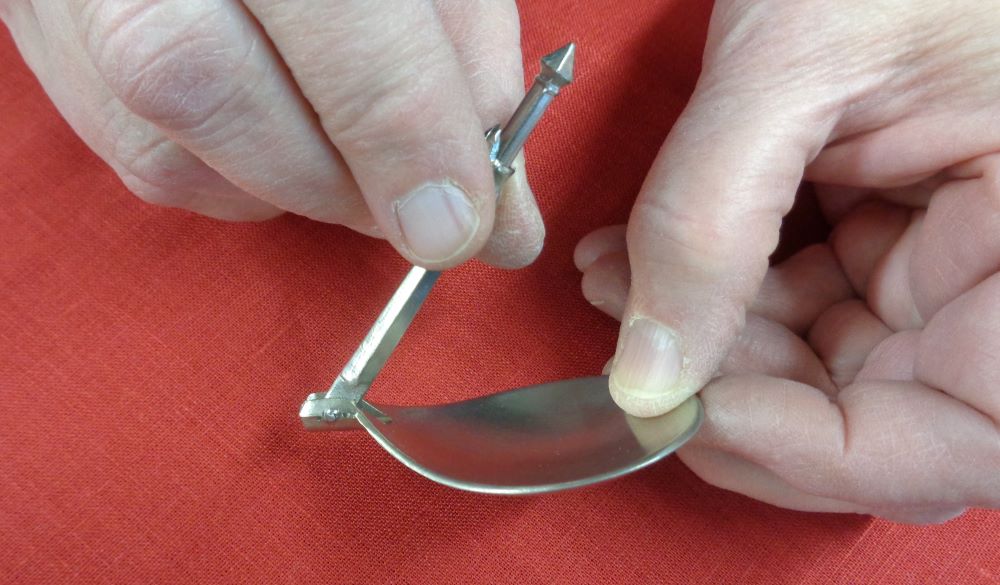
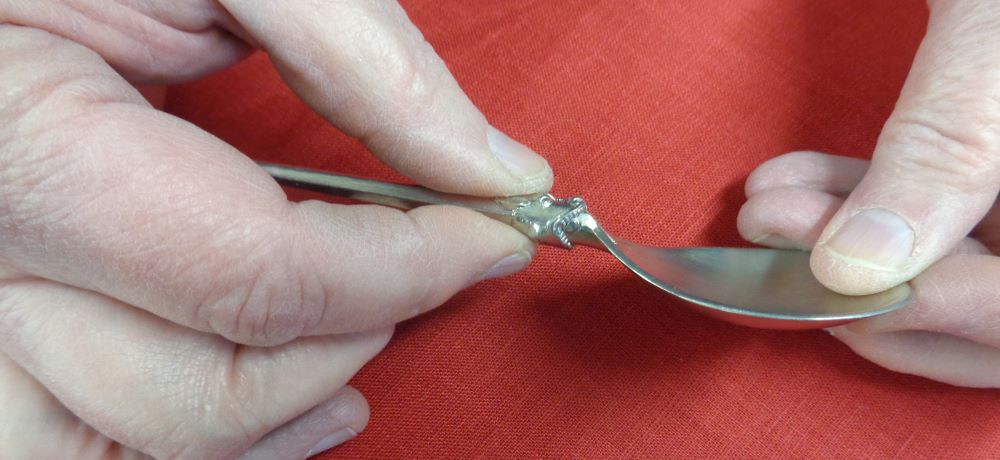
Turn the beast head so the eyes are up – your little buddy wants to look into the bowl of the spoon to see what you are eating!
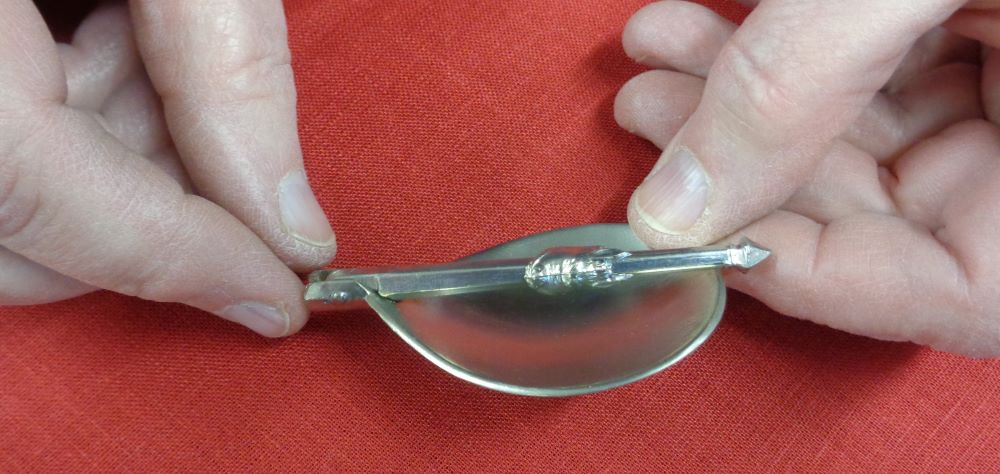
Slide him forward onto the hinge. You’re ready to go!
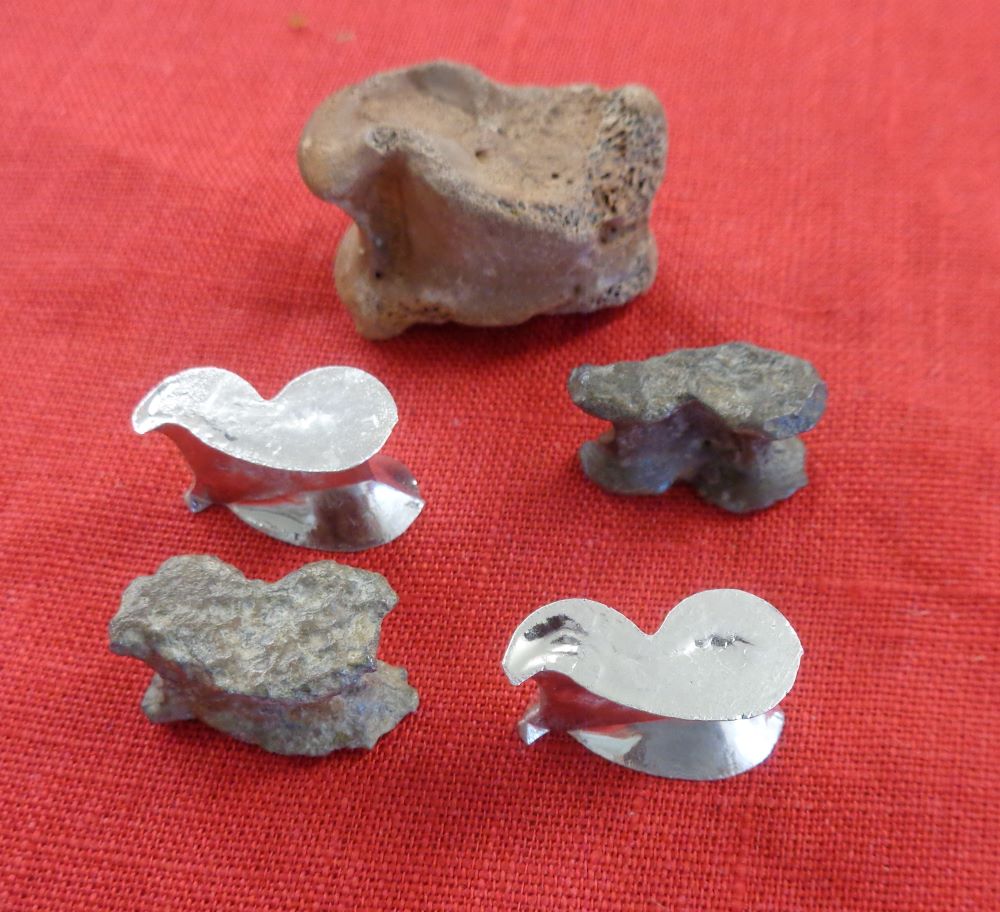
Our pewter knucklebones are copies of late medieval playthings in our collection. They are a stylized version of a real knucklebone, (talus in Latin) taken from the hind leg of a sheep. Real knucklebones have been used in games since antiquity, and Greek and Roman art, as well as in late medieval paintings, show people playing with them. Two types of game can be played with them – a game of dexterity and a gambling game.
A sheep knucklebone with two medieval and two modern pewter knucklebones.
Cock-All, A Game of Dexterity
Cock-All is a game related to the modern game of jacks. It has many names in English, including hucklebones, knucklebones, and dabs. There is no known account of exactly how it was played in the Middle Ages, but a large number of versions have been collected by folklorists over the last two centuries, and those versions, together with historical paintings and statues, give us an idea of the roots of the game.
The basic idea is that you do fancy tricks with five knucklebones, like throwing one in the air and picking up the others before you catch it again, throwing one in the air and pushing the others through an arch made by the fingers of your other hand before catching, etc. If you have played jacks, you can imagine that it is much tougher when the “ball” is thrown in the air – and comes right back down – rather than bouncing.
The most convenient source of information on the variants of cock-all that have described is Alice Gomme’s Traditional Games of England, Scotland, and Ireland. Here is a (relatively) easy one to get started with:
This game can be practiced by yourself. When played against a partner, you play until you make a mistake and then the knucklebones go to the other person. The first person to get all the way through all the tricks without a mistake wins.
Trick 1: Play with 5 knucklebones. To start, hold all five in your palm. Throw them in the air and, turning your hand over quickly, catch all five on the back of your hand. Then do the reverse: flip them up in the air from the back of your hand and catch them in your palm.
Trick 2: *Throw four of the knucklebones on the ground. Throw the fifth in the air and pick up one of those on the ground before catching the (rapidly descending) one. Repeat until you have picked up all five. *Throw the four on the ground again. Throw the fifth in the air and pick up two; repeat. *Throw down your four, throw the fifth up and pick up one. Throw again and pick up the remaining three. *To finish the trick, throw down all four, throw the fifth up and pickup all four before catching the fifth. Repeat Trick 1.
Trick 3 is Trick 2 in reverse: *Holding all five knucklebones, throw one in the air. Place one of the remaining ones on the ground before catching the fifth. Don’t just drop it – set it down. Repeat one by one until all four are on the ground. Pick up all five; throw one in the air and set down two. Repeat. *Pick up all five; throw one in the air and put down one. Throw again and put down the other three. * Pick up all five; throw one in the air, and place the remaining four on the ground. Repeat Trick 1.
That’s it – you’ve done it!
Playing cock-all – the last moment the player actually controls all five knucklebones.
Gomme, Alice. The Traditional Games of England, Scotland, and Ireland; With Tunes, Singing-Rhymes, and Methods of Playing… London, D. Nutt, 1894-1898. Reprinted – New York, Dover Publications, 1964.
The Ludus Talorum
Carolus: Now stake down thy stake. Quirinus: Let us try for nothing. C: Wilt thou learn so great an art for nothing? Q: But it is an unequal match between a cunning gamester, and one that is unskillful. C: Why, but the hope of winning, and the fear of losing, will make thee mind better. Erasmus’ Colloquies
We know from Ovid, Martial and Suetonius that the Greeks and Romans played a gambling game with knucklebones. The rules are not certain, but several people have “reconstructed” the game based on clues in the ancient authors. The first person to publish his reconstruction was the Dutch humanist Desiderius Erasmus, in his Colloquies (published in Latin in the 1520’s). Here’s how he says to play:
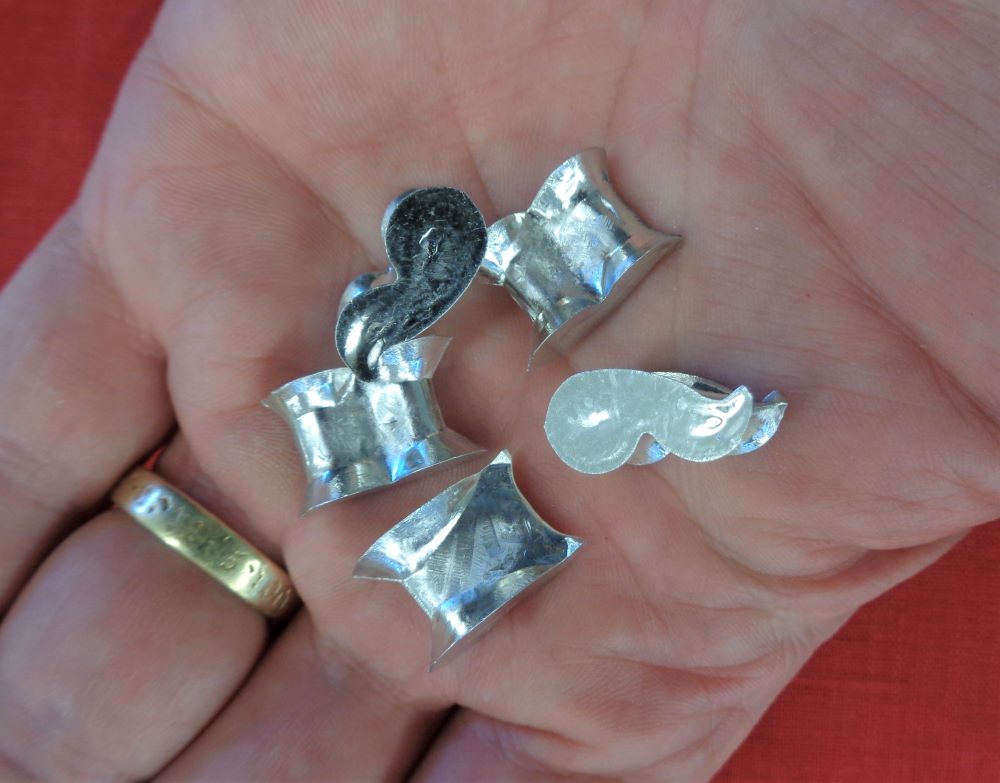
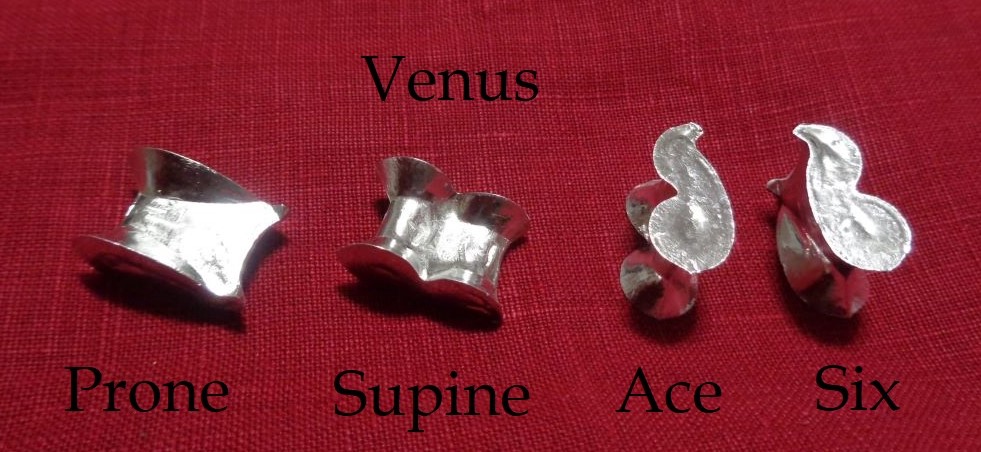
In this game, the different sides of the knucklebones (or tali) have different values. There are four sides: two sides are curved and two flat. One of the curved sides has a deep depression or cup; the other has a smooth slope (these two sides come up more frequently than the other two). Erasmus quotes Aristotle in calling these supine and prone; think of your hand by analogy: if the palm is up and cupped, it is supine; if the back of the hand is up, it is prone. (Erasmus then draws a parallel with people having sex, but we will not wander into that type of vulgarity here.) The two flat sides are mirror images of one another; the one that looks like an S is called the ace (or dog) and the side that looks like a Z is called the six. (For the purist, we should note that in real knucklebones these two sides are not mirror images of one another and there is a difference in the frequency with which they come up. The medieval pewter knucklebone we copied has two flat sides, so we have simply assigned the ace and the six. You can go chase down two sheep and take the four knucklebones you need and play next week or you can use these pewter tali and take money from your buddy right now.) The ace is unlucky; the six is lucky.
The game is played by two people. They take turns throwing down four tali. Each throws them down three times, then passes them to the other person. A game consists of three rounds, each of which ends by one of the players winning the pot. The players must agree at the beginning of each game what coin they are playing with; you may want to use pennies to begin with, since the pot can become quite substantial before the winning combination is thrown.
To begin, one of the players throws the four tali. For every ace (S face) that is thrown, the thrower must put one coin in the pot. For every six (Z face) that is thrown, the other player must put one coin in the pot. (One man’s good fortune is another man’s evil.) No penalty is assessed for the prone and supine faces. Each player throws three times, passing the dice back and forth as the pot grows. The winning throw is called the Venus: each talus shows a different face, one prone, one supine, one ace, and one six. The person who throws the Venus takes the whole pot. When three Venuses have been won, the game is over. (A variant that Erasmus suggests is that the person who throws the dice puts in a coin for every ace and takes one out for every six he throws; the other player does nothing until it is his turn. This makes the pot smaller, but reduces the number of coins you need to have on hand.
Erasmus’ Colloquies were first translated into English in 1671. Nathan Bailey translated them again, in 1725; you can read the 1744 edition of his translation at https://archive.org/details/allfamiliarcollo00eras
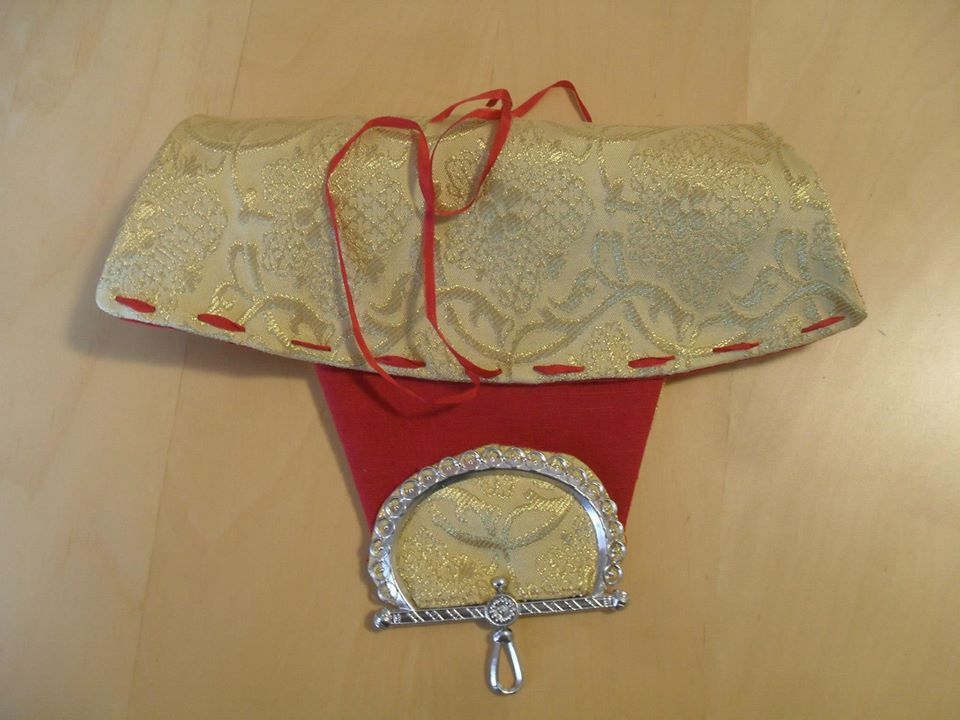
We know that there are a couple of steps in making a purse on Billy and Charlie’s frame that can seem perplexing – or even tricky. (Preview the pattern. )Marianne made this purse a number of years ago to show a few of those tricky parts. It’s not so hard at all!
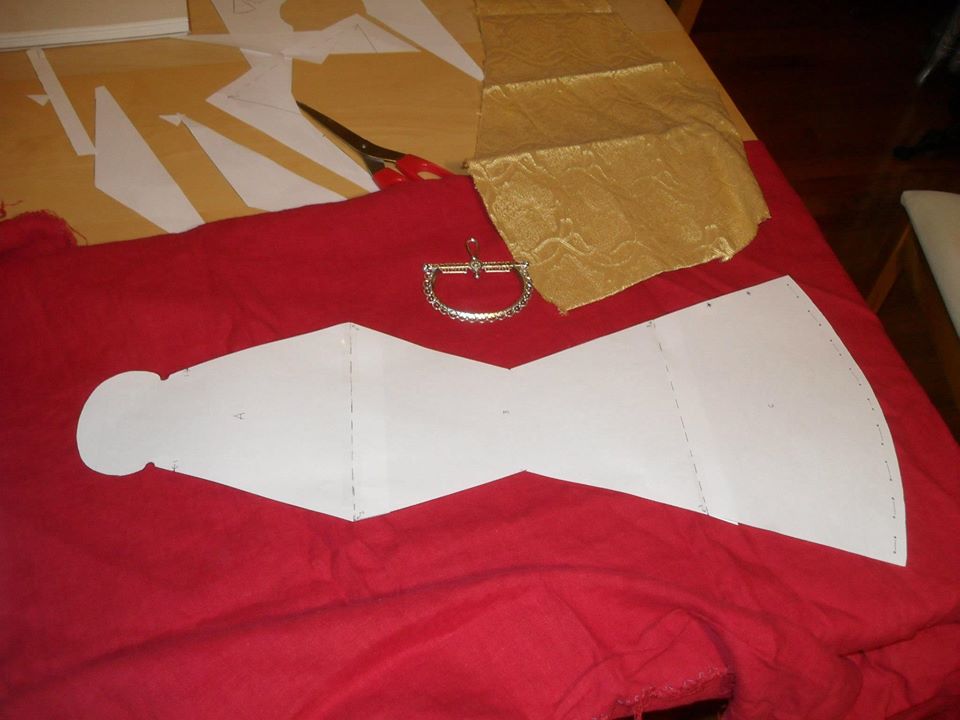
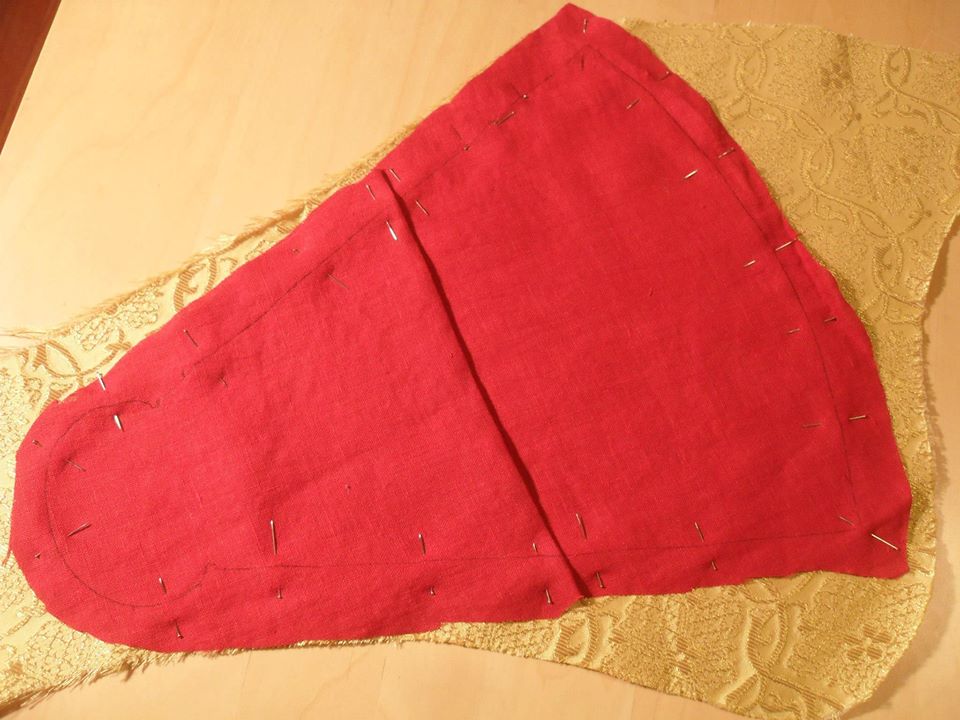
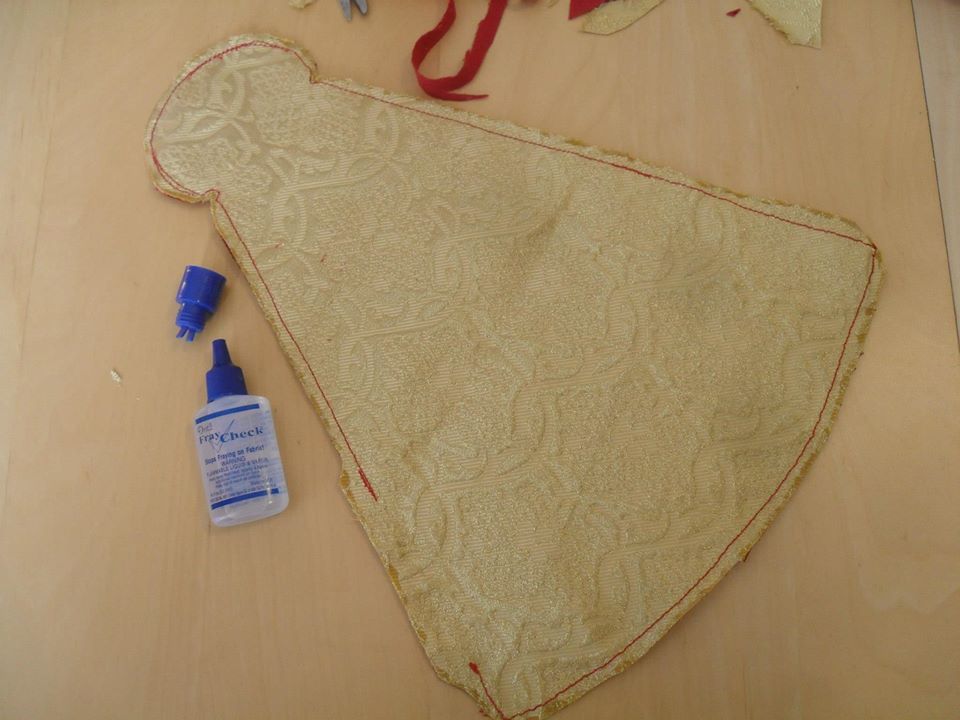
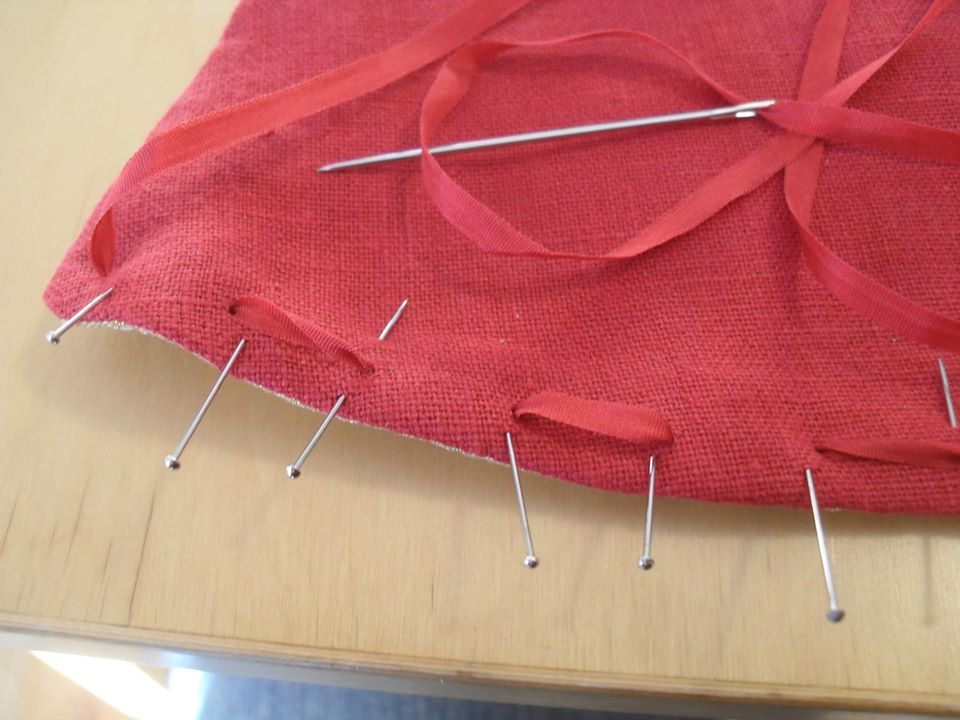
There are two pattern pieces – this is the long piece for the lining. The edge of the pattern is the sewing line, so you need to transfer the outline to the lining fabric first, then cut out adding a seam allowance – or a little more.
Fold up the central section to make the pocket; here the pins hold it in place. The sewing line is marked on the fabric in dark ink.
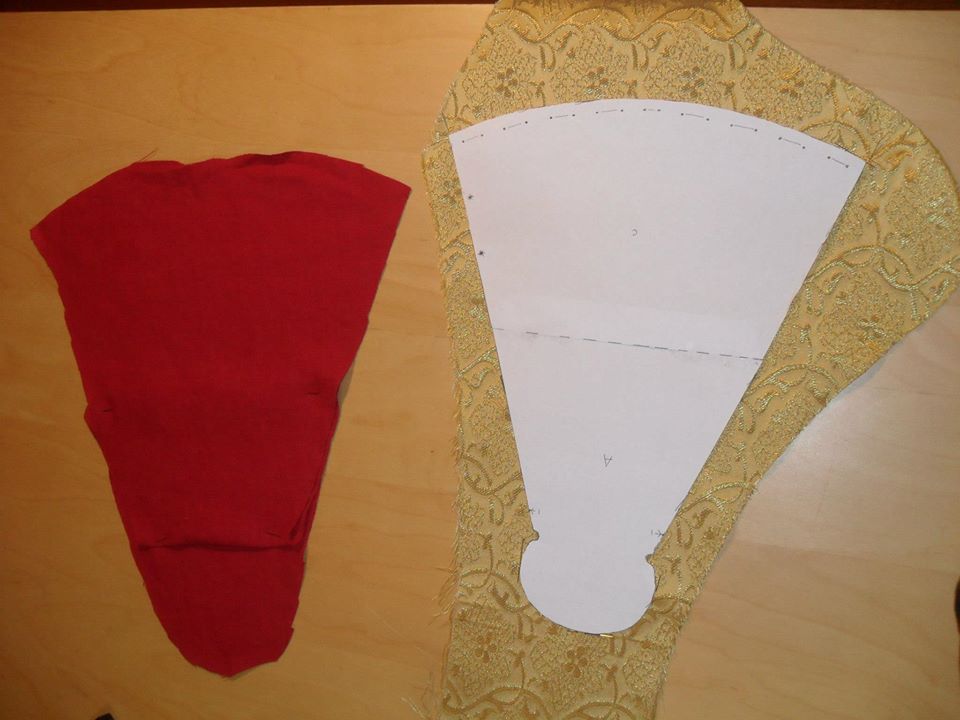
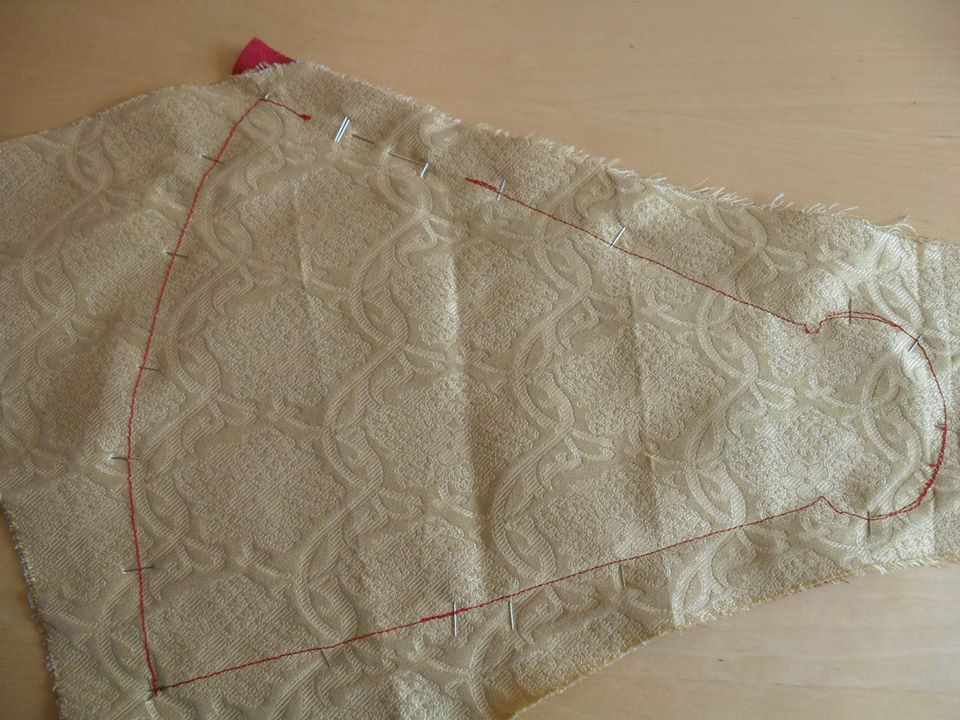
The shorter pattern piece (which is just the longer piece without the middle section) lying on the outer fabric to check size and alignment with the pattern. As before, you do not cut along the line. You will cut the fabric to its final size after sewing the seam. Preview: the broad sweeping edge is going to be gathered into folds and turn into the mouth of the purse.
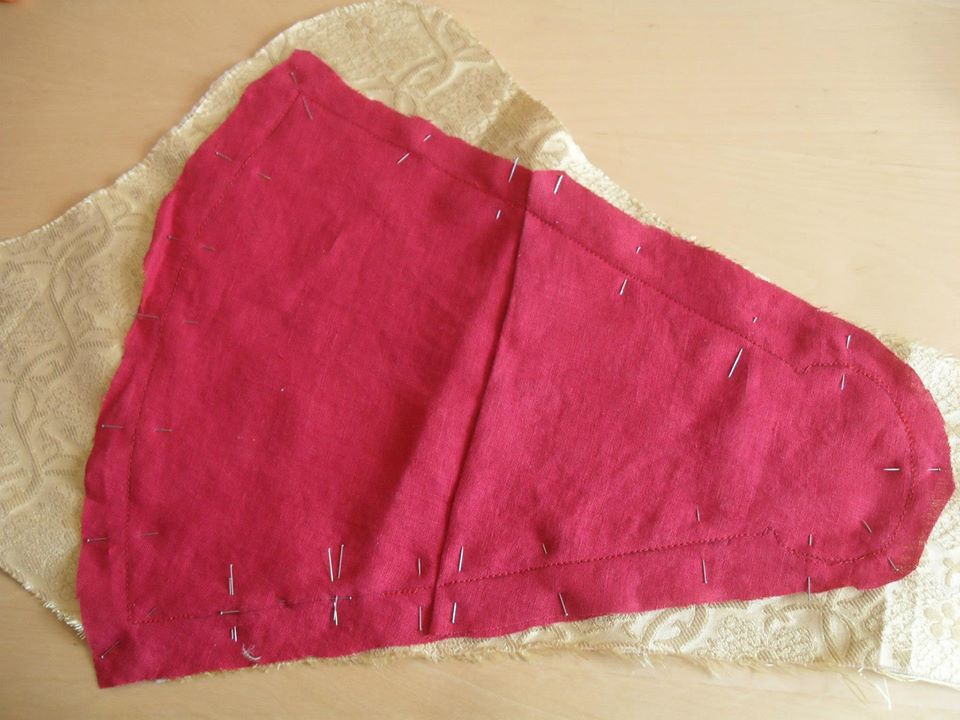
The folded lining pinned to the outer fabric. Be sure to line up any pattern in the outer fabric the way you want, especially if it is possible to arrange it symmetrically (or fail to!).
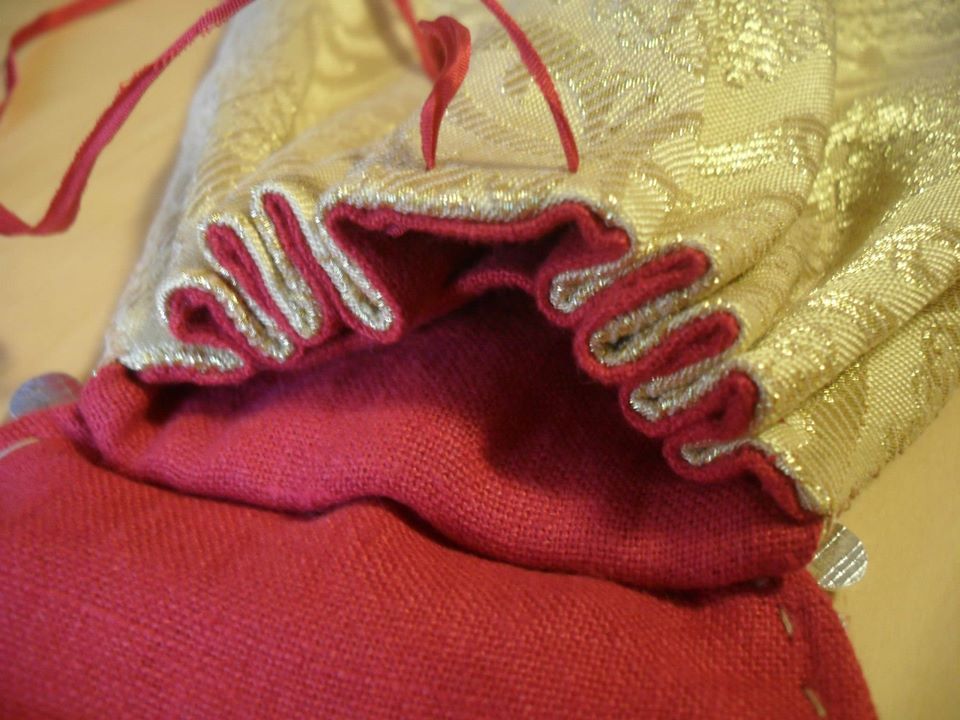
Pin the fabrics together so that the longer/wider lining fold is exposed, as in the photo below. The shorter fold is shown in the photo above; when you pin the pieces together that fold is hidden.
Sew along the seam line, leaving an opening along one edge, where the pattern shows it. The three pairs of pins at the bottom of this photo mark the opening.
Seen from the other side, the opening is easy to see.
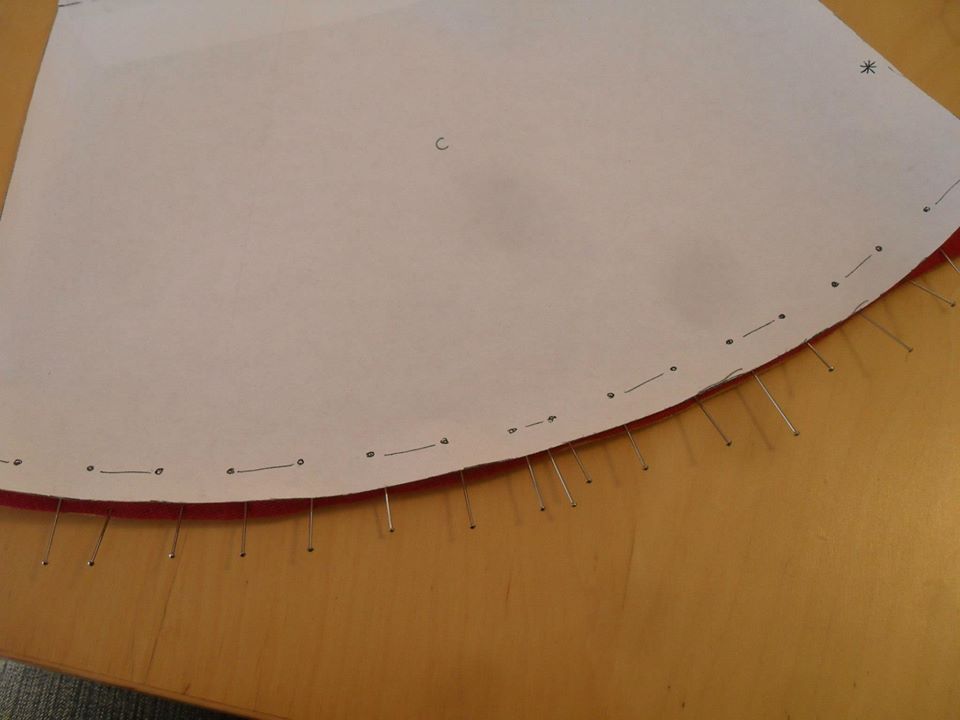
Mark the line for the seam allowance if you do not feel comfortable cutting free-hand.
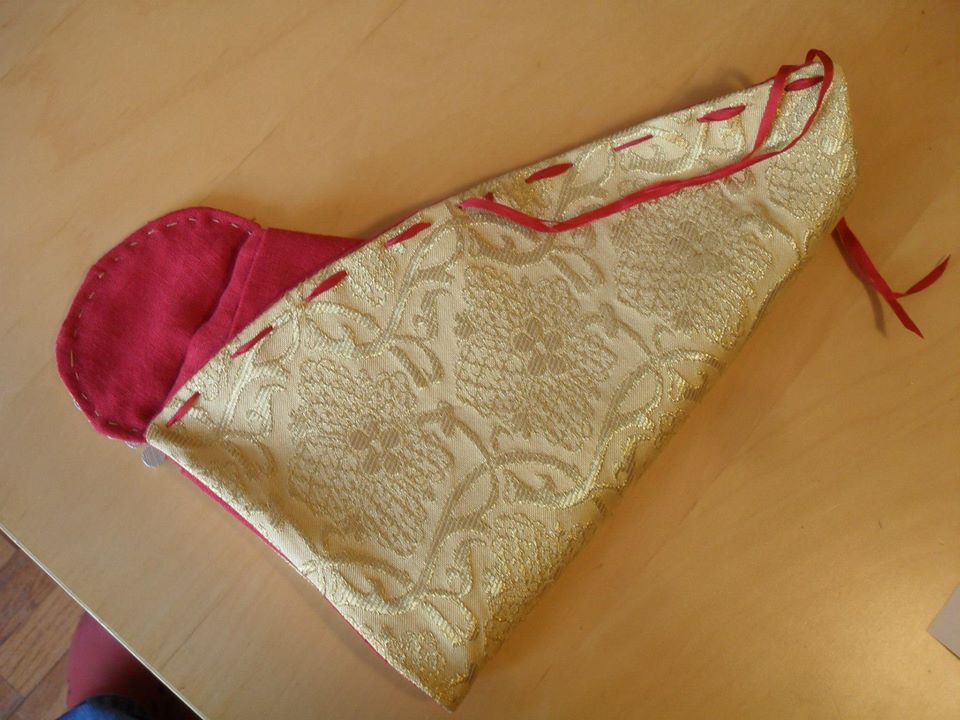
Trim the seams and clip the corners and the tight place at the top where you will attach the frame. Leave enough seam allowance at the opening to turn it and finish it securely I used Fraycheck because the brocade wanted to ravel. This is a good idea with our purse kits made with Sartor’s fancy brocades as well.
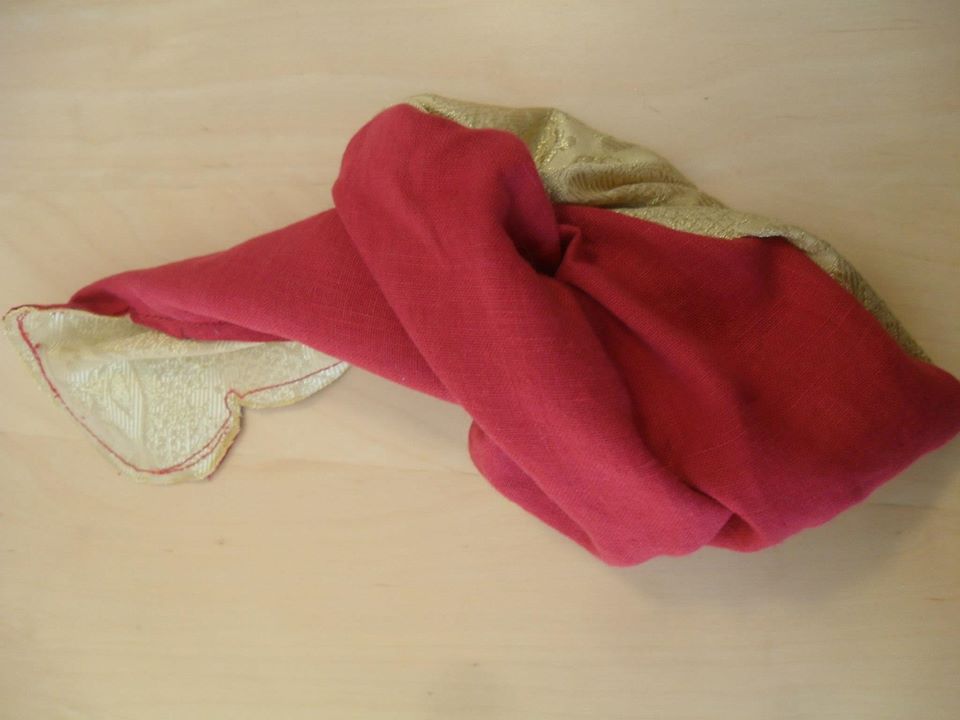
Turn the purse right side out.
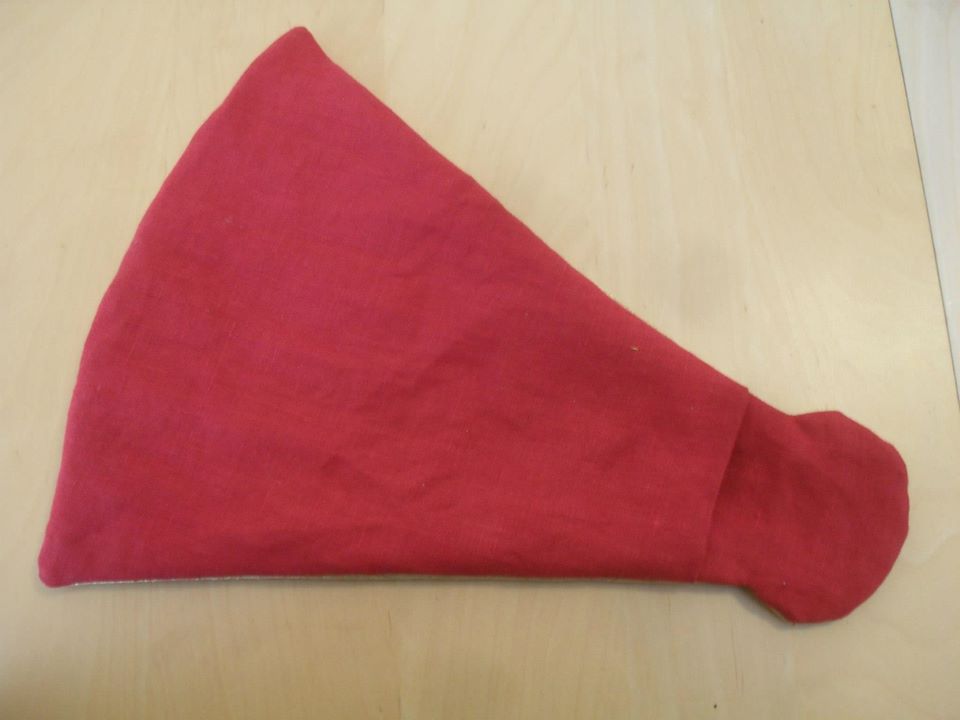
Iron, pressing all the seams and tightly turned corners.
I stitched up the opening the purse was turned through. This area will be included in another seam, so you can skip this step if you want to take a little extra care in a later step, when you sew the sides of the purse closed.
Mark the spacing for the drawstring, as per the pattern. After I had made a couple of purses, I did this more casually with marking chalk. It will look best if it is pretty even.
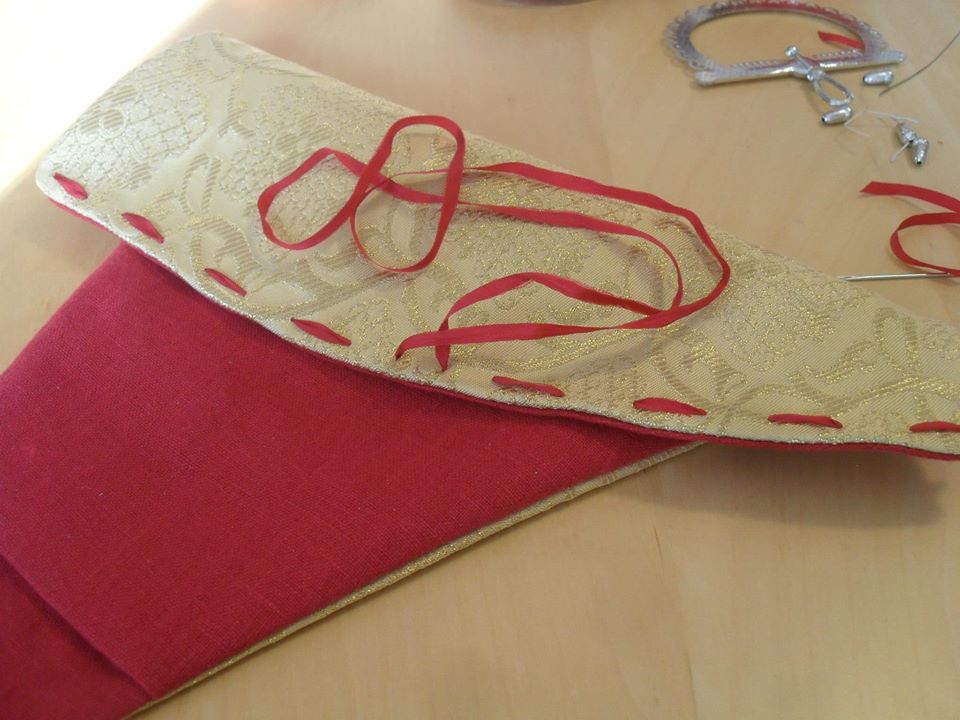
Weave your ribbon or cord in and out of the long edge of the purse, starting and ending on the lining side. Use a needle with a large enough eye to carry your ribbon. You may want to experiment a bit with scrap fabric and different types of needle; in some fabrics a blunt point will be more satisfactory.
Tie knots at each end, and bring the extra length of the ribbon to the center on the outside.
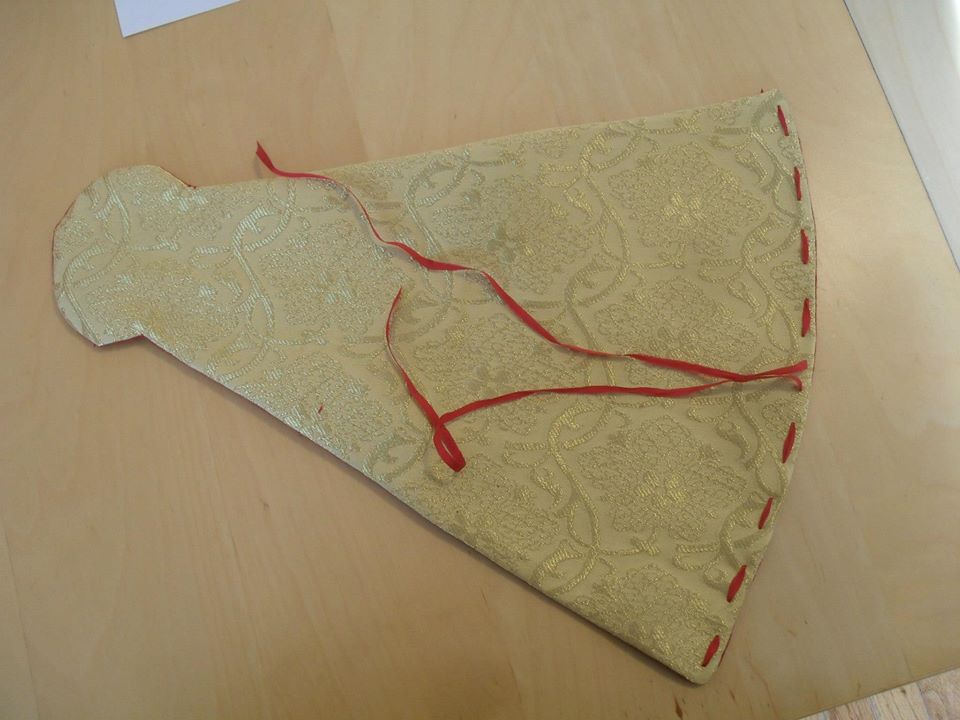
Cut the loop of ribbon in the middle.
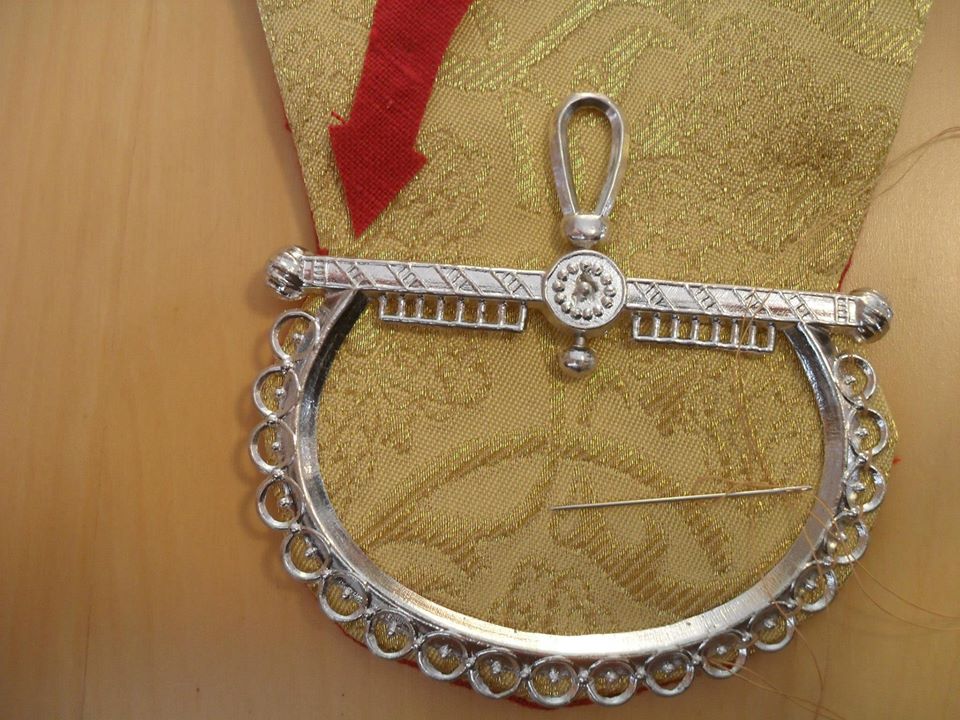
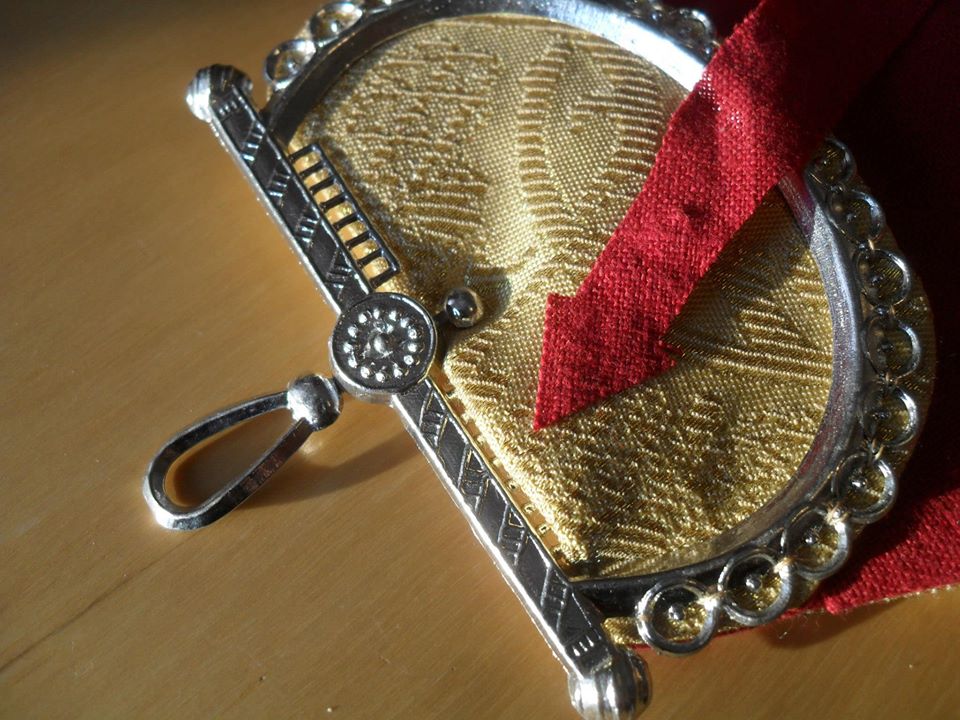
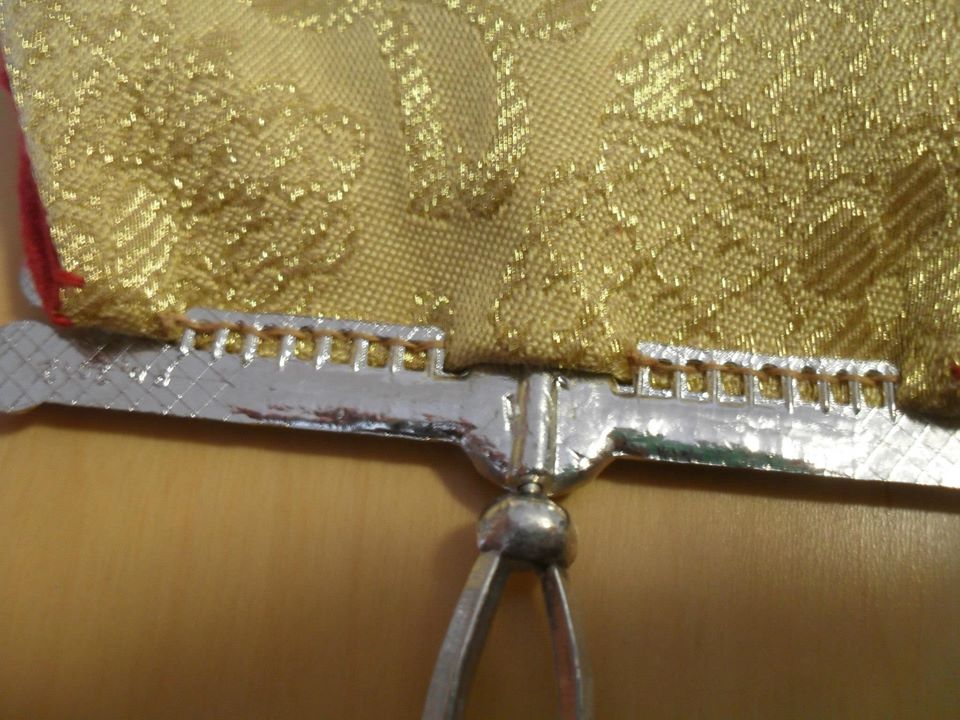
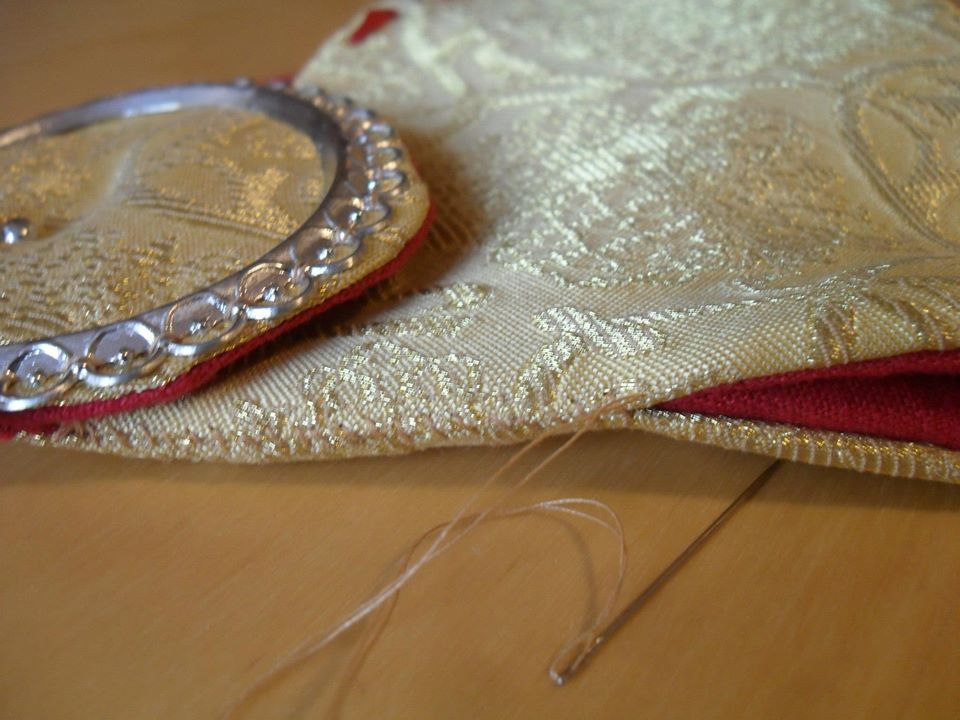
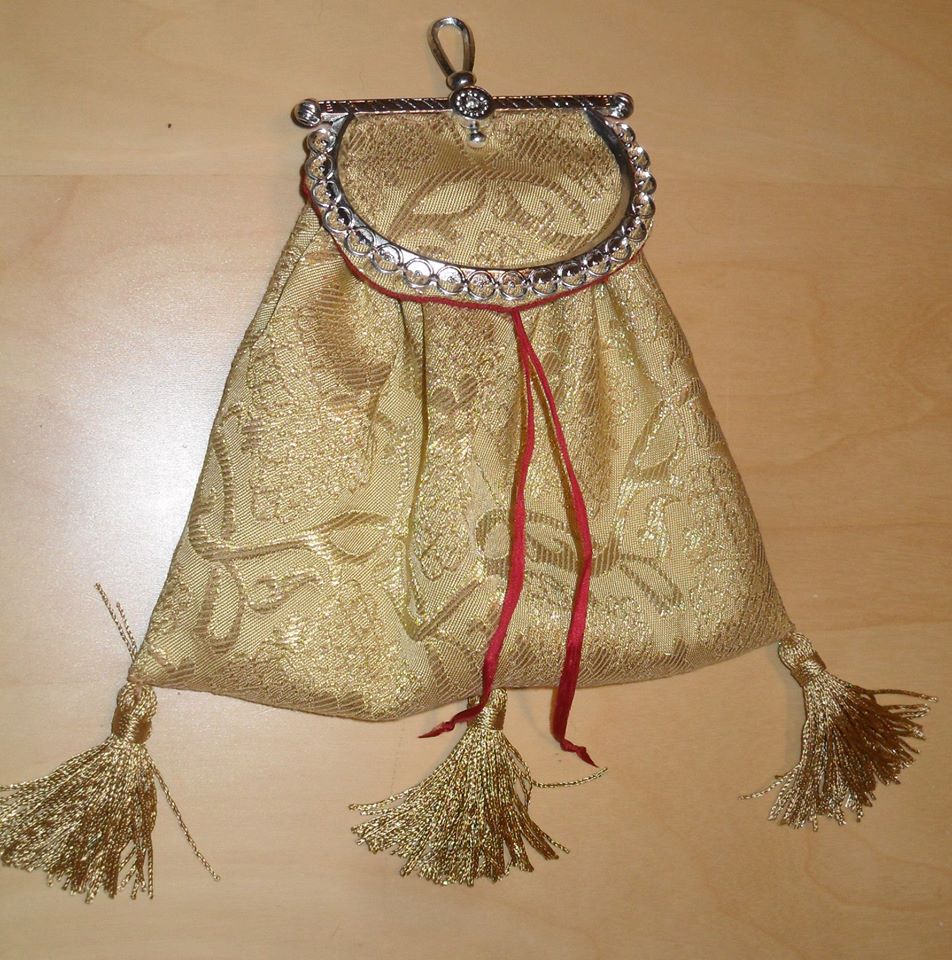
It’s finally time to sew the frame and fabric together. Check the alignment and make sure the frame is perpendicular to the fabric when you line up the bar of the frame with the narrow part of the purse.
Stitch through the loops around the edge, keeping everything as even as possible.
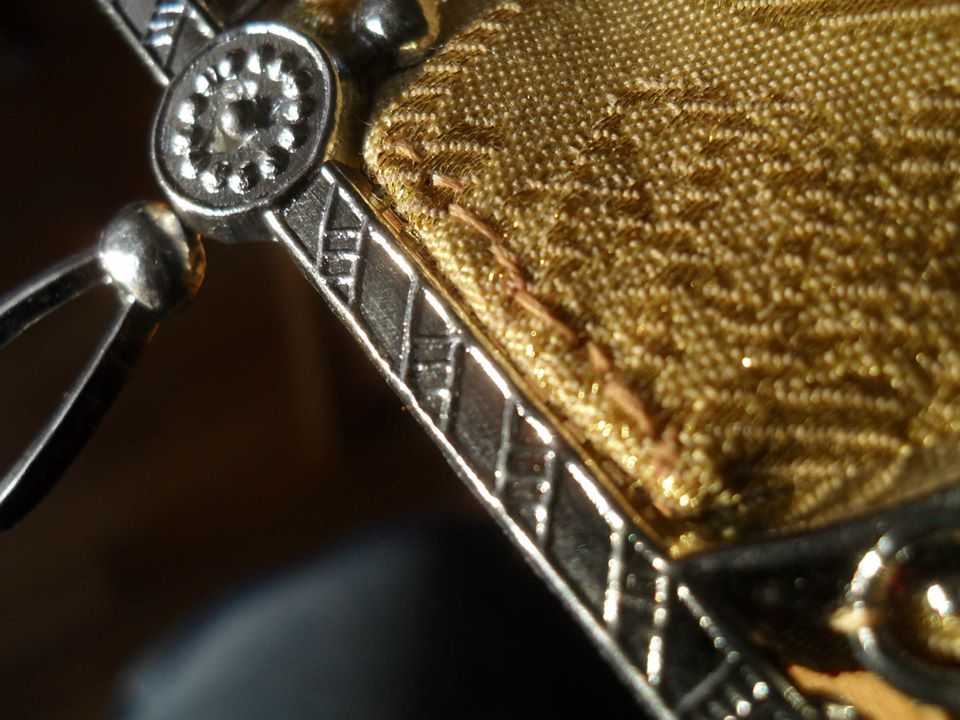
The frame stitched in. Tracy Justus (Mistress Clare de Crecy), who developed this pattern does this so much more neatly than I do, it’s embarrassing. Probably many of you will also exceed my performance.
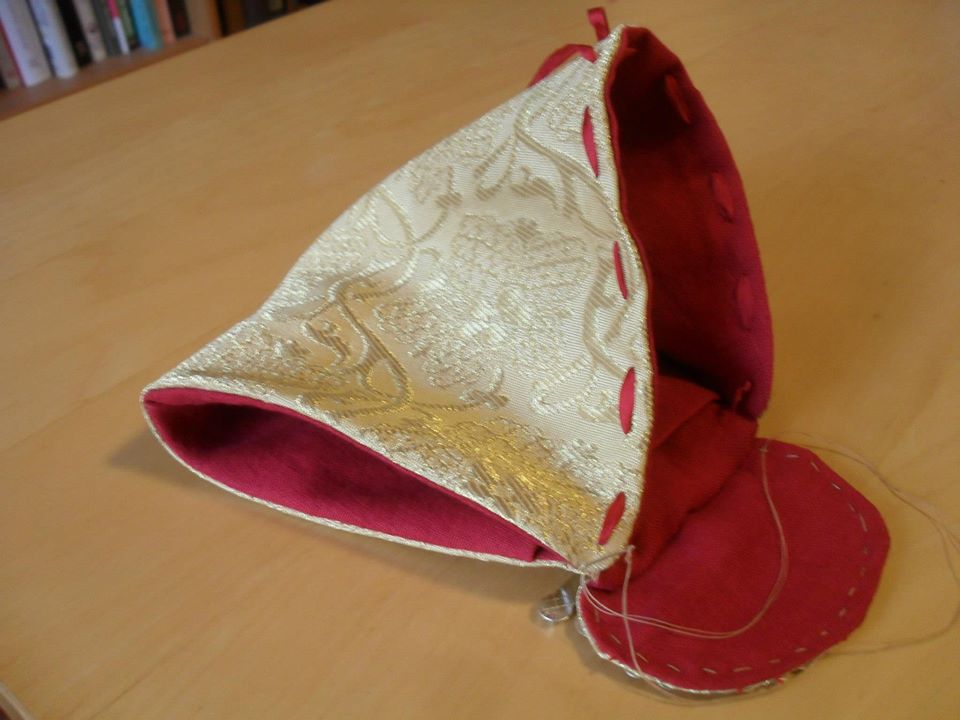
20 – Fold the purse along the top edge. Tweedle the fabric to cover the arcading inside the frame. One side is shown brought forward – make the other side match, but leave the fabric behind the pivoting knob in the middle. It may take a little fidgeting, but it fits in nice and tight when you get it lined up.
The top edge of the purse sewn down over the arcade.
Both sides sewn, seen from the back.
Ready for final assembly into a purse!
Line up one side, bringing the edges together at the top.
Sew the edges of the purse closed. If the outer fabric is at all fragile, be sure to catch enough of the lining to make the seam strong.
Line up and sew the second edge.
Draw up the ribbon/cord to form the gathered purse mouth.
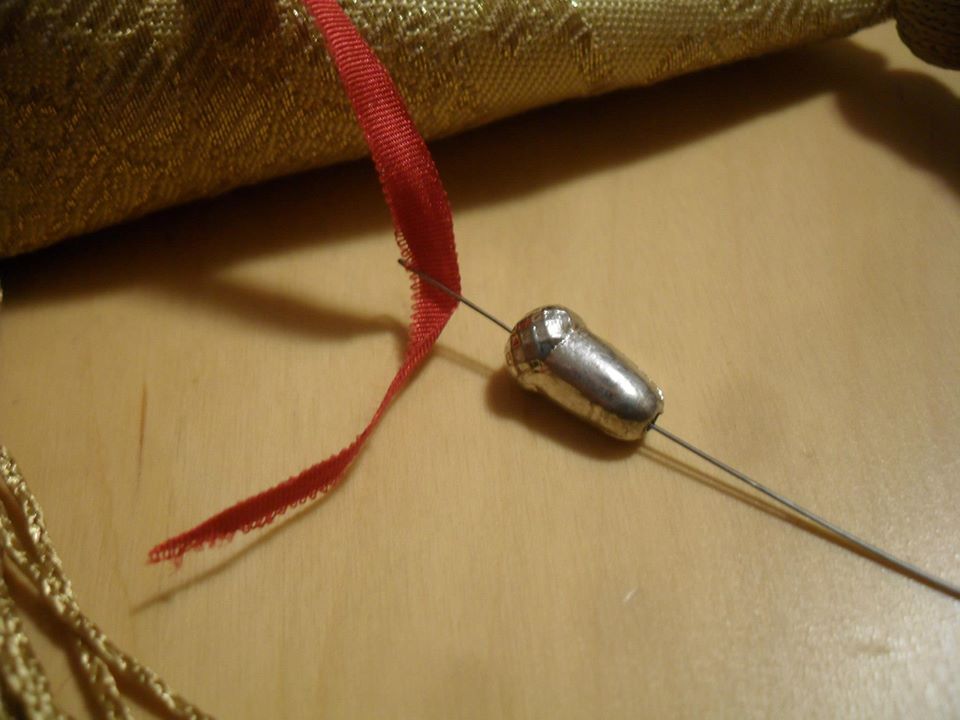
Thread bead(s) onto the ribbon or cord. Although only one ribbon is shown in this photo, if you want to use the bead to help keep the purse tight, you need to put both ribbons though the single bead. Check out the second photo below.
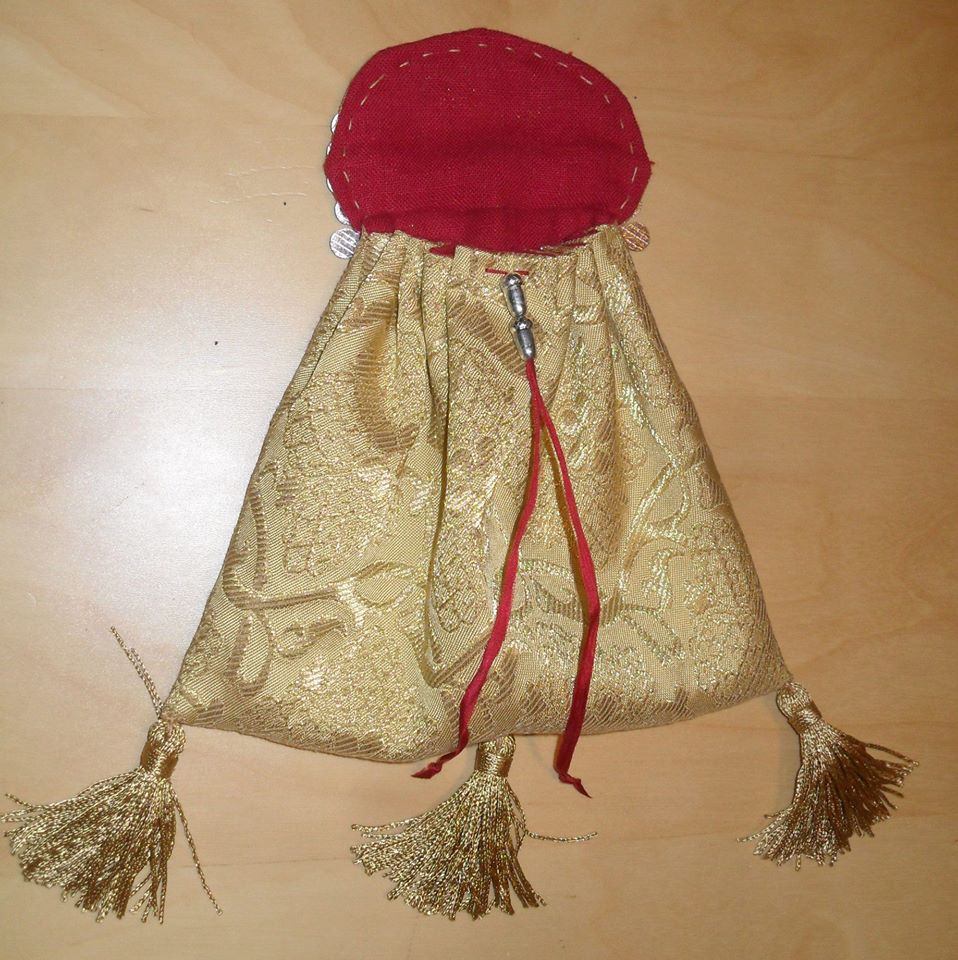
The beads drawn up to help keep the mouth of the purse closed without tying the strings. Add tassels to taste!
Ta- daaaa!
Let us know in the comments what has worked well for you – or what you are struggling with.
Photos first published Feb 1, 2013. Text revised and expanded Nov. 7, 2019
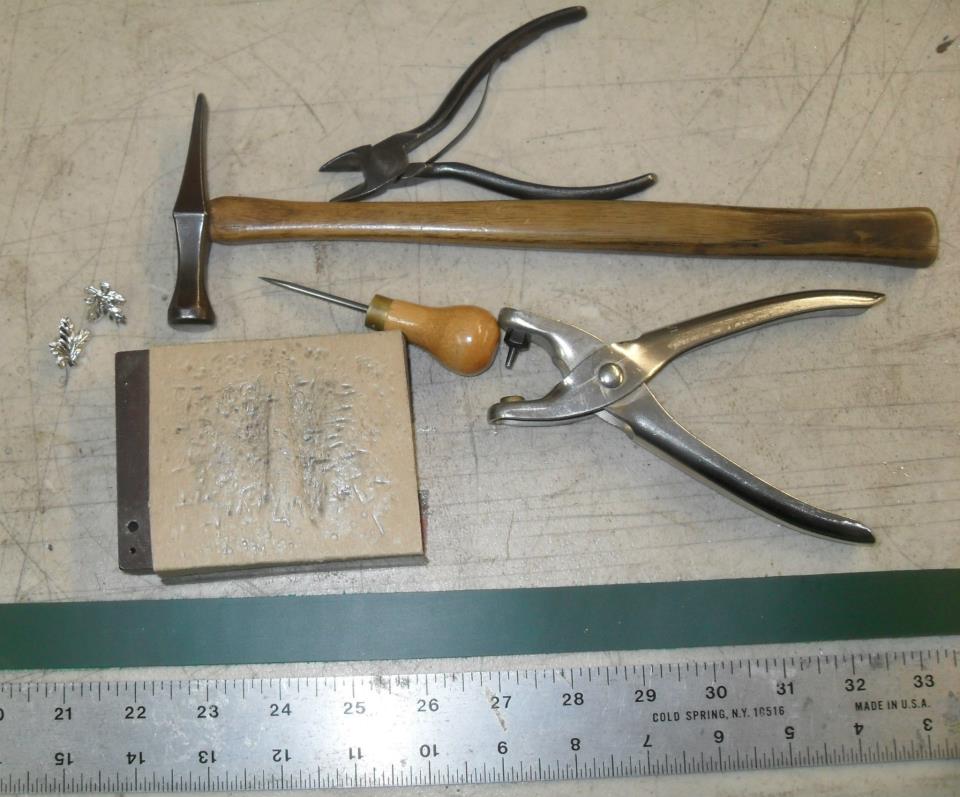
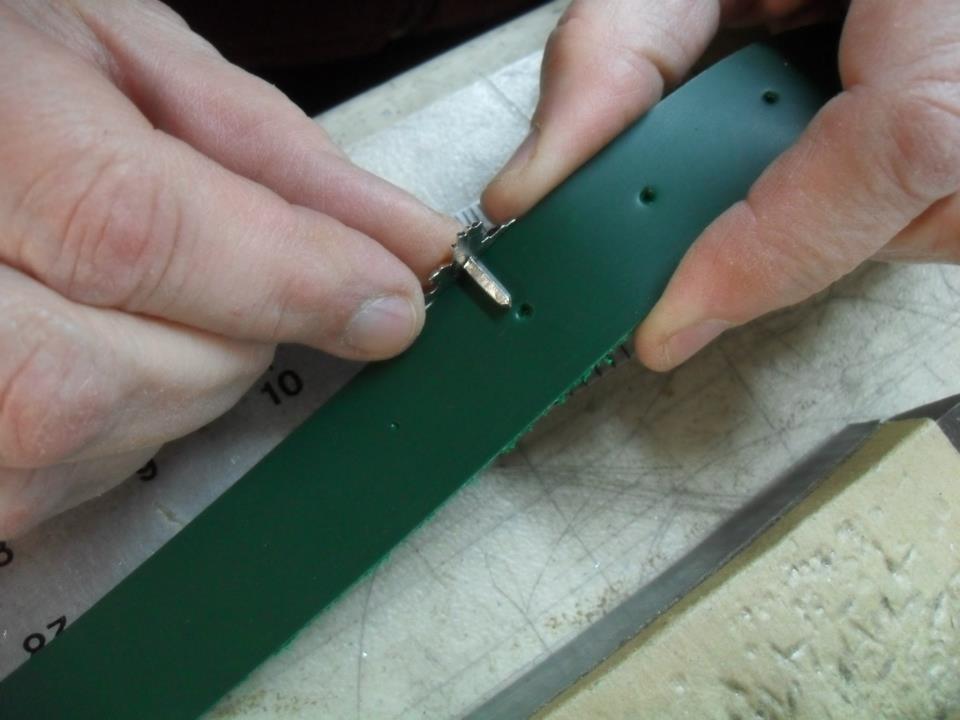
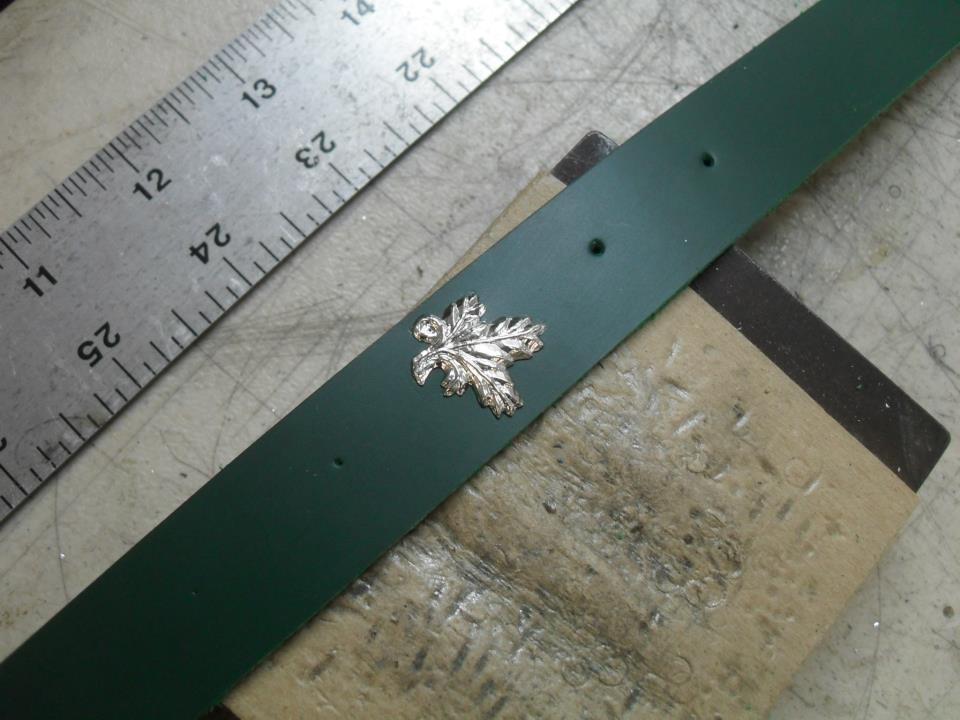
These are all the tools you need to install mounts (studs) on a belt: A ruler, a nippers, an awl, a small tube punch, a hammer, and an anvil. Our “anvil” is a block of steel covered with one layer of thin cardboard – the weight of a cereal box or the cardboard on the back of a pad of paper. Do not use leather as a pad – it is too soft and the stud will deform into it.
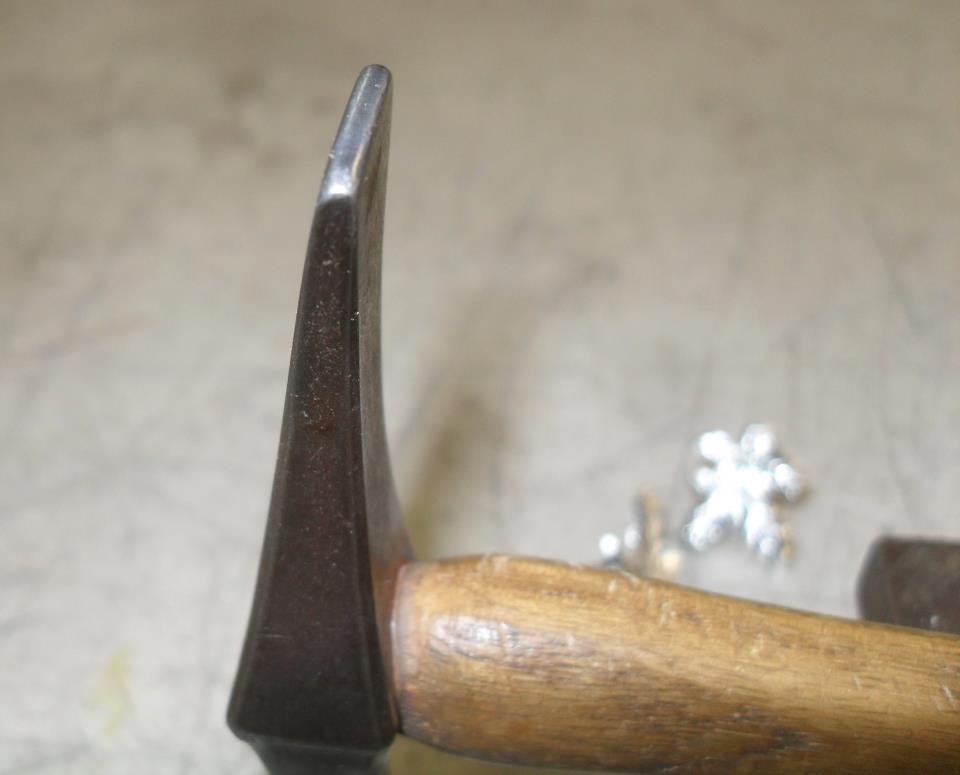
The ideal hammer is a small cross pein (or peen) – which may just be called a “riveting hammer” on jewelry supply sites – with a head weight of 1 to 2 ounces (25 to 60 grams). We use a hammer with a head Mac ground down from something larger, but you can buy usable cross peins from jewelers’ suppliers inexpensively. (Under $10. You do not need imported Swiss watchmakers’ hammers to do this.)
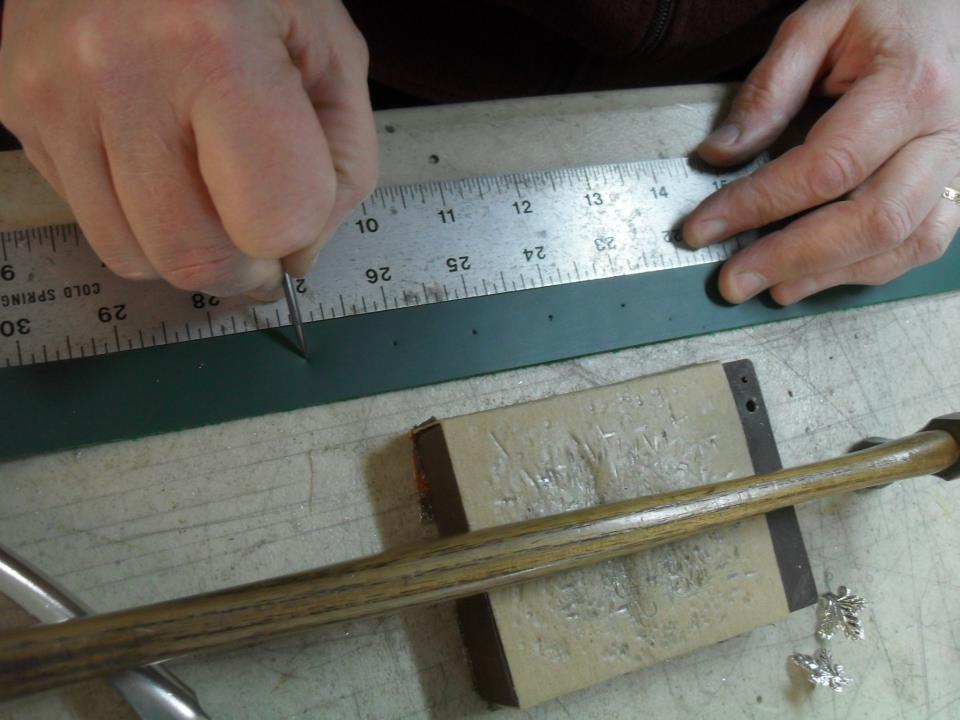
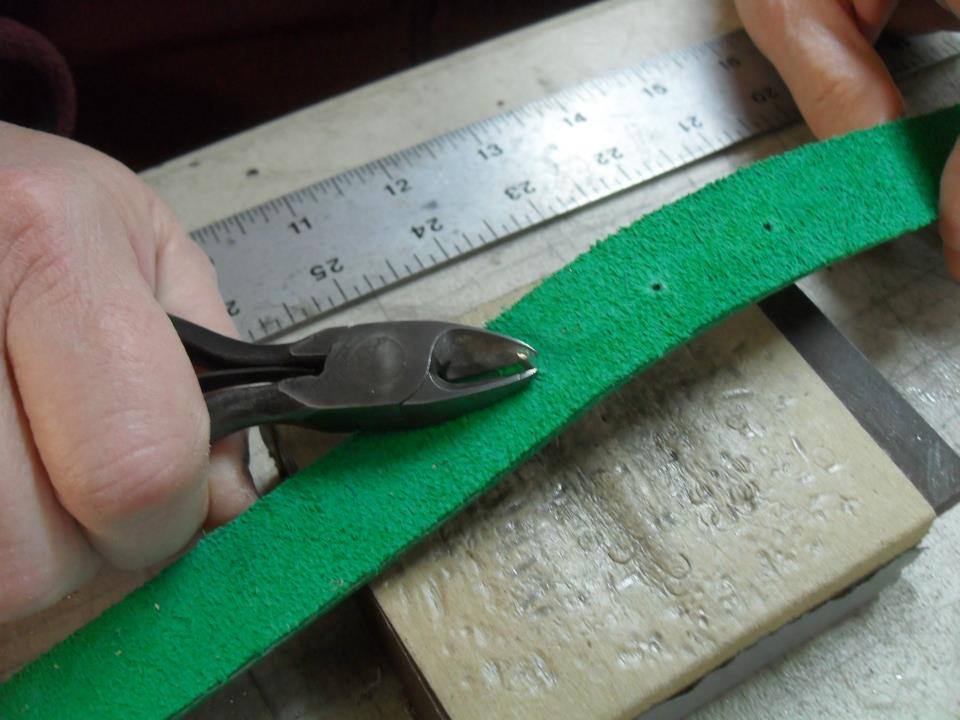
Use the ruler and the awl to mark stud locations..
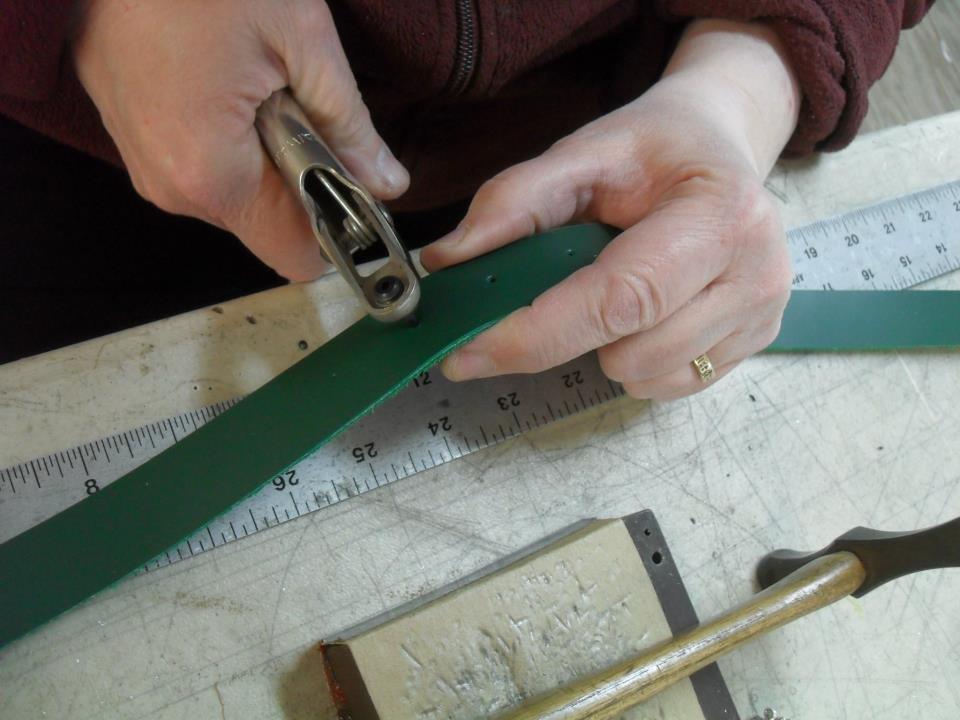
Use a very small tube punch to make holes for the studs. The hole should be smaller than the smallest hole made with a normal rotary leather punch.
The hole must be smaller than the stem of the mount or rivet. If you do not have a small punch, you should force a hole open with an awl – or a nail.
Or anything that makes the hole small enough that you need to really press the stud to get the stem into the hole. It should be a tight fit.
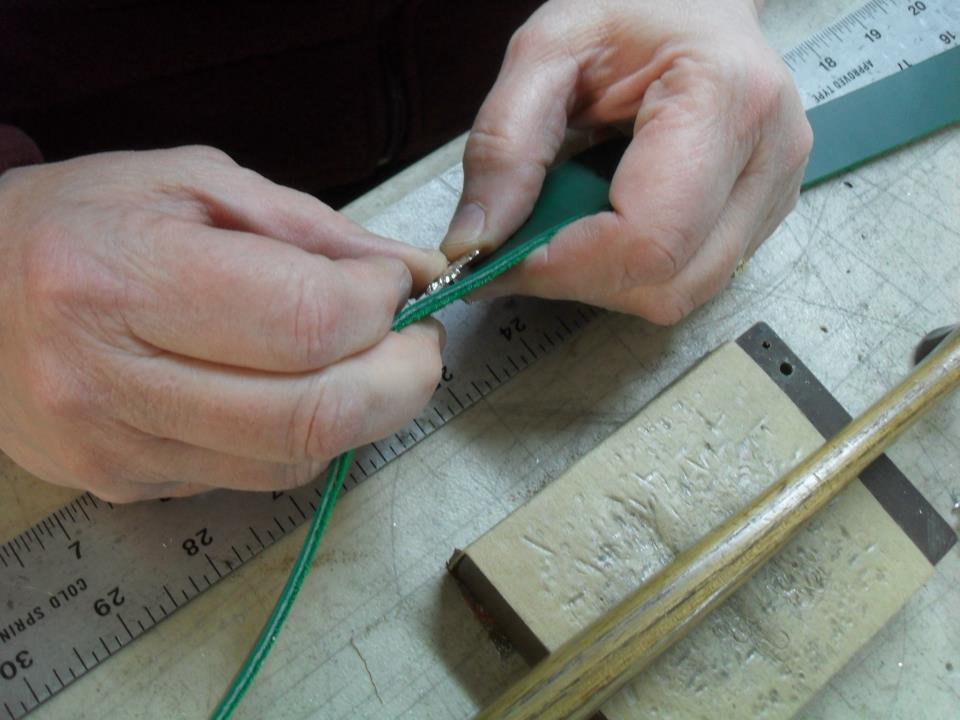
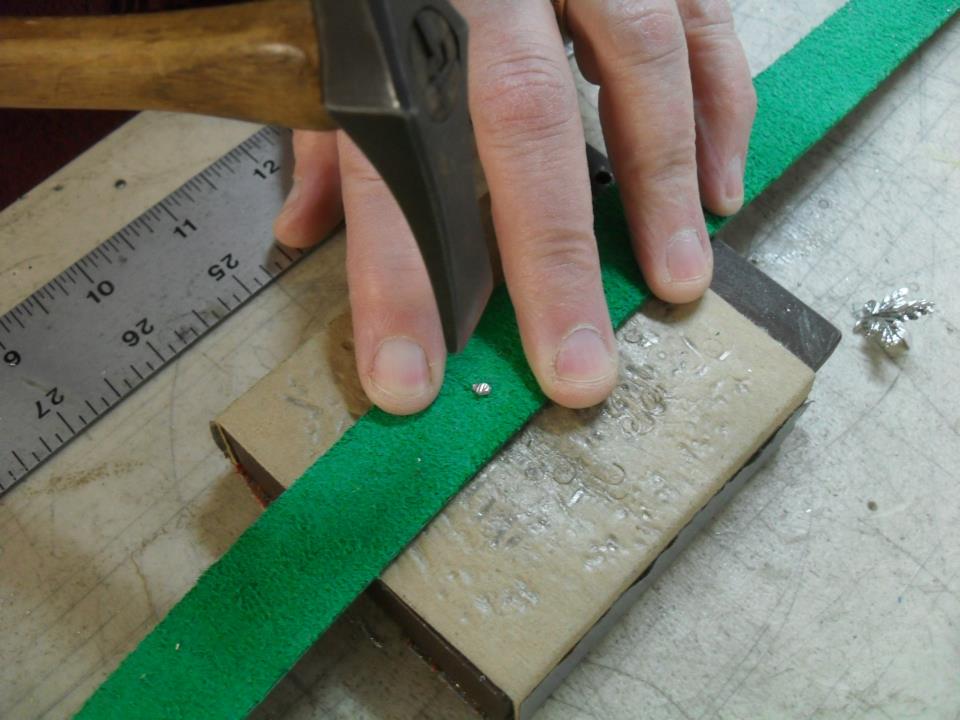
Nip off the excess stem.
The amount of stem protruding should be less than the diameter of the stem.
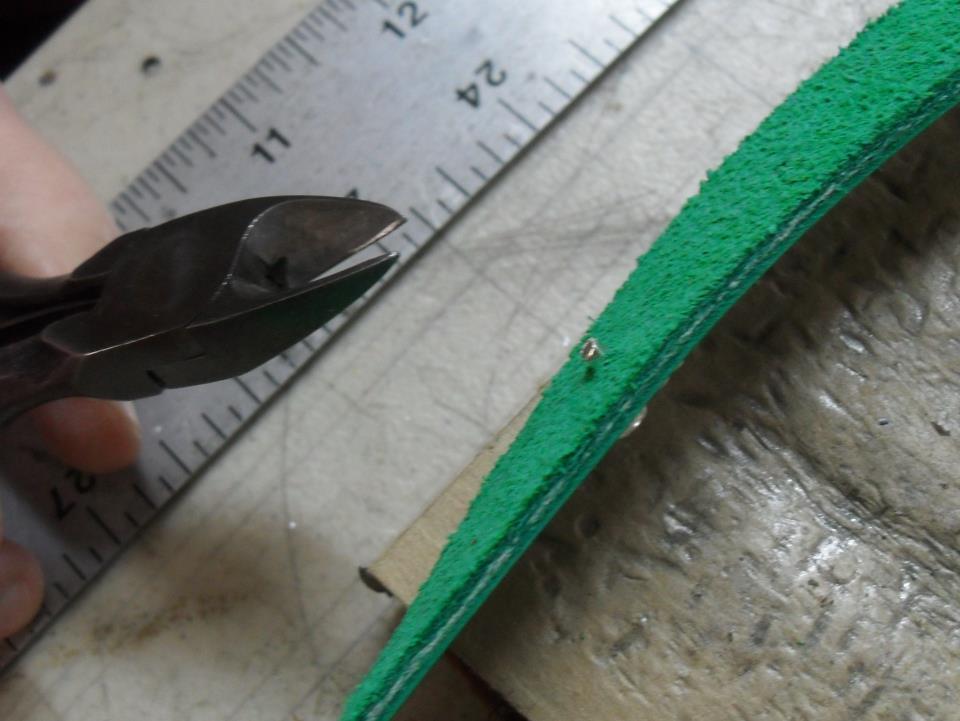
20 little taps in one direction…
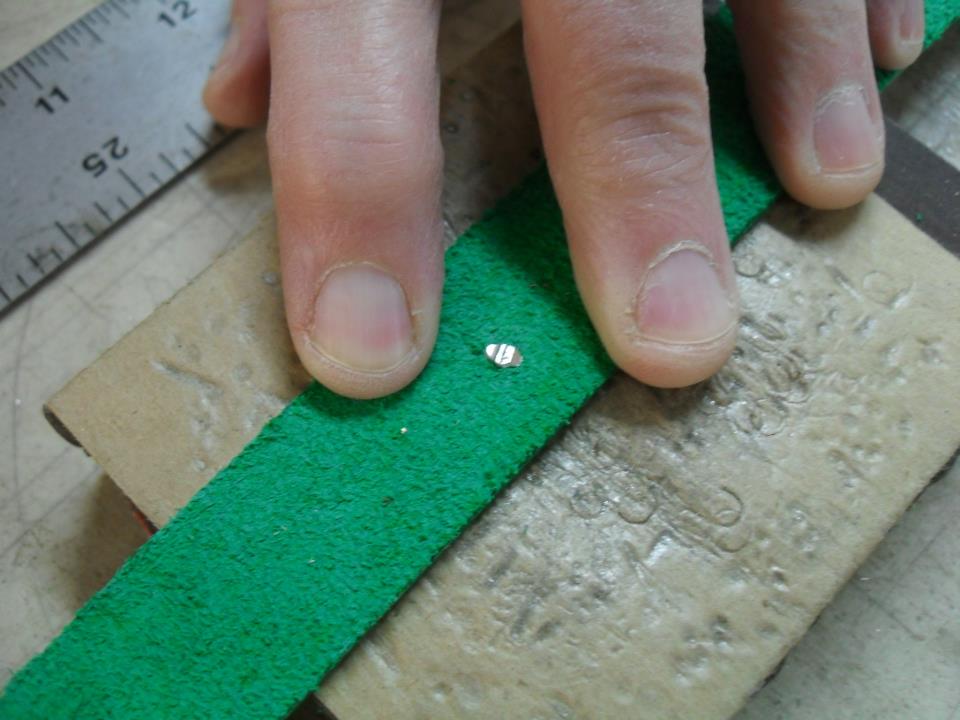
…makes it look like this
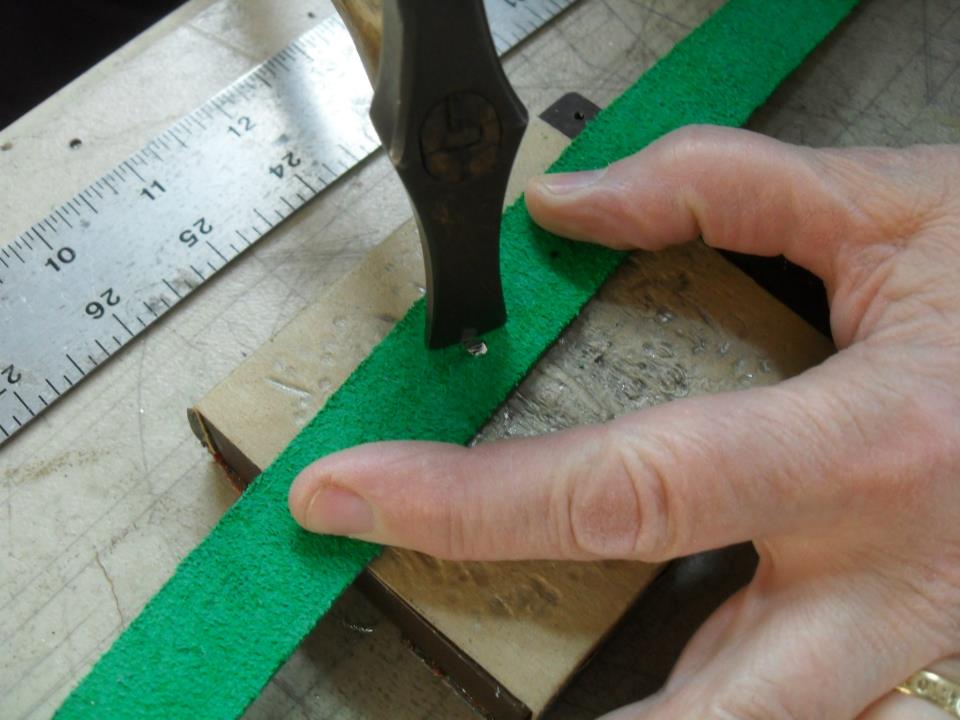
20 little taps in the other direction…
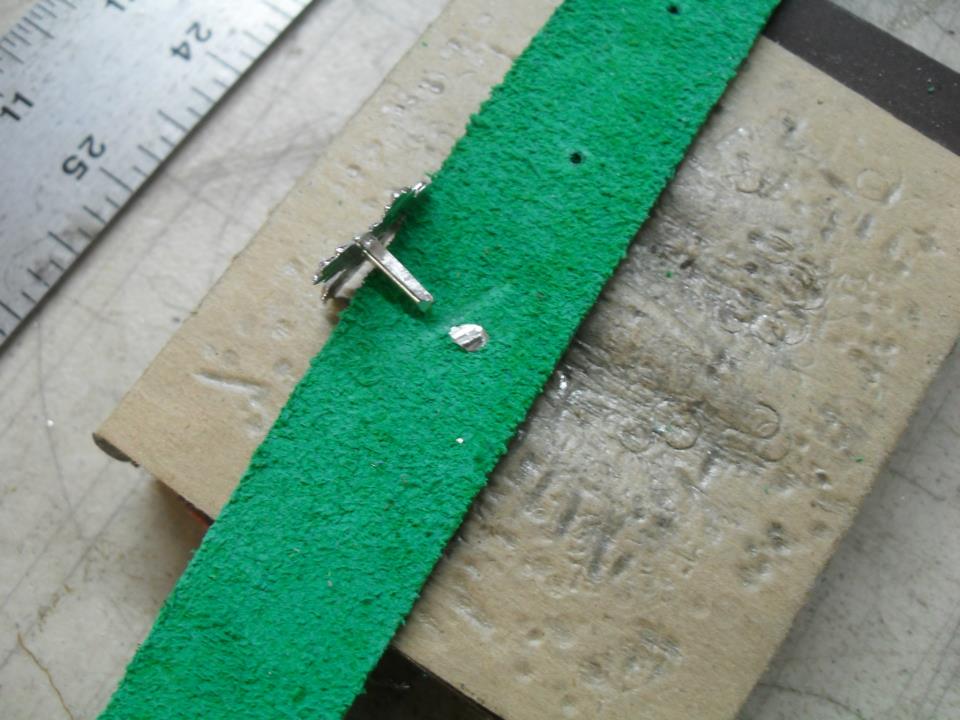
…finishes the job. Note that the rivet is spread out – the cross pein hammer moves the metal sideways to create a mushroom. This will hold the mount securely to the strap. If you just crush the stem with a ball pein or a similar hammer, it will open the hole up and damage the leather. The stud may or may not fall out.
Done! Now you, too, will be able to install mounts on a belt!
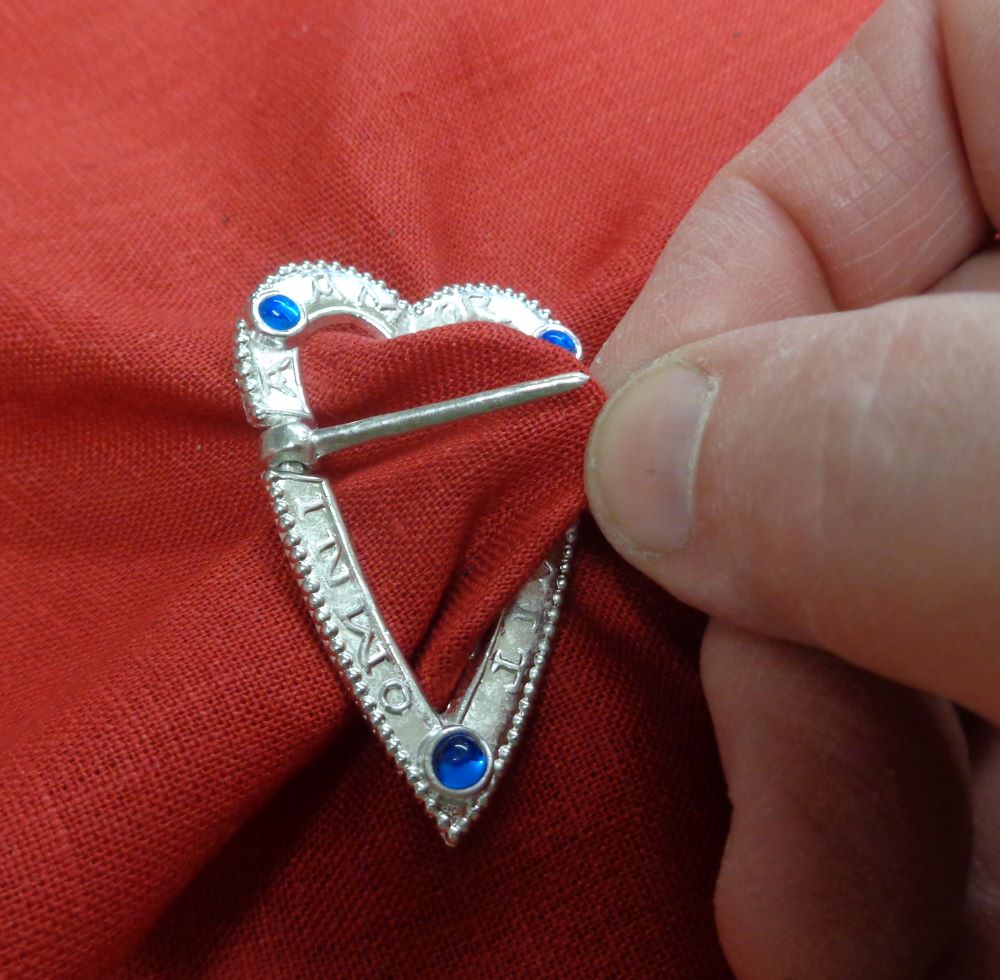
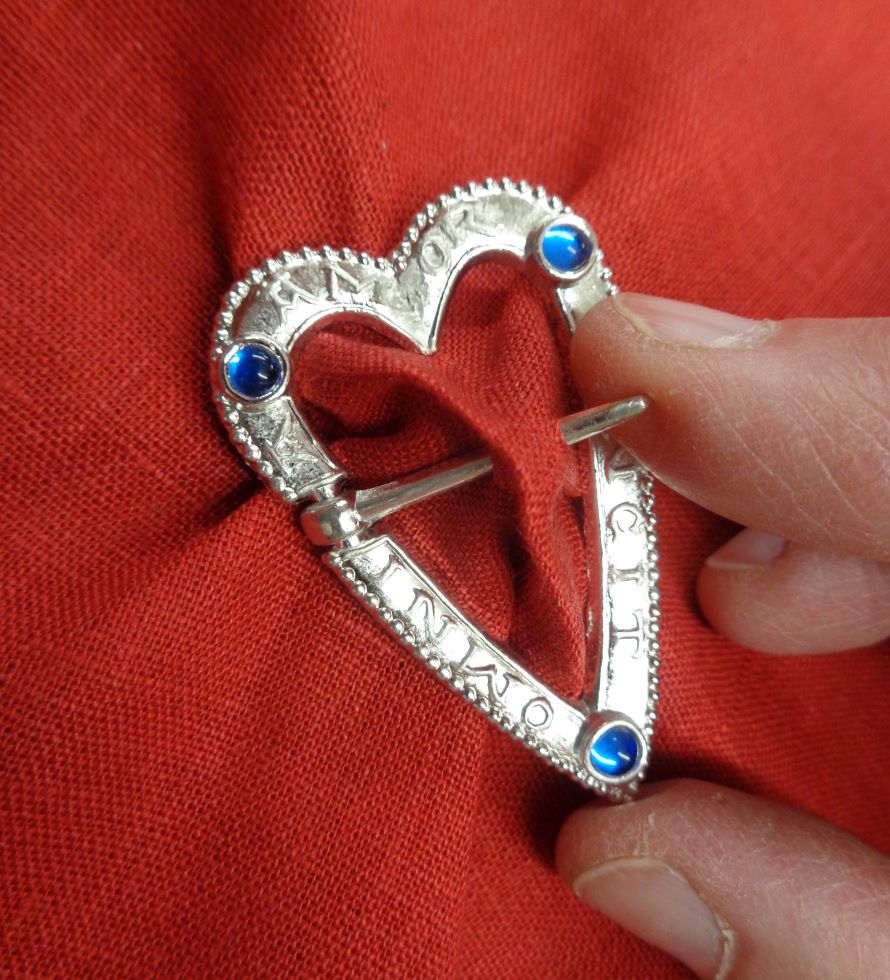
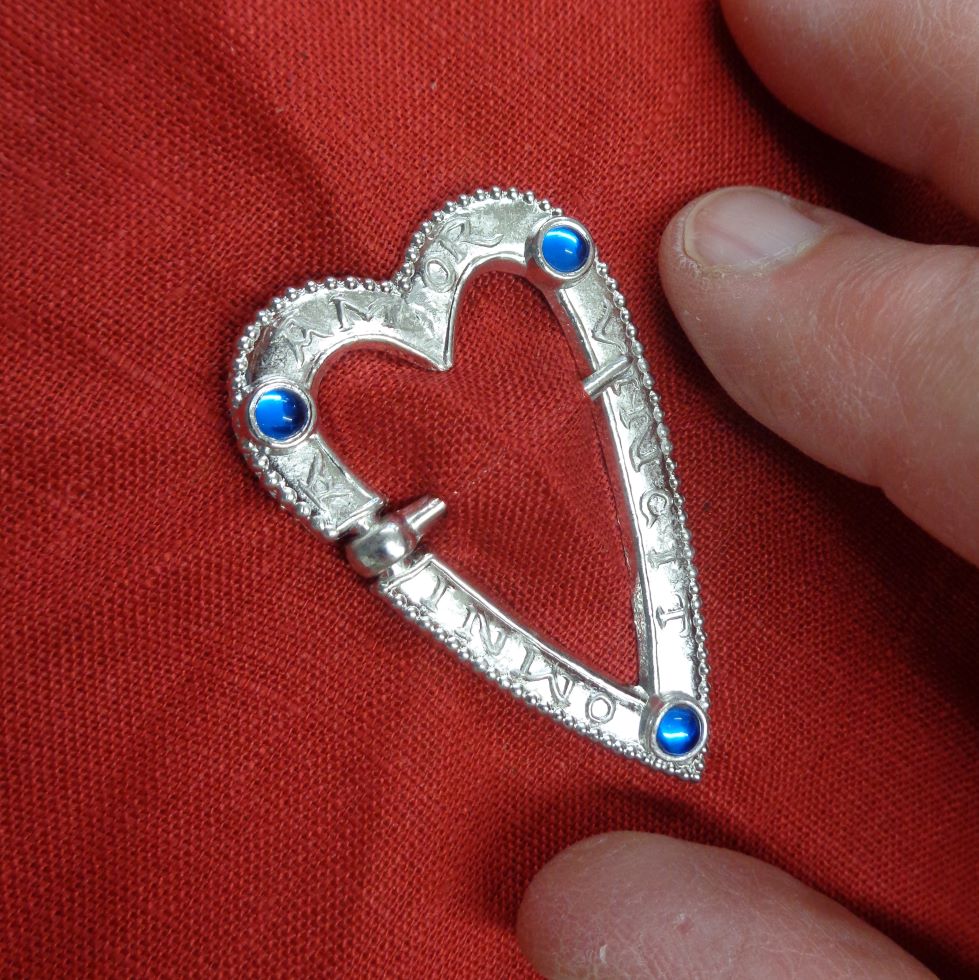
Do you know how to put a ring brooch on? These brooches, which were ubiquitous throughout the High Middle Ages, are beautiful and easy to wear, once you’ve learned the trick. Here we go, in three easy steps:
Pull a pinch of fabric up through the ring from the back. Pierce the fabric, and let it slide along the pin.
Let the fabric smooth out and fill the inside of the ring brooch.