We made our first spoon mold 25 years ago – and have made several improved versions since. There is a persistent problem, though, and Mac has been engaged in the next experiment to solve it. The bowl of our spoons is usually slightly porous (more or less depending on the casting). Uncorrected, this lets liquid contents seep slowly through the metal. We have used two separate “repairs”: sometimes we hammer the bowl, which compacts the metal and closes up the tiny holes. The other solution is to fill the porosity with bismuth solder. Both methods work, but they take time and lead to additional clean up before the spoon is acceptable.
The cause of this problem is using a modern (tin/antimony/copper) alloy in a stone mold. We warm our molds before we cast, but they continue to warm while we repeatedly fill them with hot pewter. Spoon molds are large, and the stone does not transmit heat readily. The result is that the temperature of the mold stabilizes, but with a marked difference in temperature between the hot end where we pour the metal in – the bowl end – and the much cooler long stretch down the handle and to the knop. This means that the bowl cools much more slowly than the handle, and during that cooling porosity develops as the metal continues moving minutely.
A possible solution is to change our alloy – but we do not like our choices. There are two authentic types of alloy found in medieval spoons. One is tin/lead – and you know that is not food-safe. The other is tin/copper; we have tried that, but it is softer and easier to deform than our normal alloy, and we prefer not to use it. Another lead-free modern alloy is available (tin, bismuth, silver, and copper; distributed as “AquaClean”). It has a whitish surface when cast which we dislike, creaks slightly under even gentle pressure (like between your lips), and tarnishes very readily.
The other possibility is to change molds. By the eighteenth century metal molds were normally used to cast pewter spoons, dishes, and knickknacks of every sort. Antimonious alloys were also in common use. We thought it worthwhile to see whether a brass mold would permit us to cast spoons in our standard alloy successfully.
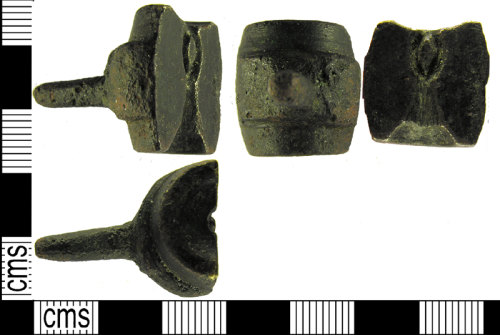
There are extant Roman era bronze molds for copper alloy objects (thanks to Mark Shier for this information). The British Portable Antiquities Scheme also report numerous brass molds for small items dated from the late medieval to early post-medieval date. (A search for medieval period molds can be reproduced at https://finds.org.uk/database/search/results/objecttype/MOULD/broadperiod/MEDIEVAL/material/7.) In addition, an inventory of a London pewterer’s shop from 1427 included three molds specified as brass, for making a charger and two platters respectively. (Quoted in John Blair’s English Medieval Industries, p.71. Thanks to James Supp for the citation.)
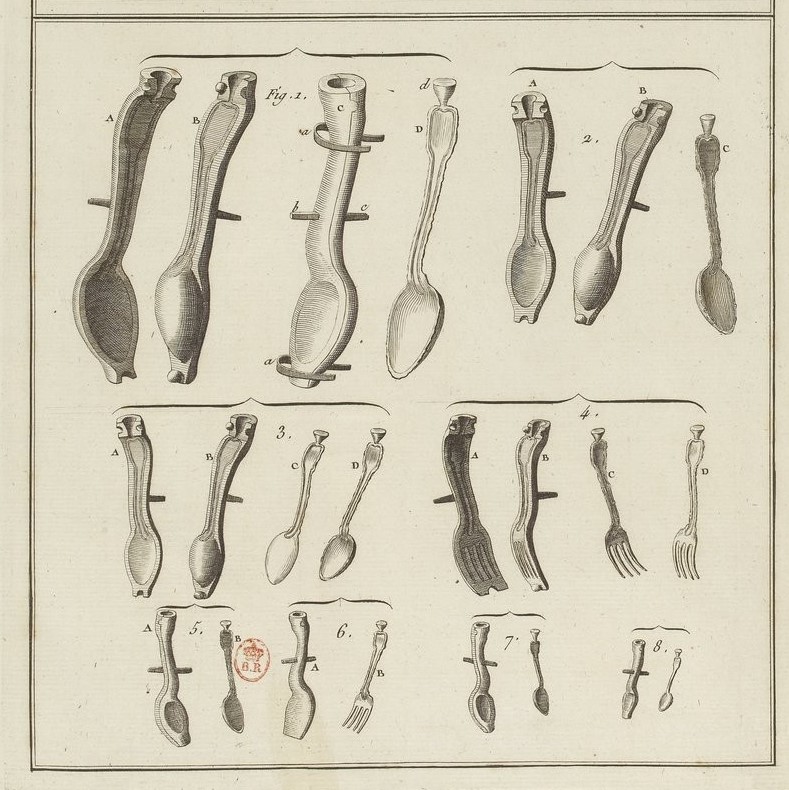
We depend for many technical details on an 18th-century work, the Art du potier d’étain of Pierre Augustin Salmon, Paris, 1788. This is a remarkable work with extensive information about the technology of somewhat later pewterer’s work. We deeply regret that Salmon never did write the chapter on mold-making, which he referred to repeatedly, but published the book without.
Bolstered by all this information, Mac began the prolonged experiment of casting spoons with a brass mold. If you would like to read his extensive and repeated reports to fellow enthusiasts, with their helpful comments and advice, he has blogged this and related projects on the Armour Archive. The executive summary follows:
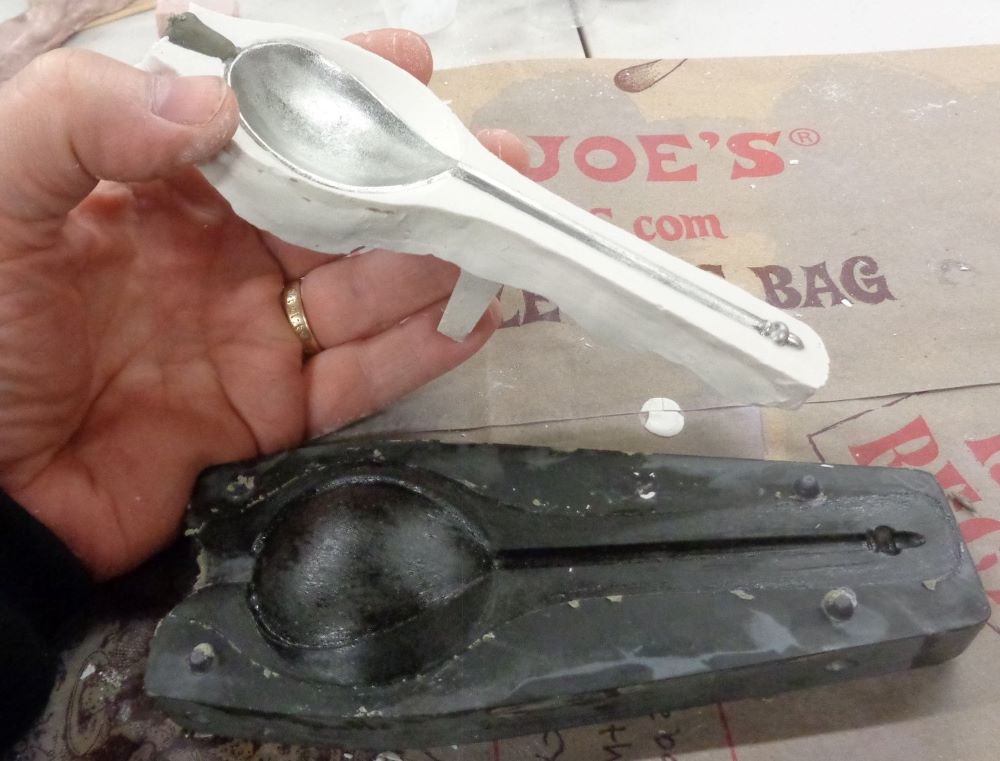
He created a plaster pattern for half the new mold by taking a cast off our most recent stone mold with the spoon in situ. He created locating keys for aligning the mold parts, and covered everything with grease.
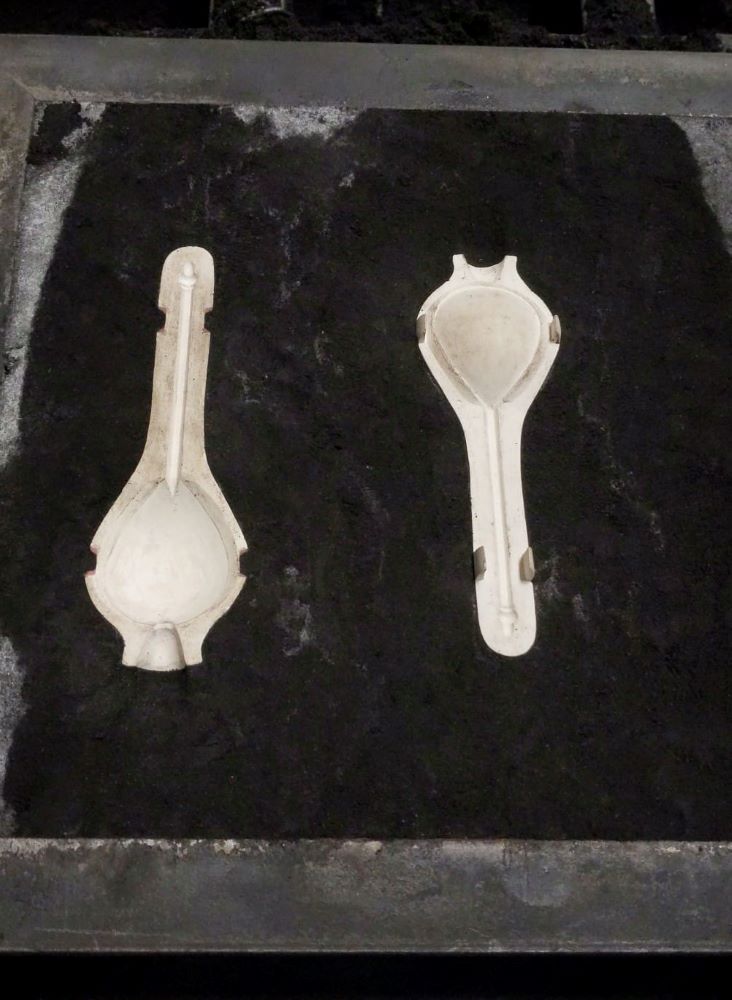
Left: Pattern for half the mold with spoon embedded, built up on stone mold .
Right: First pattern, with locating pins, greased up
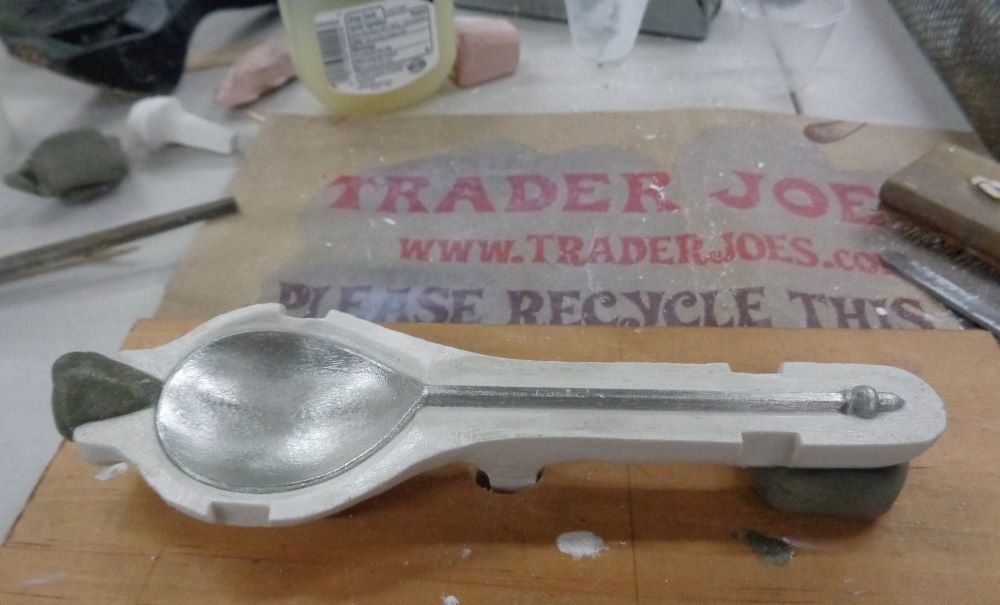
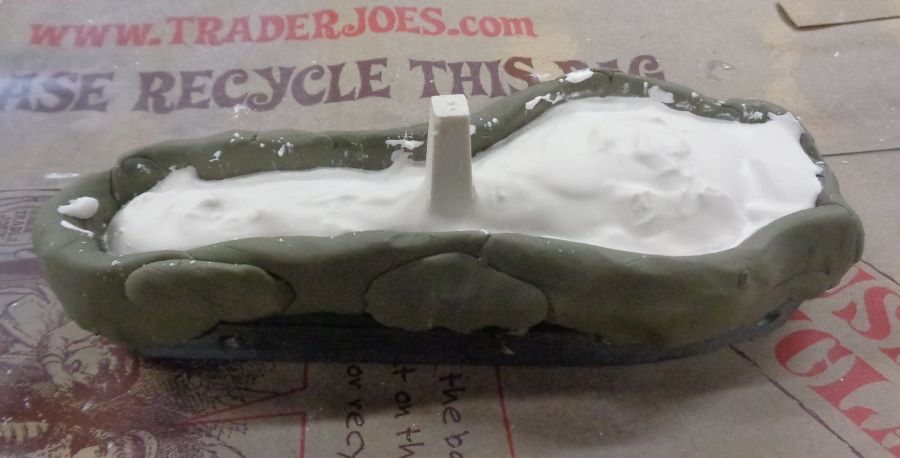
He built up plaster for the matching pattern to create the second half of the mold, and when the plaster was dry (or nearly so) finished the two patterns to the form the mold was to have.
Left: Making the second pattern by piling up plaster on the first half
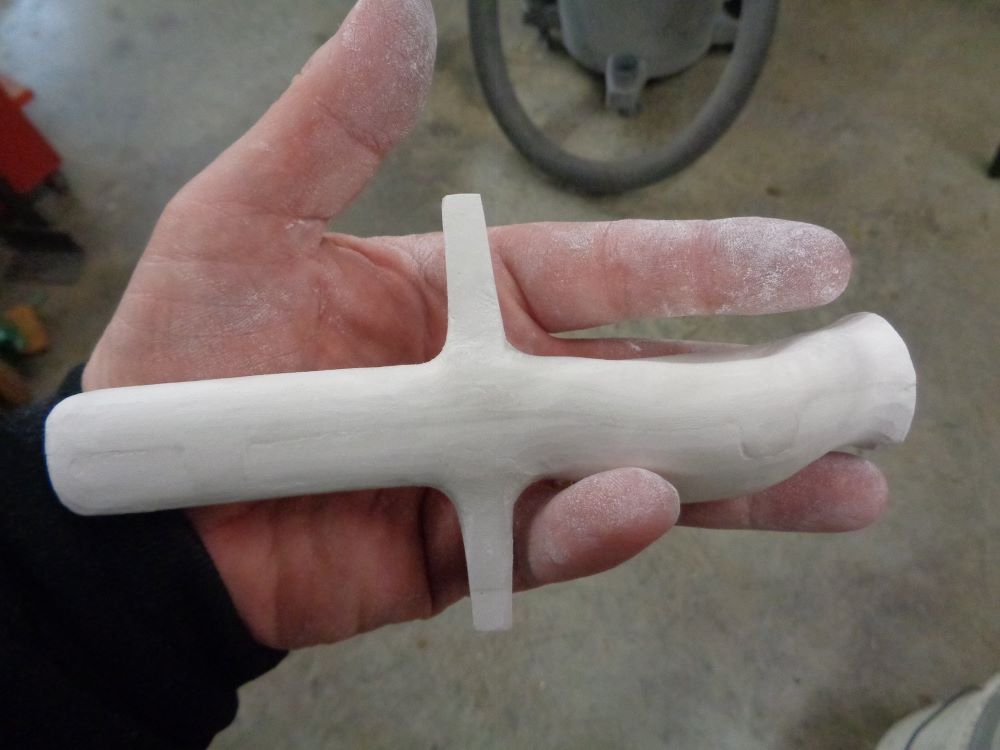
Right: Both patterns together, cleaned up
He packed up the two patterns and shipped them to Patrick Thaden, who cast them in brass.
Left: Patterns in the casting flask
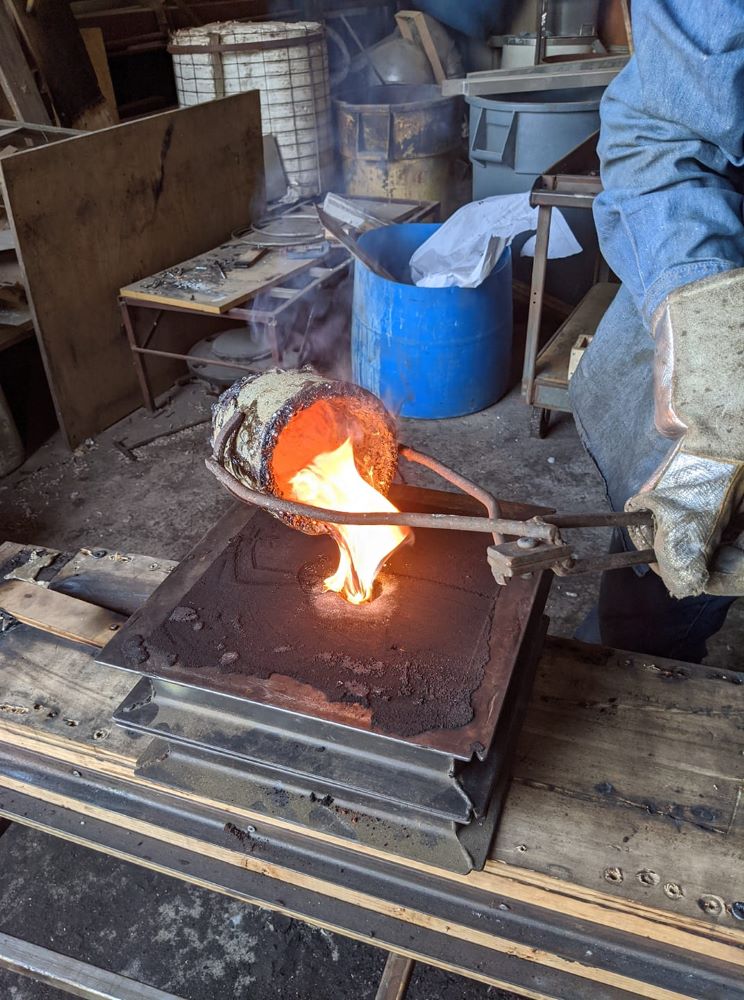
Center: Patrick pouring the brass
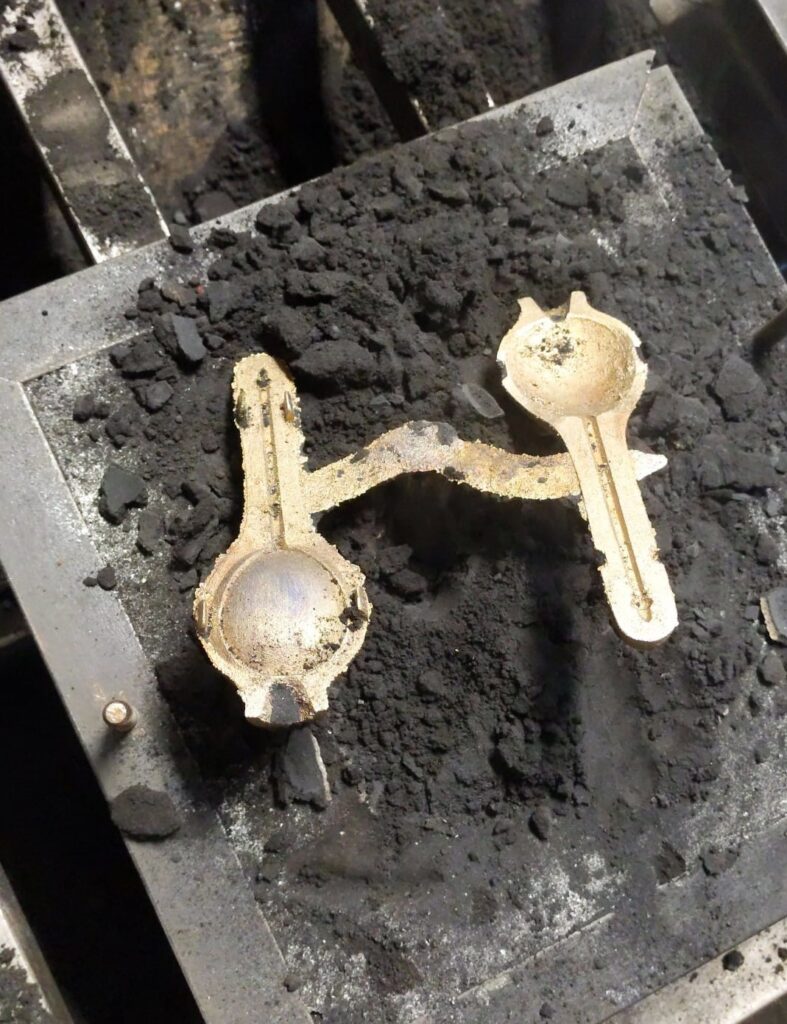
Right: Cast mold pieces, with sprue
We live and learn. Because the plaster did not make an ideal pattern for sand casting, clean up took a long time. Mac worked first on matching the two halves.
Left: Rough castings
Center: Facing one mold piece as the first step in matching the halves
Right: Matching the mold pieces


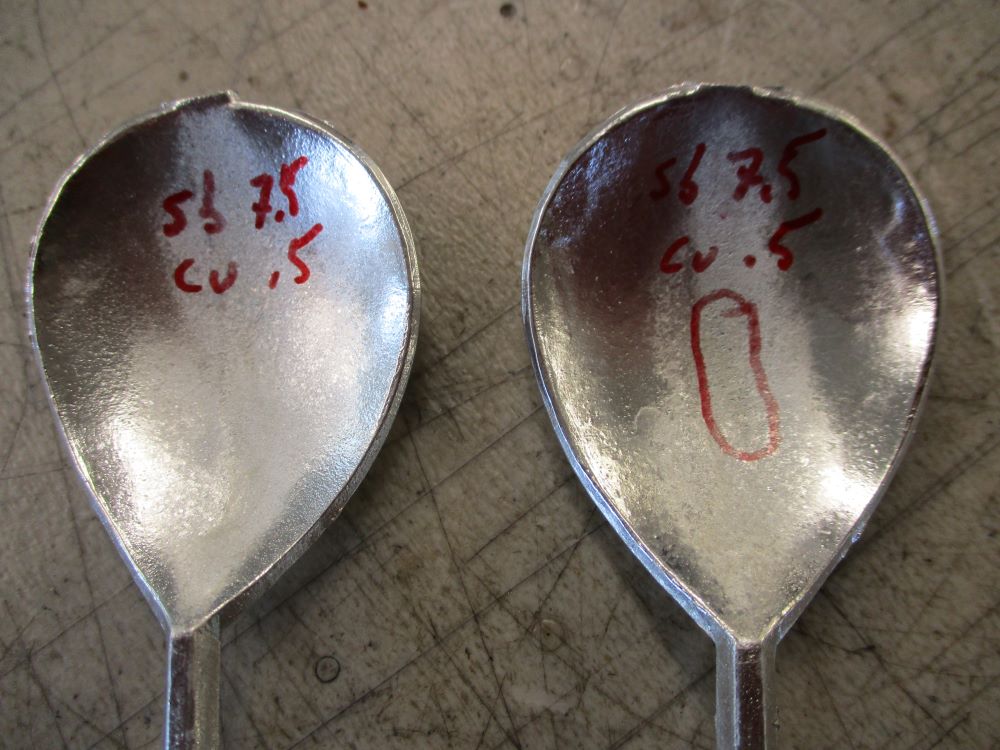
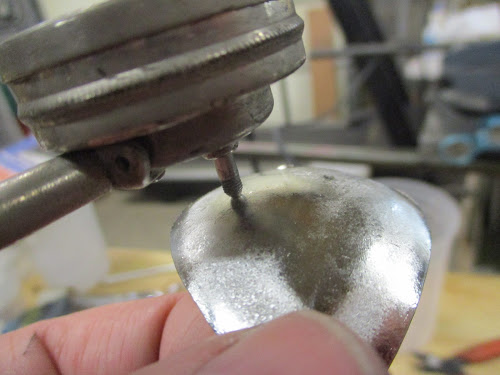
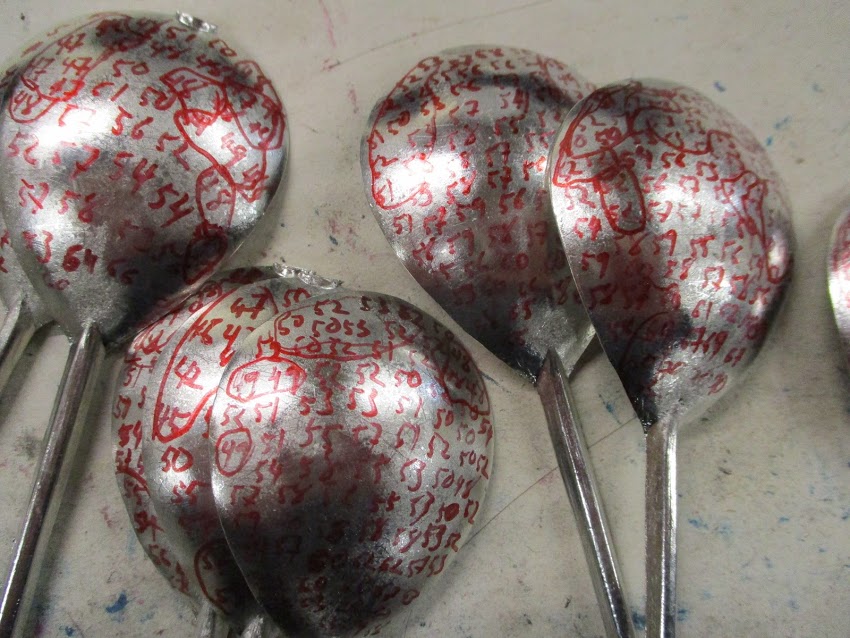
Once they fit together, he cleaned up the surfaces of the mold and made repeated adjustments to the volume at various places. He measured the thickness of the cast spoon, and recorded the results on multiple casts to guide the removal of material from the mold.
Left: Measuring the thickness of a casting
Right: Recorded measurements of thickness. Circled areas are too thin and indicate where the mold must be deepened
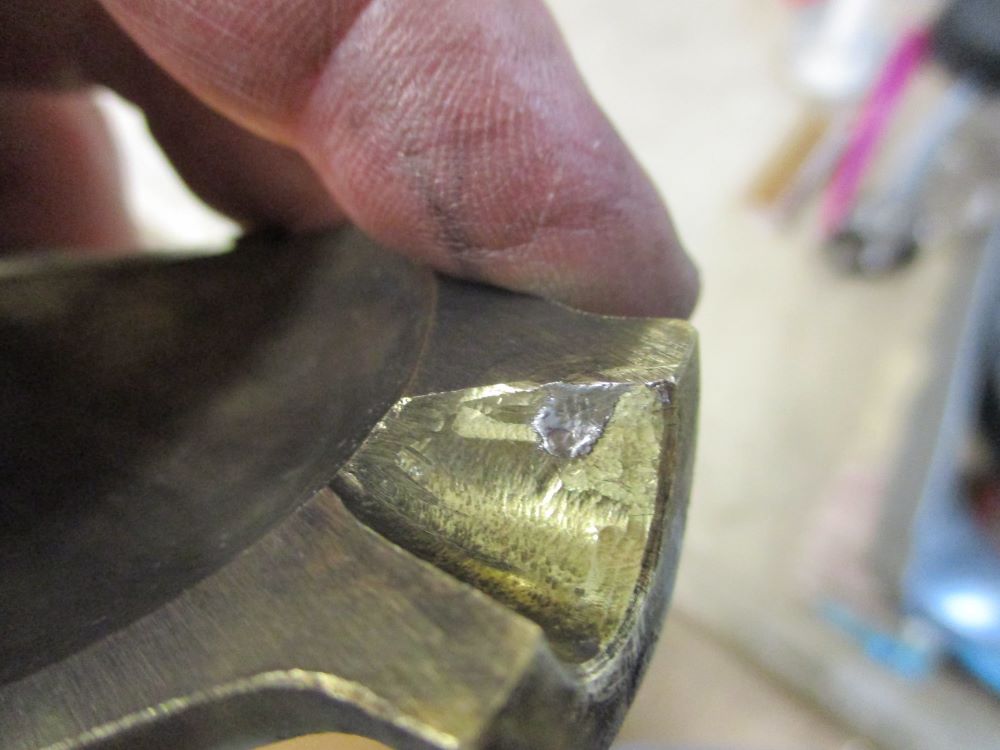
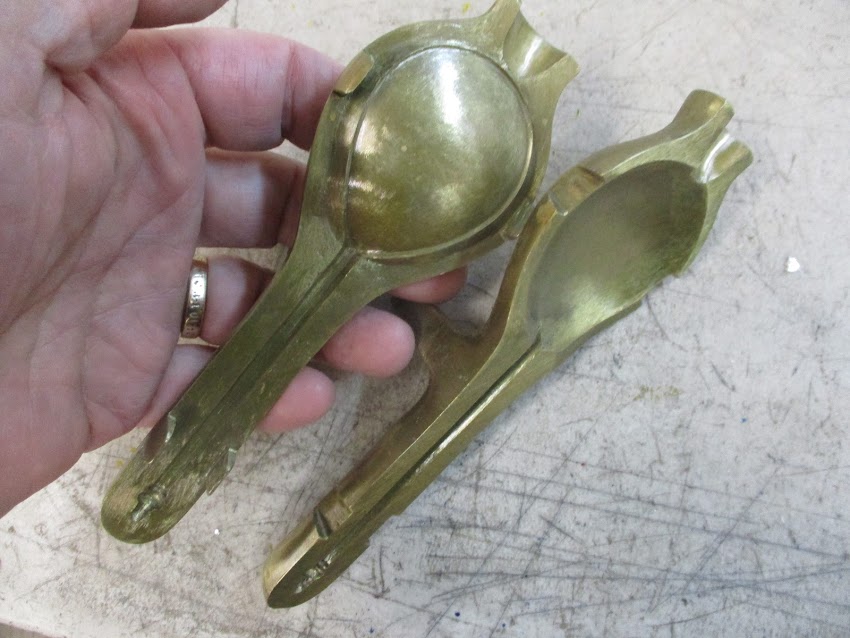
While making early test casts, he used heavy applications of soot as a resist to keep the molten pewter from soldering itself to the metal mold. After one frightening, although ultimately inconsequential, failure of the resist he started patinating the surface by fuming the mold with vinegar after every work session in which fresh metal was exposed, as an additional protection. (During this time he also made a stool for an armored man to sit on to rest, after late medieval images, but that is a different story.)
Left: Pewter soldered to brass mold
Right: Vinegar-fumed patinated mold
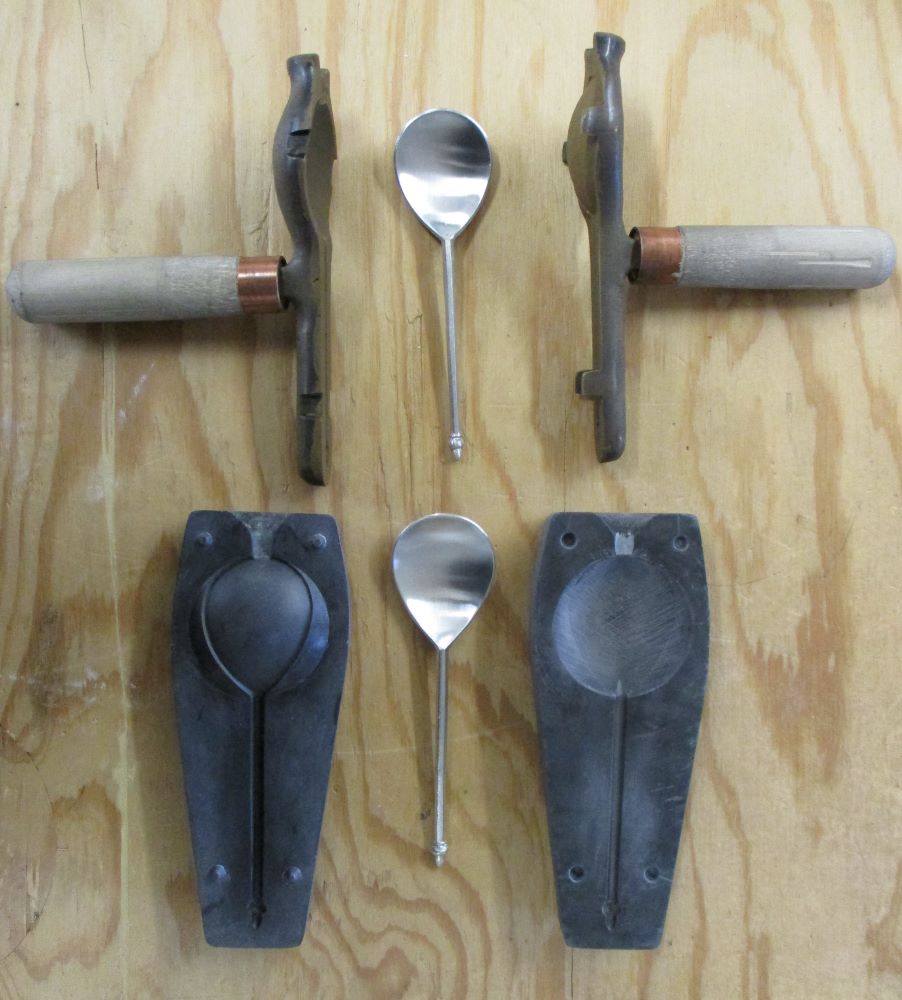
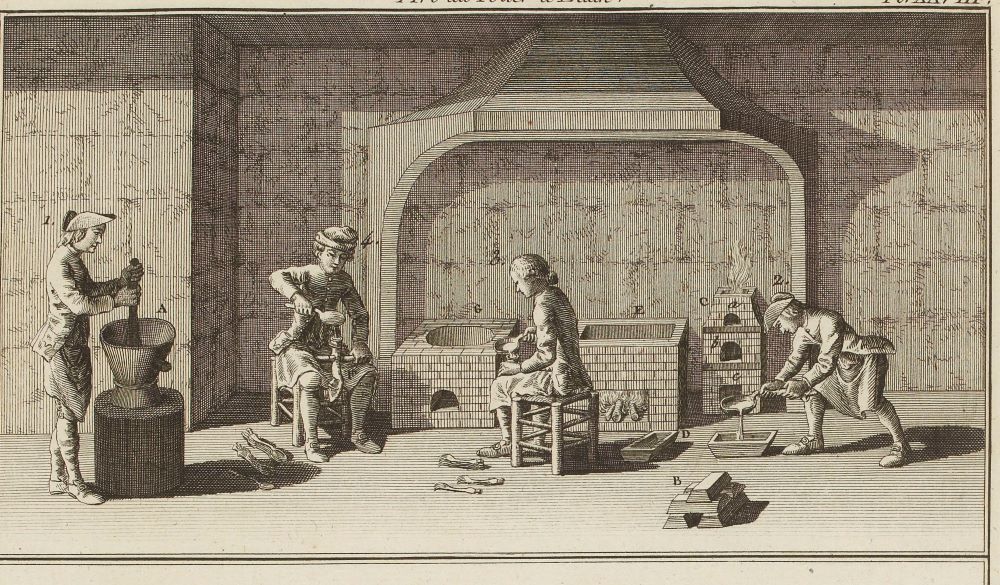
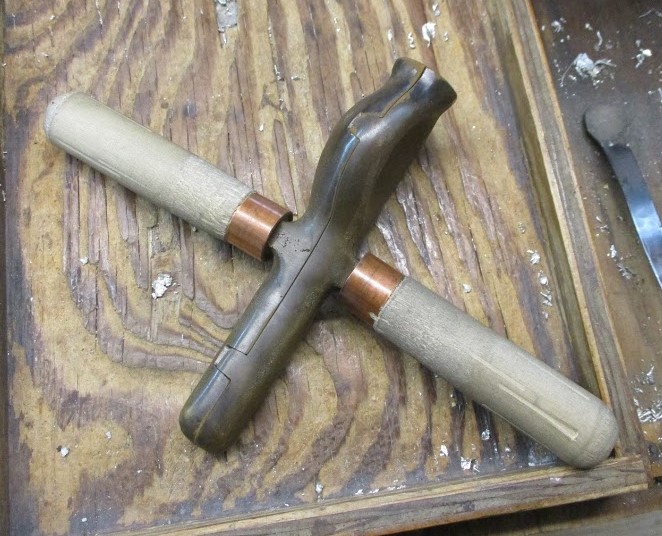
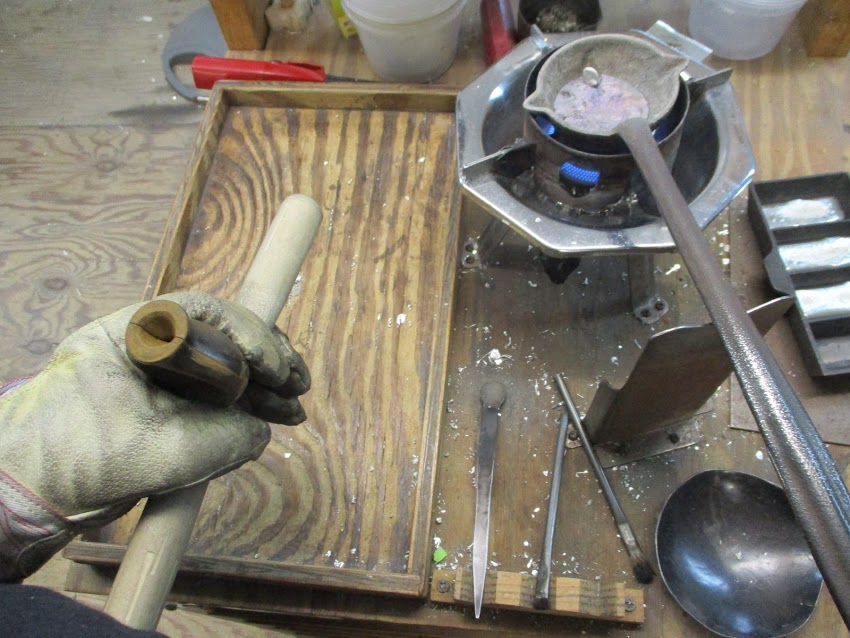
Although we cast standing at our bench, Mac went ahead and made slip-on wooden handles like those the (seated) caster is using in Salmon’s illustration. They are of most use to him in handling the mold with his right hand, since we routinely use a heavier glove on the left for holding the molds, and a lighter one on the right to pick up and pour the ladle of molten pewter and do other tasks requiring more dexterity.
Left: Mold with wooden handles
Right: The mold at our pouring bench
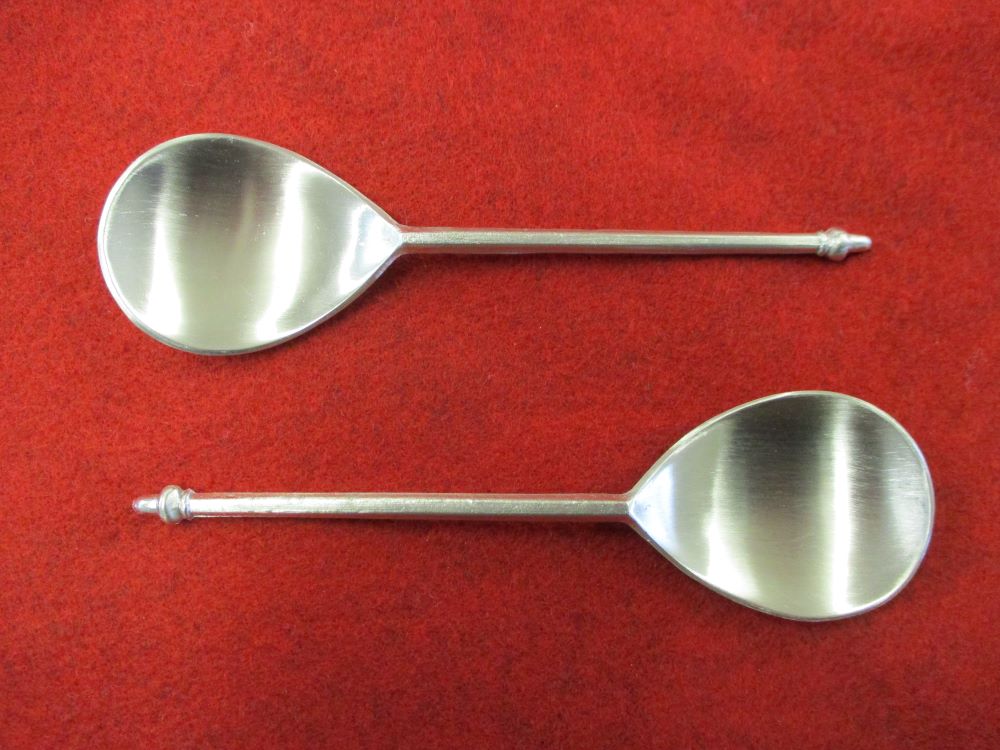
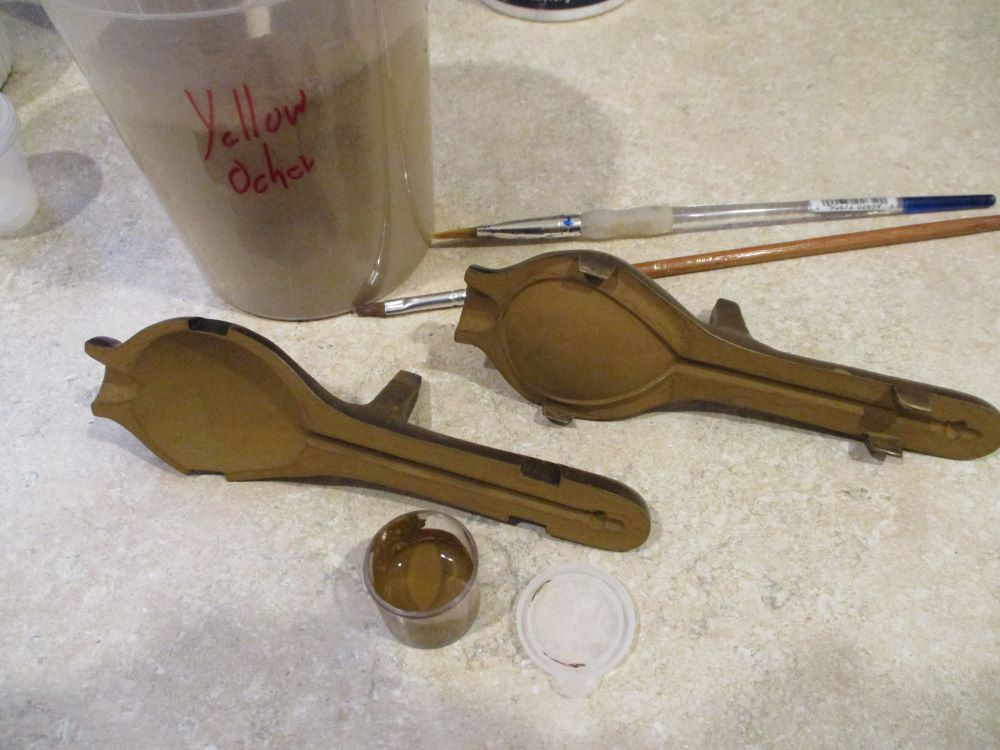
He had to order in ocher, but as soon as he received it, Mac moved on to a resist compound containing the ocher, egg white, and vinegar, as per Salmon’s instructions. After a little experimentation, he has learned to apply it smoothly, and it is proving to be both effective and persistent during casting. The brass mold casts complete spoons within three pours – and keeps producing them without overheating the way the stone mold does – and without porosity.
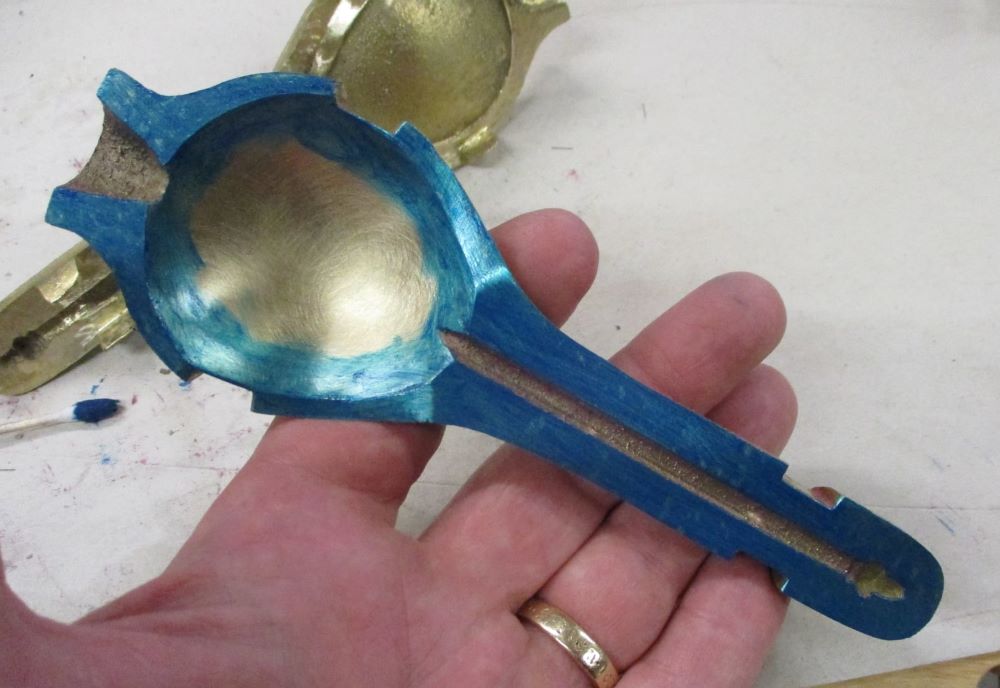
Left: Mold halves painted with ocher
Right: Successive good casts from the brass mold
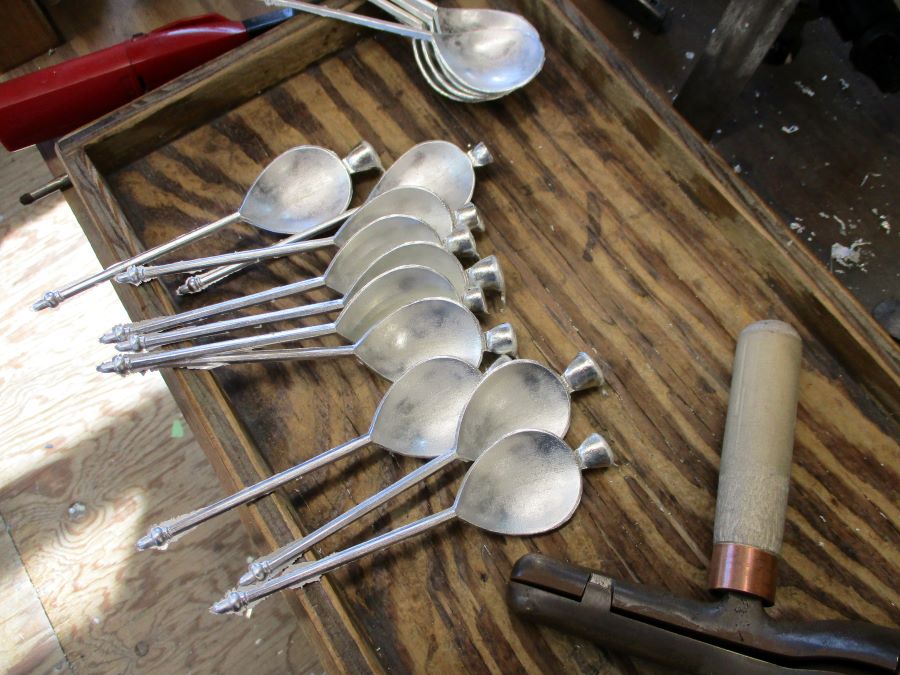
We are pleased with the results of casting in this brass mold: spoons which are strong and nonporous, with surfaces that are easier to clean than those from the stone molds. Mac has begun experiments with new cleaning and polishing techniques, and we will share those results when they come to fruition.